Why Your Past Matters When Organizing

Hi there! A new year is prime time to talk decluttering and organization. Like many of you, I like to start the new year with a clean and organized home and will be writing more about that and how to help you in coming posts. Before I get into tactics though, I want to start with some retrospection. Your past matters when organizing. Why? Because just like in relationships, marriage, parenting and finances and more, much of your behavior may be rooted in the past. In fact, psychology plays a large role in why decluttering can be so hard. So let’s take a moment to think this one angle through.

What was your home like growing up?

Did you grow up in a spotless, perfectly organized home? Every item had a “home” put in its designated place at all times? Or was it the opposite? Maybe it was tough to find the kitchen table because of all of the papers piled on top? Or the dining room was not a dining room but a storage unit? Did your parents save everything or throw it all out?

How the Depression and the War influenced family organization

In my case, my dad grew up in the Great Depression. My mom was also born at the tail-end of the Depression and was growing up during World War II. People had far less stuff, whatever was purchased was bought very carefully and nothing was discarded without thought. Characteristic of that era, my parents tended to save items and were reluctant to throw them away. It turns out my French husband had the same dynamic. His parents grew up shortly after WWII when there were real shortages of necessities in France.

Growing up

How did this impact our homes? Both of our families had lovely homes for which we are grateful. My mom kept a spotless, beautiful home, and the clutter was mostly confined to the hidden areas. That said, over the years, these items tended to accumulate so I became used to seeing a space (especially a closet or “junk drawer”) full of items. In other words, no one wanted to throw anything out! Sure we would get new decor (but the old decor was stored for someday). I am not criticizing my family for these ways – it went along with the times. Also, even when I was a kid, we did not have the explosion of cheap items created abroad. We tended to buy more carefully and keep what we bought.

How does that impact my organization journey?

Fast forward to now

If you have been following my blog, you know I started an organization journey (Project O) a few years ago. I had some of the typical obstacles that kept me from throwing anything out:

  1. “I might need it someday”
  2. “My children (or sub in nieces/nephews/their children may need it someday.”
  3. Sentimental
  4. It was a gift
  5. “It cost a lot/or it is worth a lot.”

I promise to write more on these challenges. That said, the biggest obstacle for me has been overcoming the past and what has been engrained as “normal.”

What is “normal” varies for each person

Your past matters when organizing because it sets up your “normal.” Here are a few habits/behaviors that may be setting you up for failure as you try to declutter and organize.

  1. Your family saved everything for someday. You may need that rope (yes, I come from a family of avid sailors…we had plenty of ropes around the house/garage!), tennis racket, window treatment, fill-in-the-blank. This is a big one. In my house, we often had lovely new curtains or a rug…but the old ones were not discarded but stored. I can not remember when an item that had been replaced was used again…
  2. Your family and friends shopped a great deal. Shopping was big in the eighties and nineties. Many of us grew up going to the mall just for fun. Shopping was entertainment and bargain hunting was a practical sport in my family. Frankly I still enjoy a trip to my favorite boutique or discounter. That said, shopping and especially impulse buys can really add to your stuff and make your home unmanageable. Retailers are masters at luring you in with sales and then making it very hard not to buy. Social media and the Internet, with hyper targeting, has made it even more likely you will buy on impulse. Buyer beware.
  3. Your house was a mess/super organized/cluttered. I have a friend who grew up in a very cluttered home. Her mom never saw a garage sale she did not love and came home with dozens of “finds.” My friend today has the opposite approach. Her husband calls her the “terminator” as she throws everything out. It can work both ways. She could have also become immune to clutter and that would become her normal for now. Neither is inherently bad but if clutter is something you want to avoid then be aware of how your home growing up may impact what you are comfortable with now.

Where am I today (and how do I deal with it?)

So dealing with my past has helped me really understand the obstacles that face me when decluttering and organizing. Here are few:

As I noted, my mom kept a very clean and lovely home. I actually am also very particular about cleanliness which I no doubt inherited. Enjoy cleaning…but decluttering is another story.

I have tendencies to keep items too long (I am looking at you Restoration Hardware window treatments…) with the idea I may need them someday, they were costly, it was a gift etc.. Questions I ask:

Am I keeping this because of my past? What part of my past? Frugal, depression era parents (usually a good thing especially when it comes to finances but not so much when decluttering).

Do I feel guilty because perhaps my modern day values do not align with the values of my family growing up (but are OK today as we are not in a depression, items are readily available etc.)

Is a closet that is stuffed to the gills a result of too much stuff or the fact that I am used to seeing closets looking that way? While Pinterest and Instagram may present unreasonable or unrealistic organization, both platforms woke me up to what is possible. As I have decluttered and organized I have discovered how calm and freeing it can be to have fewer items.

Have you examined your past and how it may impact your decluttering and organizing journey?

Welcome 2021

Hello 2021. Am I glad to see you! I am up early today as 2020 New Year’s celebrations went the same as the rest of 2020. Small, low-key and at home. We ordered sushi takeout and Mr. SB made some steamed clams. I think I was in bed by 10!

The upside is I am up bright and early this morning and thinking through my hopes and plans for 2021. I thought I would share instead of keeping them in my head.

Organization and Home Plans for 2021

I will start with the house. If you have been following my blog you know I started Project O (O is for organization) years ago. I learned a great deal and will be sharing more this January on how you can declutter and organize. I am in a good spot but have the following to tackle in 2021.

  1. Archiving all kids artwork. Yes, I have teens. Yes, I still have artwork that I want to preserve. I am going to use a free app from Artkive and put all of the actual art into a book. If you would like Artkive to do the task you can. For me, by the time I organized the art (it is one large folder) I may as well do it myself.
  2. Tackling sentimental clutter. I found an excellent podcast over break, called the Sustainable Minimalists She recommends making appointments with your sentimental clutter and going through it in 15 minute increments. I love this idea. My goal is to take two packing boxes and consolidate into a scrapbook or one memory box.
  3. Creating photo books. I usually create a photo book and calendar every year. This year was no different. I created a calendar of our time at the shore in CT. However I never created a book for our three week trip to Bretagne and Normandy France or our tour of the Pacific Northwest. On my list for this winter!
  4. Refreshing our kitchen. Our kitchen screams late nineties. Everything works and I am grateful for all of the yummy meals we make there. However having spent so much time in it this past year, I really want to paint the cabinets white, install new countertops and refresh certain appliances.
  5. Deck redo. Our deck has been an afterthought until this year. In 2020 our girls loved laying out in the sun and we started entertaining on the deck. The table, which is 19 years old, has seen better days. I would like to paint it a Nantucket grey and buy some comfortable deck furniture. Aiming for this spring.

Well am sure there will be more plans to come but these are some of the more pressing ones that I hope to tackle. How about you? Do you have certain projects and goals for 2021?

It’s A Wrap: 5 Creative Ways for Wrapping Holiday Gifts

Hi there.  It is countdown to Christmas around here, and I can’t wait to share with you a few creative ways for  wrapping holiday gifts.  Wrapping gifts is one of my favorite things to do.  Growing up my mom used to have me wrap all of the presents. I gladly took on the task!  Every step is fun from picking out the look + color scheme, wrapping paper, ribbon, trimmings – not to mention watching my family and friends open the gifts.  I hope you enjoy these ideas, and that they spark some creativity while you wrap your own gifts.

Please note, this post contains affiliate links (but I only recommend what I love and would use!).

The steps to creative ways of wrapping holiday gifts

Creative holiday gift wrapping steps:

  1. Establish the look and feel.  Rustic?  Cozy?  Formal?  Vintage?  Farmhouse?  Just as you would pick a look for decorating your home, the same can be done for wrapping gifts. 
  2. Choose the container.  I often re-use boxes year to year (eco friendly).  I keep a selection of different sizes.  Further, the assortment of box sizes also adds some visual interest when you group the packages together.
  3. Select wrapping paper.  Wrapping paper really sets the tone with the color palette, texture, pattern.  I also prefer to buy some wrapping paper that is not only for Christmas.  The colors can evoke holidays without an obvious holiday theme.  Bonus:  You can use that paper year round. 
  4. Choose ribbon or trim.  Trim also can add that special detail and again give a look and feel.  Of course, velvet has a very different feeling than straw raffia.  Both can be lovely if paired with the right paper and embellishments.
  5. Embellishments.  This is where I have some fun.  I love using ornaments, natural items like pine cones or fun details such as greenery.  Additionally, ornaments are also a second gift.  I include gift tags here too.  I use everything from cut out holiday card images to photos for my gift tags.

How I wrapped my gifts this year

This year I had several themes:

  • La Belle France:   I used a deep red cranberry and cream toile wrapping paper with coordinated velvet and gold ribbon.  If you have read my blog, you know I am a Francophile.   So it is no surprise that French toile would be one of my favorite ways to wrap gifts.  The touch of gold adds some sparkle too. It says holiday without being obvious.
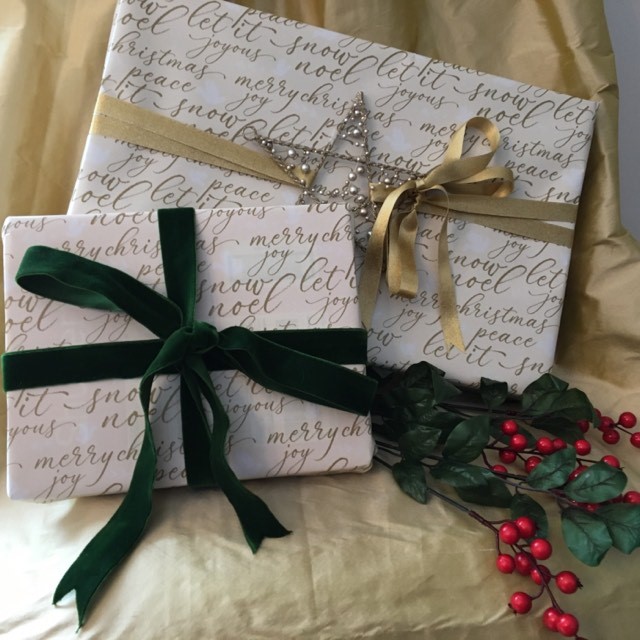
  • Shimmery gold and white:  For this theme, I selected cream and gold wrapping paper patterned with holiday messaging.  I tied the packages with heavy, dark green velvet ribbon or gold satin.  I embellished one gift with a beaded, gold star ornament for some additional holiday cheer.
Cream and gold gift wrap decorated with a holiday star ornament
A sparkly star adds a nice touch
  • Candy cane land:  With a few younger children to wrap for, I opted for a cheery bright red wrapping paper embellished with candy cane inspired trimmings of red ribbon, white string and ornaments or bells.
  • Brown paper packages tied up with string (could not resist the Sound of Music tie in!):  Here I chose rustic patterned craft paper trimmed with holiday ribbon and pinecones from the yard.
  • Nautical “Take me to the sea” (or seafood as the case may be): I used plain craft paper with a natural straw, raffia ribbon embellished with sea ornaments and real sea shells.

Details on wrapping ideas

La Belle France

Deep cranberry red and cream toile wrapping paper is the base.  This toile is not necessarily a Christmas print but the deep cranberry paired with the cream works so well for holiday wrapping.  I picked up the ribbon at Costco ages ago but this here.

Cranberry red and white toile gift wrap for holiday gift wrapping
Cranberry toile evokes the holidays without an obvious theme

The small tree you see has fairy lights on it with miniature vintage inspired cranberry heart ornaments.  I put the tree in our formal living room (our real, fresh tree is in our more casual family room).

Tiny Christmas tree with white lights and toile wrapped gifts
Fell in love with the vintage heart ornaments
Toile Gift Wrapped Holiday Packages
Cranberry and cream toile wrapping paper with gold and velvet ribbon wraps presents under a fresh evergreen tree

Shimmery Gold and White

Cream and gold paper with holiday script makes a great canvas.  The “Merry Christmas” pattern came from Home Goods.  Home Goods has a lovely assortment of papers and the quality is excellent.  If you can find what you are looking for, I would think you will be happy with the weight and handling of this paper. 

That said, I also picked up the other pattern at Walmart for 97 cents a roll!  Once you decide on your look and feel you can often find papers even the drugstore.  This one was a perfect example.  Since I had chosen the gold and cream color palette as an overall theme, it was easy to find gift wrap at Walmart that fit the bill.  I also found another pattern at Caspari which has gorgeous papers. This dark green velvet ribbon drapes beautifully and was easy to tie.

Gold and white wrapping paper is tied with green velvet and gold satin ribbon

Candy Cane Land

Candy cane inspired.  The cheerful bright red paper was actually from my local drugstore and was reversible with a peppermint stripe. 

Red and white gift wrap decorated with ribbon and bells

I added ribbon and embellishments of a candy cane ornament, some bells from Michaels and a glittery red ribbon I had on hand.  If you use double sided tape to secure the ribbon to the back of the package it is seamless. I can’t wait to drop these specially wrapped gifts with the little girls who will be receiving them!

Red and white striped wrapping paper tied with red ribbon and decorated with ornaments
Candy cane inspired presents for little girls

Brown paper packages tied up with string  

I had the patterned craft paper on hand but added the cute truck/Christmas tree ribbon and tied some pine cones (from the yard) on top with raffia string.  I love the rustic feel. Additionally, candy canes (and other candy) are also an easy and inexpensive way to decorate a gift.

Craft paper with natural embellishments make perfect wrapped holiday gifts

Take me to the sea  

Last summer we spent so much time sailing, kayaking and enjoying the beach on northern Long Island Sound, I was excited to purchase nautical gifts and wrap them up accordingly.  My husband is a huge seafood fan so I could not resist the lobster and crab ornaments. These ornaments are from Christmas Tree Shops but you can find a similar lobster here – I also used real seashells that I had on hand for additional embellishments. 

Nautical gift wrap ideas
Craft paper gift wrap decorated with sea ornaments and real seashells
Nautical gift wrap ideas
A lobster holiday ornament makes a great gift embellishment
Nautical gift wrap ideas
A blue crab adorns this gift

Next step I put wrapped gifts around the house and in the places where the gift wrap really accents the surroundings.

How about you? Do you like to wrap gifts? Any special creative ways for wrapping holiday gifts that you would recommend?

Weekend Wrap Up: Holiday Decorating and Buffalo Check Style Finds

Happy Monday all, and welcome to the holiday weekend wrap up.  It was a busy one!  This weekend I finished decorating, baked my favorite gingerbread as well as soft sugar cookies (that taste as good as they look) and wrapped gifts.  I am focusing today’s post on holiday decorating and Buffalo check style finds but promise to share my recipes and gift wrap ideas in the coming days.

It’s a Buffalo Check Christmas

Buffalo check wired ribbon
Buffalo check wired ribbon trims my pine garland on the deck

As I shared before in my wreath tutorial (making your supermarket wreath look good:) I love this year’s trend of buffalo check.  I am craving a homey, warm Christmas atmosphere inside and out.  The cheerful red combined with the black check fits the bill.  Never one to be reticent I will admit right now that I may have gone overboard.  Is it bad to buy a matching buffalo check scarf for your dog?  GG and I had some fun (and there were plenty of treats for her patience!).  I found both the dress and scarf at Old Navy which is always a good source of affordable fashion and usually right on trend.  I bought a sweater too.

Buffalo Check Ribbon

I love using ribbon to decorate, and I used the buffalo check ribbon to trim my garland on the deck and found an adorable basket with…you guessed it buffalo check.  I picked up some bright red pillows too.  This little scene is what I see from our kitchen sink so I try to always have something cute to look at for every season.  As I mentioned in my how to make your supermarket wreath beautiful – I also used the buffalo check ribbon and trimmed the wreath with berries and pine cones.

Me and GG sporting our buffalo check style

Deep Red Berries in a White Pitcher

It is the small things in life right?  And, sometimes the best decorating is simple and inexpensive.  I found these artificial stems at Michaels and put them in this white pitcher. The pitcher was a wedding gift and from the Museum of Modern Art in New York (I like this one from Target too)  I love the deep red of the berries next to the white pitcher. I keep moving it around the house as it adds such a nice pop of color.  I could see these berries in vintage jars as well.

Faux red berries for holiday decorating
Faux red berries in a white pitcher add a nice touch for holiday decorating

Holiday Tablescape

We had a nice family dinner Saturday night.  I adore the white village theme that Pottery Barn showcased this year.  I found these mini ornaments with a similar look at Christmas Tree Shop (see below).  Paired with a pine cone, some red candles and with my jacquard Santa and his sleigh Williams Sonoma tablecloth, it made such a cozy and festive table. 

Ornaments are a fun way to add some festive touches to your holiday table and are often inexpensive and easier to store than an entire village.

Pottery Barn Christmas village theme
Christmas village theme tablescape

Holiday Mantle Decorating Tutorial

Lastly, I love using natural products to decorate.  First, I like to support our local farms and nurseries.  Second, I do not have to store anything – I just add to our compost when the holiday is over.  If you are in the Fairfield County area, Town and Country nursery has a lovely Christmas shop.  I purchased fresh magnolia and boxwood bunches.  I prefer these greens as they do not leak sap!  One year it took me forever to remove the sap from the mantle after using pine branches.  Here is how I decorated our mantle (see below for pictures):

  1. Lay down the magnolia branches.  Step back to see what it looks like and adjust the leaves accordingly.  Also, trim any errant stems.
  2. Layer on the boxwood using the same technique of stepping back.
  3. I love candles and use our existing candles to flank either end.  chasing some faux lighted candles.
  4. Add touches.  You can be creative here.  I used some vintage looking ornaments from Magnolia home mixed in with some pinecones and silver ornaments sprinkled throughout.
  5. You could add some lights too with a strand of white battery operated lights.
Decorating your mantle with fresh greens for the holidays

Well I hope you enjoyed this post on holiday decorating and Buffalo check style finds. Please check back in for some recipes and more and I would love to hear about your holiday decorating and planning.

Best ever sliders with caper mayo

Happy Wednesday friends. The holidays may be quieter this year but I am still so busy! I received our holiday cards (see picture of the SB family at the beach last fall). Here is a holiday planning secret. I always order a regular Christmas card and a New Year’s card. That way I can send New Year’s cards to friends or contacts who may have sent us a card that was unexpected (or oops if I forgot someone!). It makes it look intentional versus sending a Christmas card after Christmas which always bothers my Type A personality. In all of the holiday busyness, I also realized that I had not yet shared Mr. SB’s recipe for his best ever sliders and amazing caper mayo from our Christmas tree cutting tailgate! Read on for the recipes, details, and here is the full tailgate post too.

Tips on making great sliders

It is not easy to get Mr. SB to reveal his secrets but I promise these are the most delicious sliders, and it was worth my cajoling (OK nagging) to get him to share his recipe. Here are a few of his tips too on making the best ever sliders with caper mayo.

First, try to buy locally sourced grass fed beef. We have a share with Walden Local which delivers monthly. This is not a sponsored post. From my experience with being a customer for over two years, I can assure you that their products are sustainable, grass fed (for the beef…they also offer seafood) and most importantly delicious. You do not have to worry about antibiotics or hormones in the meat as all of their meat comes from local farms that are strictly vetted. I also like knowing that the livestock is humanely raised. Ideally you will want 80% lean for the best sliders. Grass fed beef can be on the very lean side but what we buy from Walden Local has always made delicious sliders and burgers. If this sort of beef is not available, then simply buy the best quality you can at 80% lean.

Prepare the sliders ahead of time

Second, the sliders actually taste better if you prepare them a few hours in advance and refrigerate. The time allows for the spices to meld with the other ingredients. This is ideal for tailgating as you will want to have your burgers already mixed and formed into sliders.

Mr. SB always has a meat thermometer to test the right internal temperature. Frankly he prefers his meat on the rare side (that is very French) but with hamburgers I insist on well cooked as there is a risk of contamination. Check out the USDA’s link for what they recommend for safe cooking.

Toppings suggestions for sliders

He grills on his portable Coleman grill and once the sliders are done we always have an assortment of toppings – baby lettuce, ripe red tomato slices, thin onion for everyone to choose what they prefer. As for buns, we like ones that are firm enough that they are not impossible to eat when outside at a tailgate. Whole Foods always has a great selection in our area. Then of course, Mr. SB insists that the best topping is the caper mayo (and I have to agree…do not even suggest BBQ sauce as I did!). As the sliders are small, feel free to eat more than one. There is no point bringing home leftovers after a tailgate!

Best sliders recipe

Best Ever Beef Slider Recipe

Juicy sliders with crisp toppings and a generous dose of caper mayo make the perfect bite sized meal
Print Pin
Course: Appetizer, Main Course
Cuisine: American
Keyword: Game Day, Grilling, Tailgate
Prep Time: 15 minutes
Cook Time: 15 minutes
Servings: 4
Cost: 7

Equipment

  • Grill

Ingredients

  • 1 lb ground chuck 80% lean, preferably grass-fed. We like Walden Local if available.
  • 1 tsp kosher salt
  • 1/4 tsp cracked black pepper
  • 1 tsp onion powder
  • 2 garlic cloves minced
  • 1 tsp freshly chopped thyme If not fresh you can use 1/2 tsp of dried thyme or dried Italian herbs if you like
  • 1/2 cup onion finely chopped
  • 1 TBSP Worcestershire sauce
  • 1 egg
  • 1/4 cup Panko bread crumbs
  • Slider buns

Instructions

  • Combine all ingredients except slider buns. Mix with your hands and form into 1 1/2 inch to 2 inch mini burgers. Cook to a safe temperature. Top with lettuce, tomato, onion slices, cheese or however you like your burgers.
Caper mayonnaise recipe

Mr. SB’s Caper Mayonnaise

Creamy mayonnaise combined with briny capers, tart lemon and some good kosher salt. You will want to pair this perfect mayo with your favorite burger, sandwich or seafood or eat it as a dip with chips or veggies. It is that good.
Print Pin
Course: Appetizer, Main Course
Cuisine: American, French
Keyword: Condiment, Dip, Sauce
Servings: 8
Cost: 4

Equipment

  • Food processor

Ingredients

  • 1/4 cup capers drained
  • 3/4 cup mayonnaise
  • 1 tablespoon Dijon mustard
  • 1 tablespoon freshly squeezed lemon juice
  • 1 cup plus 2 tablespoons avocado or canola oil
  • Kosher salt

Instructions

  • In a food processor, pulse the capers with the mayonnaise, mustard, lemon juice and 2 tablespoons of water until combined. With the machine on, slowly drizzle in the avocado oil until a thick sauce forms.
  • Season with salt and scrape into a medium bowl. Serve with your favorite burger, sandwich, seafood or as a dip. The caper mayonnaise can be refrigerated for up to 2 weeks.

Is there anything better than delicious bite sized sliders with creamy mayo at your tailgate?

Christmas Tree Cutting Tailgate Menu

It is really starting to look like Christmas in Connecticut. That means it is time for my favorite holiday tradition, a Christmas tree hunting adventure! For years the Sunday’s Bread family has been donning warm winter clothes and sturdy boots to take a hayride into the fields of the Connecticut countryside to cut down a fresh tree.

On our first trip to the farm we noticed families from around CT and NY enjoying delicious tailgate spreads. Given that we are all-in foodies around here we just had to do the same. Read on for our favorite Christmas Tree Cutting tailgate menu, some tips and more about this wonderful tradition. As you can see, GG, was all-in with her favorite tartan scarf.

Christmas tree cutting tailgate menu
GG sporting a tartan scarf before the Christmas tree cutting

Christmas tree cutting tips

We started cutting down a fresh tree twelve years ago. The girls were so young. While now the hayride is optional back then we had to take it as they could not walk that far. So first tip – check the weather and it is likely you will need to wear warm clothes and boots. If the day is going to be cold, you may even want some hand and toe warmers.

The atmosphere is very festive. Where we go they even have oxen (see picture). They also have a cute Christmas market where you can buy ornaments, wreaths and of course trees. We prefer the adventure of walking through the fields to find one. Your own cut tree is as fresh as you can get so they last easily through the holidays. I guess you can tell that I am a fresh tree gal. There has never been a question of fresh versus artificial at the SB house. I love the smell of fresh pine, and the way the white lights glow against the needles.

Oxen at Christmas tree cutting tailgate
Each of the oxen weighs 600 pounds!

As much as I love a fresh tree, there are a few items you may want to bring with you (even if you buy one from the market or local home store). While our tree farm does provide some cord to tie the tree to the roof, we always install our ski rack and bring our own set of cords for tying it securely. As I love the Christmas market and often buy a wreath or other items, I usually bring a plastic bag for the trunk so that the needles do not get everywhere.

Once you find your tree, perhaps the most important tip is to stay next to it. Our girls usually disagree about which tree is coming home with us so that means one of us has to stay with the trees under consideration. Mr SB then uses one of the farm’s saws (they give you those), and we all help securely get it down. At our farm, you are given a tag and part of the tag stays with the tree. You move the tree to the side and then they will pick it up and put it on their wagon to bring it to the parking area.

Christmas tree cutting tailgate menu

A note on Christmas tree decorating

Growing up in Rhode Island, we always had a beautiful tree. As I adore Christmas and all of the preparations I often decorated it. I was the most enthusiastic one especially after my sisters had left for college. You could say I am bit of an expert at this point. Now, I love taking out the antique ornaments. Some ornaments are from my grandparents – at least 100 years old at this point. We have also collected ornaments from around the world. We have brought back ornaments from our tours of the National Parks, Mexico, France, South America and pretty much everywhere we have traveled.

What do I do with the girls’ home made ornaments?

As for the home made ornaments from Sunday School or school – well, it all goes on the tree. I love the memories. I know in the blogging world, the trend is a super coordinated, perfect tree – that is just not me. It does not bring me joy. So, up goes the cardboard cutout with a little photo of my college girl when she was five. I add some beautiful gold ribbon as a garland along with candy canes and gingerbread cookies. At least in our eyes the tree is very beautiful and full of Christmas spirit, memories and meaning.

Christmas tree cutting tailgate tips

Back to the tree cutting, we usually go with other families. As the farms can be crowded, we caravan so we can park next to each other. We all bring our favorite menu items. So here is the menu – it may be a bit eclectic but delicious all of the same and travels easily. Oh, and Mr. SB loves to bring his portable grill.

I am including his recipe too. The caper mayonnaise is to die for, and that leftover Thanksgiving turkey is delectable when dipped in it (shh don’t tell). I also love the mayo slathered on some sourdough bread piled high with turkey for the best sandwich ever. It would even make a delicious dip for crudite or some plain ol potato chips.

Christmas tree cutting tailgate menu

OK our tailgate philosophy is pretty simple. Delicious, easy food that can be consumed ideally with your fingers (finger food:). I love to make it cute with a tartan tablecloth, festive ice bucket decorated with candy canes (a galvanized steel bucket that I picked up at Michaels a few years ago) and matching tartan plates/cups. All easy and no fuss.

Christmas tree cutting tailgate menu
An easy Christmas tree cutting tailgate…plenty of yummy food and drink!

The best ever sliders with caper mayonnaise

Mimi’s buffalo chicken dip with tortilla chips

Vegetarian wraps

Red cabbage and carrot slaw with an apple cider vinaigrette

Bagels and cream cheese

Chocolate cookies with peppermint kisses

Assorted Christmas cookies including gingerbread men/women and Christmas trees

Mimosas

Bloody Marys

Hot chocolate

Soft drinks

We brought the buffalo dip in an insulated cooler and then reheated it on the grill. Mr. SB prepared the meat at home so it was ready to go on site. We used a folding table versus our tailgate as it was just easier to lay out the spread.

Mr. SB grilling the best-ever sliders on his portable grill

After a hearty tailgate we ventured out into the farm. We found our tree and even decorated it that evening (GG was tired!). We had some leftover turkey from Thanksgiving so I made my Turkey Tetrazzini and we chilled out while watching the Christmas Chronicles. Is there a better day than that? Would love to hear your Christmas and holiday traditions. Check back as I will be sharing how to decorate your mantle with natural greens and more!

Christmas tree cutting tailgate menu and tips
GG sleeping after a long day of tree hunting…our tree decorated

The 5 Best Home Organization Blogs

Hi there. So, yesterday I shared my organization journey. It would not have been complete without the inspiration I received from other bloggers (who continue to inspire me today). How did I find them? One day I think I googled “top organization websites” or something like that and fell into the world of organization blog! These ladies are funny, have great tips and influence my own organization journey. I am happy to share with you the 5 best organization blogs.

A Slob Comes Clean (the best of the top 5 organization blogs if you are starting out)

If you are just starting out, Dana at a Slob Comes Clean is a great place to start. She shares her brutally honest struggle to put some order in her life. She does not sugar coat it either – from the dishes piling up to having to buy garage sale clothes (because the rest of the clothes were dirty), she shares it all along with how she found peace in decluttering.

Easy tips such as just “do the dishes every day” (which I have also found to be true) get even the messiest, cluttered home on a path to order and serenity. She is also very funny and self deprecating which is fun as some of the organizing bloggers might take it all just a bit too seriously. She also a podcast. I enjoy listening while I tackle a decluttering or organizing project (or anytime).

iHeart Organizing

iHeart Organizing created a big Aha moment for me. Jen, the blogger, had such beautiful spaces and was so creative in how she labeled and organized. I love the creative DIY aspect of organizing. It is fun (well if you are me) to play around with fonts, patterns and making your containers and labels special. After decluttering and organizing a space I will treat myself to some beautiful labels and possibly containers (but only if I really need them!). She does not seem to be actively blogging anymore but she still has plenty of ever useful posts that will inspire you.

Andrea Dekker

I found Andrea Dekker’s blog awhile ago likely from one of my internet searches on organization. She is all about leading a simpler life and also has great ideas on living frugally (but fully). I really like her attitude that you don’t need fancy containers or tons of money to lead a simpler, organized and very fulfilling life. In fact she often will share organized spaces that may just reuse some cardboard boxes or tin cans that could be found in anyone’s recycling bin She also has great advice on how to be careful about accumulating stuff to begin with and leading a minimalist, simpler life.

Organizing Junkie

I recently discovered Organizing Junkie. She has tons of content around organizing everything (and I mean everything). I found I had to sift through much of the content but found some great tidbits. I like her idea around pouches and am going to try that out for my office where paper tends to become out of hand. She has been blogging for years so I recommend searching on a specific topic to find exactly where you may be challenged.

Clutterbug

I recently found the Clutterbug blog and love the quiz that helps identify your organizing style. I think I fit more than one profile (definitely a Ladybug but maybe a Cricket too?). It is thought provoking and makes you review what you like/don’t like and where you may have obstacles to overcome.

I hope you enjoyed the top 5 organization blogs and will check them out. Do you have any blogs you go to for organization advice? Check back in frequently as I continue to share resources and my own tips and tricks for a decluttered, more organized, productive and fulfilled you!

The Sunday’s Bread Organization Journey

If you caught yesterday’s post, you know I took the week off. Did I jet off to Paris, Greece or maybe a resort in Cancun? No, far more exciting I decluttered and organized our home (HA!). Maybe it was not so glamorous, but it sure did feel good!  It was an especially great feeling coming back to a decluttered, organized office. I also became very motivated to share my organization journey as it has been a journey!

I have always tried to maximize life and minimize drudgery (my definition of drudgery includes endless, repetitive housework). Learning and implementing organization strategies has improved my life immensely. It can help you too. Are you sick of not being able to find items? Are clothes, papers (fill in the blank) bursting from drawers. Laundry overflowing? Or maybe 5 comes and you have no idea what dinner will be?  I have been there and I can help.

I plan to share those same strategies that took me from overwhelmed to a much calmer existence (and a home that the entire family enjoys). So onto the journey…you may recognize yourself somewhere here.

Organization growing up

I never had an issue with organization in school or work.  Home, even my childhood home was a different story. My mom good naturedly called me Messy Mimi from time to time.

But at school and work I was the organized one. At my very competitive graduate school I had fellow students who said I was the most organized person there.  I also had a professor tell other students they should emulate my organization strategies. No frantic all nighters for me…work was generally always done well in advance.   

Truthfully when it comes to my work/school I am organized. Partly because school/work has been such a priority for me.  My mind just over compensates for any messiness, clutter or disorganization in my surroundings. That said, it is still easier to be organized in all (or at least most) facets of life.

Young, single and organized

Second, when you are a single person staying organized is just not as hard.  If you move frequently as I did back then, you also just can’t hang on to that much stuff (unless you want to pay to move it!).

And I moved frequently as a single woman in my twenties. I lived in Boston, New York City and then off to business school and some time in California.  When my husband and I married we lived in Montreal, and then moved back to New York City.  What does all that moving do?  It makes you constantly sort through your stuff.   As we lived in rentals we did not invest too much in home décor either.  As a single or newly married woman without kids, I was lulled into thinking that being an organized person with a tidy home was really pretty simple.

Organization post children

Moving into our first home in CT from a small one bedroom in Manhattan changed our lives in more ways than one.  All of a sudden we had space!  Four bedrooms and two thousand square feet seemed like a mansion.  

We also had two babies born two years apart.  An entirely new shopping category was added – baby stuff!  At the time I was working full time with a 45 minute commute one way, caring for an infant, and as our home was a fixer upper we remodeled it.  Oh boy I was busy…at least I thought I was busy.  

Then our second daughter came along (I was even busier!).  I was full on Mom and enjoying every minute (at least for the most part).  I worked part time at this point.  So my days off were spent taking the girls to the aquarium, children’s museum, beach and library and doing all of that fun mom stuff I could not do while in the office.

In other words organization was not my priority…and frankly I was and am still OK with that thinking. Although if I had known a few strategies I would have lived a more organized and enjoyable life – but I was not there yet.

And the stuff just accumulated.  Babies grow and clothes that fit two weeks ago no longer do.  No one ever told me there could be so much stuff with two little kids. 

Our girls are also the youngest of 10 other children from our extended families.  The hand me downs started – everything from a full play house, at least 50 Barbies (with all of the little shoes and outfits), endless toys to dozens of clothing items.   I also worked in children’s publishing so had access to free books!  I am a book lover and was so happy to have all of these books for our children.  Before you know it, our house that seemed big, was stuffed to the brim.

Selling our first home

At some point, we decided to move into a larger home.  We were busting at the seams so the answer was a bigger home right?  Now as I look back a larger home to move more stuff is usually not (almost never!) the answer.  You have to live with what space you have. In our defense we had hit a remodeling wall.  It just was not worth it money-wise to put more money into that house so we called an agent.

I remember the day the real estate agent came, toured our house, and then when he arrived in the basement he said, “now it all makes sense.”  Basically we had made the basement a dumping ground.  We never had time (nor did we make time) to deal with the excess stuff so we just stuck it in the basement.

To sell the house, we started some serious decluttering, sorting and organizing.  After an exhausting few weekends and the realization that we had accumulated so much in a short period of time, I vowed that in my next house, I would not let a year go by without at least cleaning out all closets at least once.  At this point I realized that taking care of me versus taking care of a family and a home was something I knew little about.  This realization was really step one on the organization journey.

Being a successful professional does not mean organization at home is second nature

Here I was a successful business professional known for being efficient and organized at work, yet at home it was a different story.  If you are at this point, do NOT be ashamed.  No one really teaches you these skills now. Home economics was either eliminated or barely covers how to run a household.  Along with teaching personal finance to women and girls, it is a major reason and passion for starting this blog!

Another notable change has contributed to our difficulties managing our belongings. We entered the decades of stuff somewhere in the eighties and nineties.  Cheap exports from abroad and “fast fashion” have made it so easy to buy stuff and more stuff (and then there is an entire industry devoted to organizing it!).  We are also marketed to constantly on social media, email, TV …you name it.   Americans are drowning in stuff!

Nature versus nurture

It is worth mentioning that I had also mistakenly thought there are “neat” people out there, and that I was simply not one of those people.  Sort of like how some people tend to gain weight while others have problems keeping it on – organization was just not in my genes.  While it is true that being neat with your stuff may come naturally to some, I would argue (as a convert) that you can absolutely learn the habits and skills to become a neat, organized person.

To start solving a problem you need to realize you have a problem

Our second and current house is larger.  It has a finished basement/rec room and a walk up attic which have been blessings and challenges.  A blessing as it has been so nice to have some extra room (and ability to hide the mess).  A challenge as at some point, you need to face all of that stuff you “stored.”

I remember the day the realization came that our second home, while so much larger and with better storage, this home had also become terribly disorganized.  

We are fortunate enough to have someone help clean our home every other week.  One day, I saw her go into our rec room with the vacuum and come out almost immediately.  The room had so much stuff in it that there was only a tiny area to vacuum and clean.  Stuffed animals were everywhere. Toys the girls had grown out of were still there long after. Even my beloved children’s books were so overwhelming that no one really read them. Bells went off.  And, that is when I started Project Organization or Project O as I refer to it.  

I started reading books, searching on Pinterest for organization ideas and came upon some excellent blogs.  After some trial and error, I developed my steps to organize just about anything.  I spent all of my weekends one winter tackling the mess and getting to a really great place.  And, Project O as I still call it continues.

While I have entered more of a maintenance phase, I also have times where I still occasionally become overwhelmed (including the last 3 months). However, now I have the tools and inspiration to tackle it.

So check back in as my next post will share some great books, blogs and influencers who have helped me come up with my own strategies.

Kick-Off to Organization 101

Hi all,

How have you been?  I took some time off both from my job and the blog, and unplugged and organized!  I decided to organize our home in a week!  Yes, an organized home in 7 days.  I promise to share how I tackled that challenge.  But before I get to that, I am excited to share that I will be posting a series that I am calling Organization 101. I will share my journey and all of the tips, tricks, strategies and resources that have helped me lead a calmer, more productive life and have a home and homelife that the entire family enjoys.

Here are topics to look for in the coming days:

The Sunday’s Bread organization journey

Top organization blogs, books and TV shows

Getting started when your home is a mess

Why your past matters for your organization style

What motivates you to organize?

How organization is like weight loss

Why it is OK to keep some stuff (at least for now!)

The organization pass system and how it will help you minimize

Daily routines that help you maintain an organized home 

Trigger points to watch out for that will sabotage your organization progress

How to make money selling your stuff (and where to sell it)

How our consumable “Stuff” culture has made it so hard to get and stay organized

And probably more!  My goal is to share all of the tips, tricks and how to’s that I have learned through the years to make YOUR home and life as organized as you want it to be.

So stay tuned folks.  And, before I begin, you may just want to check out The Home Edit on Netflix to get excited about having an organized home.

Fall Weekend Wrap Up + Apple Crisp

The weather was gorgeous this past weekend, and we did a second round of apple picking at our favorite orchard which made the most delicious apple crisp (recipe below!).

Friday I realized that I had dozens of eggs in the fridge (don’t ask) and decided to make a quiche. Then I realized I did not have prepared crust so did a quick recipe search and found this simple recipe for pie crust. Could not have been easier, was delicious and I used real ingredients like organic flour and butter so am guessing was much healthier too and without the preservatives in refrigerator crust! French guy was impressed although we both agree we need to find a low-cost source of gruyere cheese which is one reason why quiche in France is so delcious (I used sharp cheddar as that is what I had on hand).

We also had our last day at the shore which was bittersweet. Even during the pandemic, it was so great to escape to sail, kayak and hit the beach and socialize safely outside. It has been a silver lining to discover the beatuiful, CT shore and go back to my roots of sailing (and now teaching the girls to sail).

While hiking will be great during the fall, I told Mr. SB that we need a winter escape (am asking for cross country skis for Christmas). Downhill skiing may be challenging as the pandemic continues.

Sunday afternoon I tackled cleaning the basement. I actually organized the spot two years ago, and while it looked terrible in recent days, it only took me about an hour to remove unwanted items and put others away in the labeled spaces I had created years ago. I used my 5 step organization method for a particularly messy part. So nice to go in and not have stuff everywhere! I also realized that end of season or any major event should be an alert. That is the time to empty beach bags, wash towels etc. (anyone ever clean out a kid’s backpack and find 3 month old hummus?…surely not me:).

Now what about that apple crisp?

Apples from apple picking

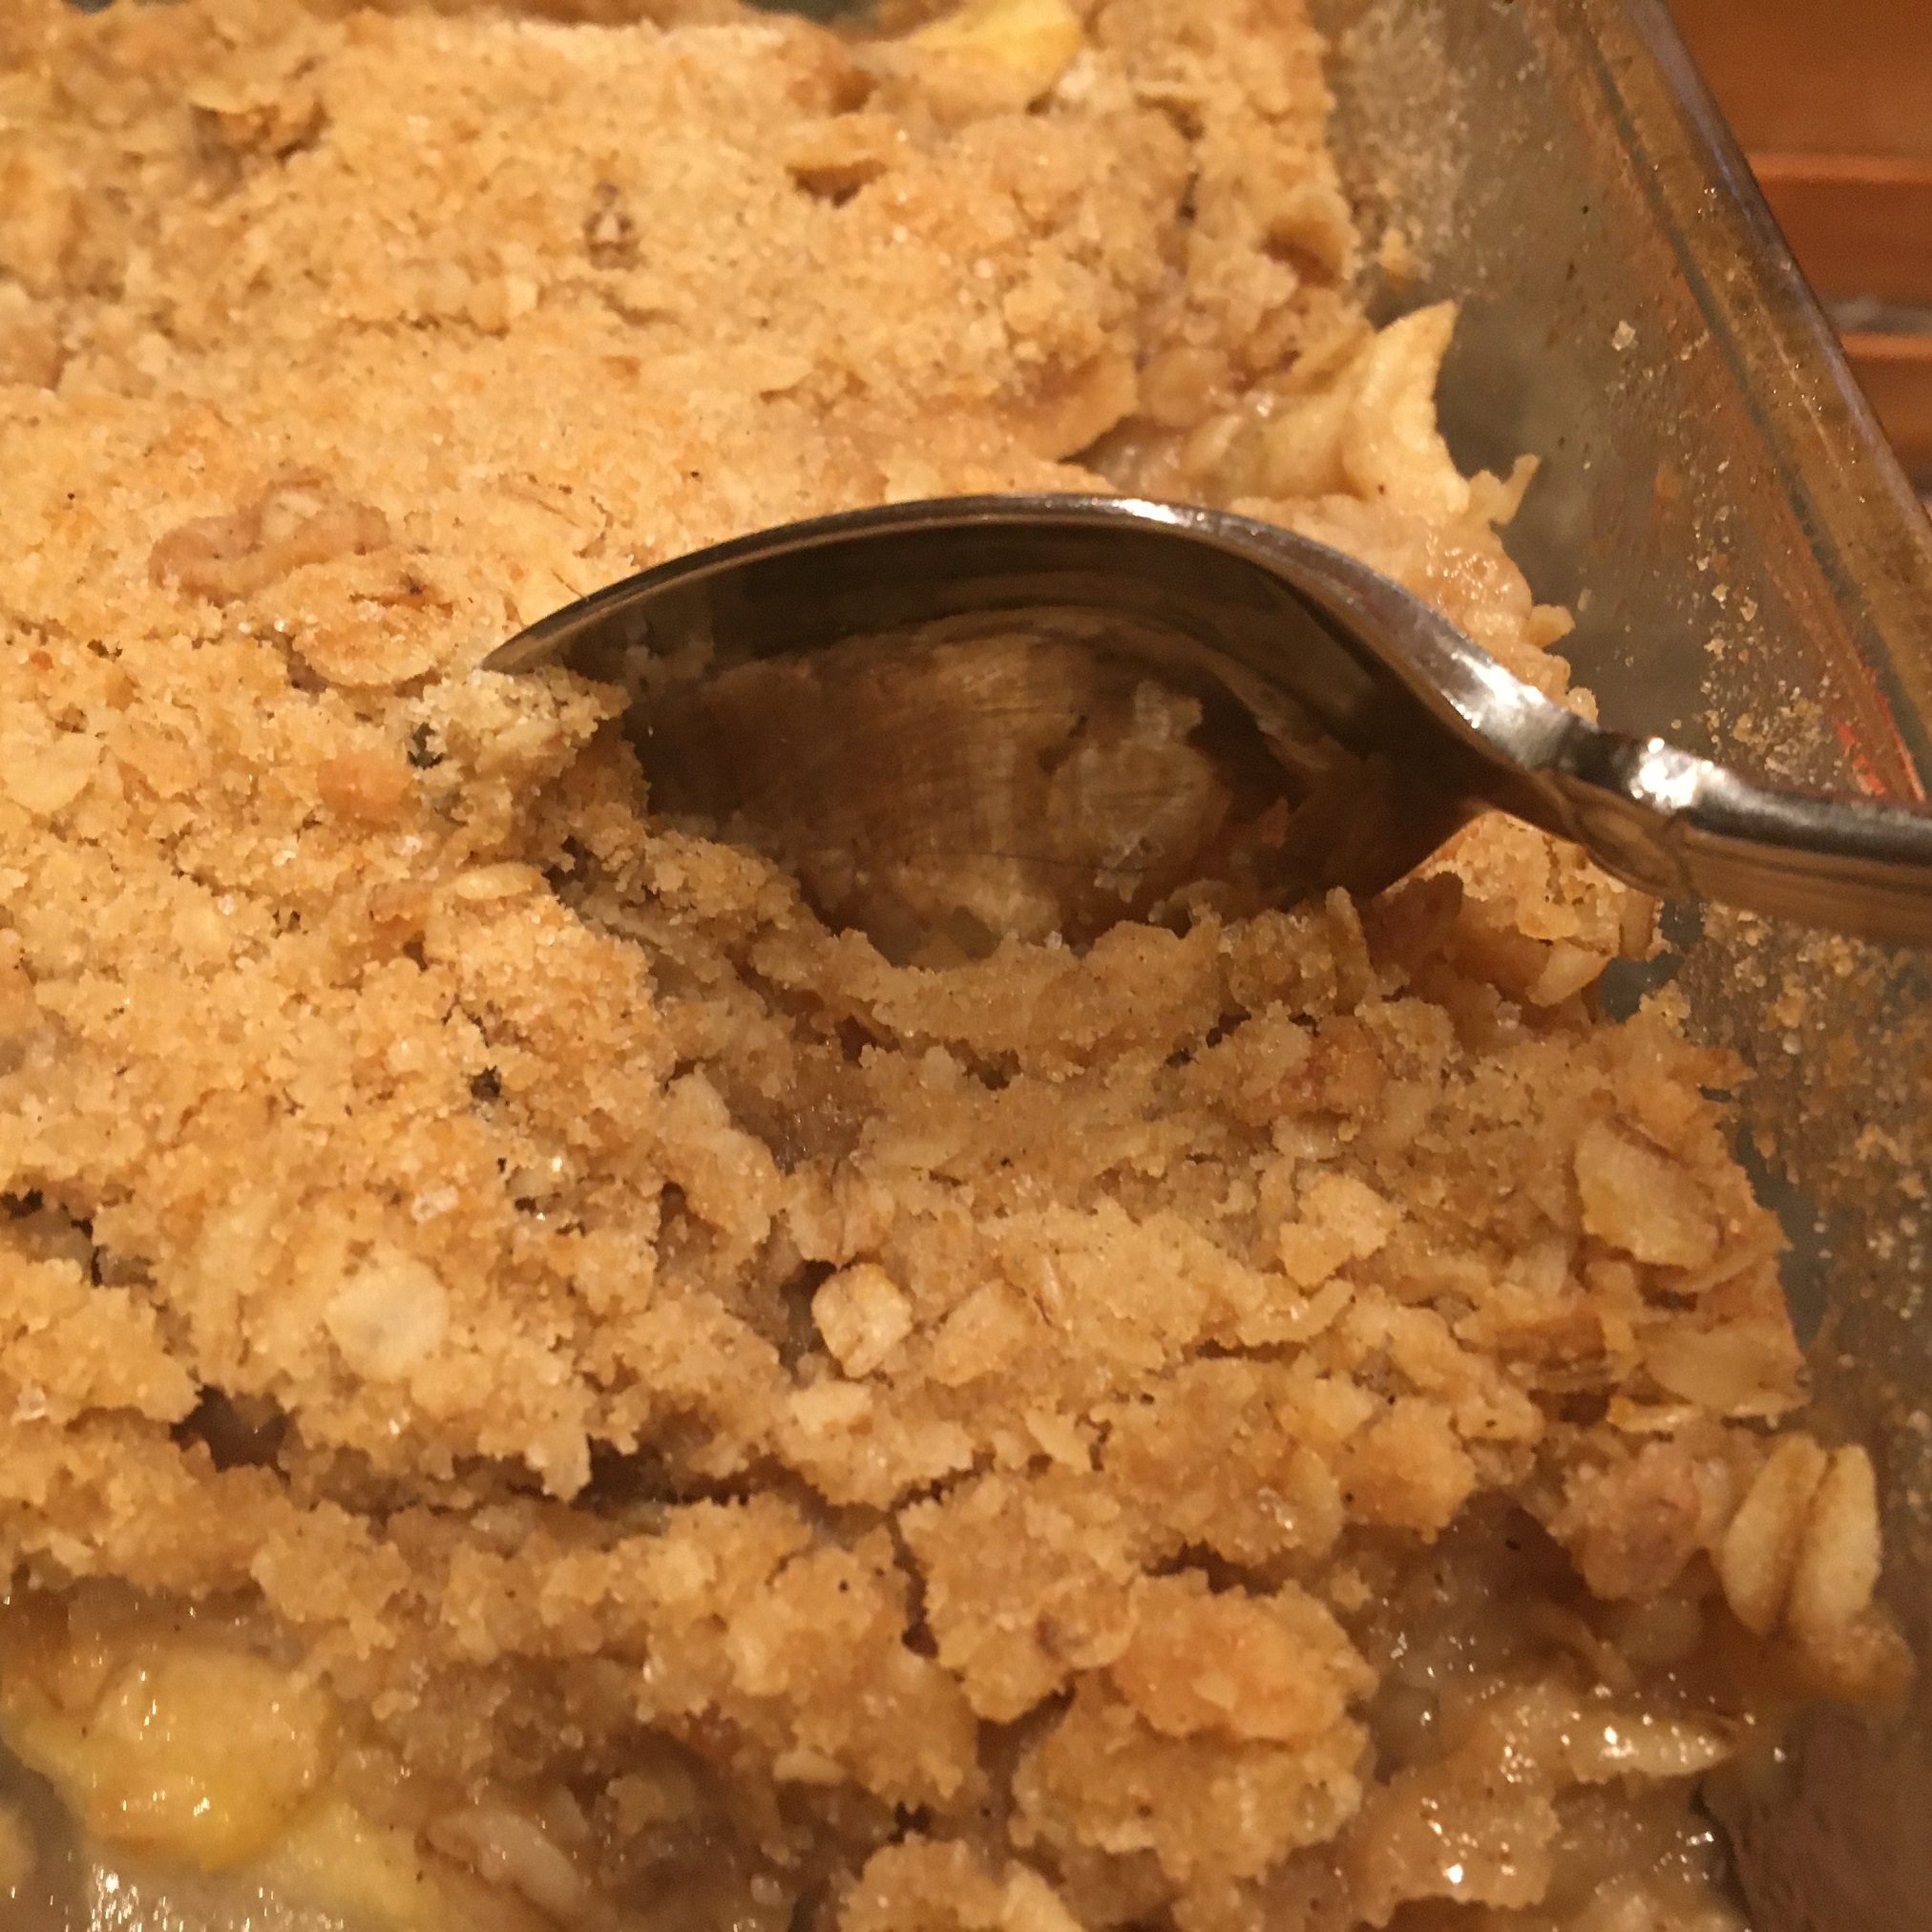
So all in all a good weekend. The apple crisp was a perfect way to end Sunday dinner. I used a mix of Jonah Gold, Granny Smith, Cortland and Mutsu apples. Typical recipes use far more sugar – while this recipe is plenty sweet I like to taste the apples. The top is a delicious mix of oats, brown sugar, cinnamon and butter. If you love crisps as much as I do, be sure to check out last week’s pumpkin crisp recipe which is also easy, perfect for fall and delicious. Super easy…enjoy!

Apple Crisp

Best Homemade Apple Crisp

Sunday’s bread recipe for warm, homemade apple crisp.  Nothing says home like apple crisp.  Top with some vanilla ice cream or whipped cream for the perfect, sweet comfort food.
Print Pin
Course: Dessert
Cuisine: American
Keyword: Apple, Dessert, Fall, Fruit dessert
Prep Time: 35 minutes
Cook Time: 40 minutes
Servings: 8 servings
Cost: $3

Equipment

  • 8 by 8 pan
  • Peeler
  • Sharp knife

Ingredients

  • 4 cups apples sliced thinly. I leave a little skin on for texture.
  • 1 tablespoon flour
  • 1/2 cup sugar I use Costco organic
  • 3/4 cup brown sugar
  • 1/3 cup butter cold and cut into smaller tablespoon sized slices
  • 3/4 cup flour
  • 1/2 cup oats
  • 1/4 tsp baking soda
  • 1/2 teaspoon salt
  • 1 teaspoon of cinnamon

Instructions

  • Preheat oven to 350 degrees
  • Combine the first three ingredients and place in a greased 8×8 baking dish.
    Sliced apples
  • Combine the remaining ingredients. I use kitchen gloves to work the butter into the dry ingredients. Mixture should look crumbly. Spread over the top of the apple mixture.
  • Bake for 30 minutes. Apples should be juicy and bubbling but hold their shape. Test with a fork or knife to determine that the apples are tender. Bake for another 5 to 10 minutes if necessary.
    Apple crisp from the oven