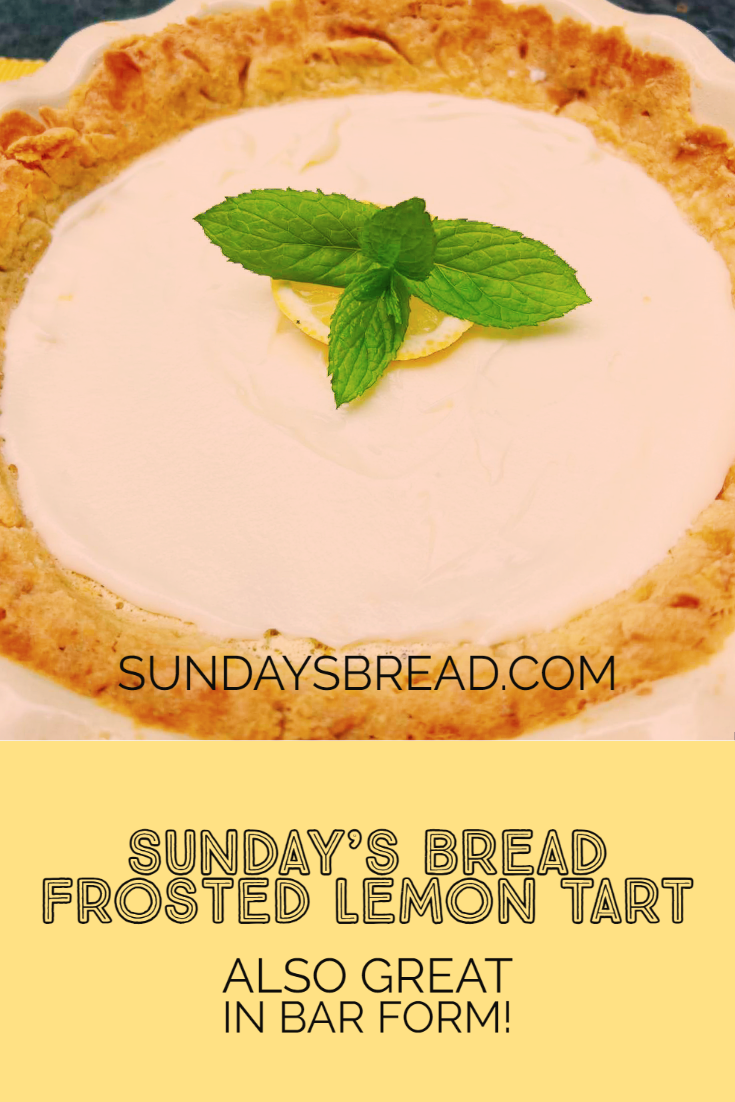
Favorite Frosted Lemon Tart or Bars

Summer is in full swing around here (finally) after a rainy start. We are taking the good days when they come! Two fun meals most recently included Mr. SB’s birthday dinner held at our club on the shore as well as my book group (held on our deck and dining room as thunderstorms made it impossible to have at the shore club).

Shore Menu (including lemon tart for the birthday dessert)

Last Sunday was a hot one on the shore. I was on Race Committee for the club and after a long day on the water was looking forward to a yummy dinner and at Mr. SB’s request, I had made his favorite lemon tart. As usually he loves cheesecake and is a picky French guy – a special request for lemon tart means something!

Our friends joined us for both happy hour and a dinner of teriyaki salmon on a cedar plank, caprese salad with fresh basil from my garden, mediterranean pasta salad and the tart! Good club friends stopped in spontaneously and let’s just say you know you are having fun when the club staff tell you they are closing soon and it is time to pack up!

Book Group Menu (including lemon bars)

I made two tarts actually – as this recipe works so well in bar form too – I made one in an 8 by 8 pan. My book group came over on Wednesday so I made the bars and tart on Saturday and froze the bars but did not frost them. They came out great. As we had been planning on going to the shore the rest of the menu was picnic food – but worked well for a summer book group menu. Will make these again – here is the easy make ahead menu.

Charcuterie board with prosciutto, salami, Boursin, dried apricots, nuts and grapes (enjoyed on the deck before a rain storm)

Toasted Israeli cous cous with grilled vegetables

Grilled lemon pepper chicken

Lemon bars and brownies for dessert

Super easy to make ahead and delicious! Here is the recipe for Mr. SB’s favorite frosted lemon tart or bars. Enjoy!

Frosted lemon tart

Frosted Lemon Tart or Bars

Tangy, creamy filling topped with a tart, sweet frosting. Easy to make and with ingredients that can be stored easily (so usually on hand!). Mr. SB requests it for his birthday! I have also made this for book group and two dinner parties. It comes out perfect every time.
Prep Time: 1 hour
Cook Time: 40 minutes
Course: Dessert
Cuisine: French
Keyword: Citrus, Dessert bars, Fruit dessert, Lemon
Servings: 8
Cost: $3

Equipment

  • 1 Tart pan
  • 1 8 by 8 pan

Ingredients

Crust

  • 1 cup Unbleached, all purpose flour
  • 8 tbsp Unsalted butter at room temperature (1 stick)
  • 1/4 cup Confectioners sugar

Filling

  • 1 cup Granulated white sugar
  • 2 Large eggs
  • 2 tbsp Unbleached, all purpose flour
  • 1/2 tsp Baking powder
  • 3 tbsp Freshly squeezed lemon juice
  • 1 tbsp Freshly grated lemon zest

Frosting

  • 2 1/2 tbsp Unsalted butter at room temperature
  • 1 1/2 cups Confectioners sugar
  • 1 tbsp Lemon juice
  • 1 tbsp Freshly grated lemon to sprinkle on top

Instructions

  • Preheat oven to 350 degrees and place a rack in the center of your oven
  • For the tart or bar crust – combine 8 tbsp of butter 1 cup of flour, and 1/4 cup of confectioners sugar with a fork or pastry blender (I prefer the latter) until the flour is absorbed into the butter in a course mixture. Take the mixture and put it into your bar or tart pan. Press it down to an even layer. I like to use a ramekin to press it down. Bake until the crust is a light brown. Watch it carefully after about ten minutes (it will take between 10 to 16/17 minutes).
  • Make your filling by whisking together the eggs, granulated sugar, 2 tbsp of flour, baking powder, 3 tbsp of lemon juice and the lemon zest until combined. Pour over the partly baked crust and continue baking until the filling is firm, about 25 minutes or so. Let the tart or bars cobol completely before frosting. If freezing (and this recipe freezes really well), do not frost.
  • For beat the frosting – beat 2 1/2 tbsp of butter with 1 1/2 cups of confectioners sugar until smooth. Add the lemon juice until the frosting is at a good spreading consistency.
  • Spread icing over the bars once completely cooled (or if you freeze ahead of time, remove from freezer and let thaw). Sprinkle lemon zest on top. Let sit for at least an hour before cutting into squares or slices of tart. Enjoy!
Tried this recipe?Let us know how it was!

Pumpkin Blondies with White Chocolate Chips

Hi there! Well fall is in full glory in Connecticut. Our leaves are turning and the weather has been beautiful. We have been busy with visits to Vermont which I hope to share some recommendations and up to Boston. Last weekend I finally had a chance to catch my breath and do some decorating to celebrate the season. The wreath in the picture was a Christmas Tree Shop find which I added a bow with some Michael’s ribbon (on sale now!).

Fall wreath
Some fall cheer at the door

Other touches around the house include pumpkins, mums and some delightful Williams Sonoma fall soap for the powder room (I typically do not like pumpkin spiced scent so the cider option is wonderful). I also found myself in the kitchen making lentil soup and these amazing pumpkin blondies with white chocolate chips.

Pumpkin blondies with white chocolate chips are full of brown butter taste and the pumpkin flavor is not overpowering. You could easily make them with dark chocolate or milk chocolate chips too. I happened to have white chocolate chips on hand and loved how the white chocolate complements the pumpkin flavor. It took me a few tries to get the recipe just right. Needless to say this dessert was gobbled up! I may even try a teaspoon of ground ginger next time to add some depth (but they are delicious as in the recipe below).

Pumpkin Blondies with White Chocolate Chips

The taste of fall in an easy-to-make blondie full of brown-buttery, pumpkin spice flavors with creamy white chocolate chips. Delicious for game day or as dessert or snack anytime.
Course Dessert
Cuisine American
Keyword Bars
Prep Time 25 minutes
Cook Time 25 minutes
Cost $4

Ingredients

  • ½ cup unsalted butter
  • ¾ cup brown sugar packed
  • 1 egg
  • 1 teaspoon vanilla extract
  • 1 cup pumpkin puree
  • 1 ⅓ cup all purpose flour
  • 2 teaspoons pumpkin pie spice or apple pie spice
  • ¾ teaspoon baking powder
  • ¼ teaspoon salt
  • 1 cup good quality white chocolate chips

Instructions

  • Preheat oven to 350°F. Grease and line a 9×9 pan with parchment paper.
  • In a small saucepan over medium heat, melt the butter. Continue to cook, stirring the pan until the butter becomes a golden brown color. Watch it carefully to make sure the bits on the bottom of the pan do not burn. Remove from heat and cool slightly. It will look like the image when it is ready.
    Browned butter
  • In a large bowl combine brown butter, brown sugar, egg, vanilla, and pumpkin. Stir until combined.
  • In a separate bowl, combine flour, pumpkin spice, baking powder, and salt. Add the flour mixture to the wet ingredients and stir until combined. Fold in the white chocolate chips. Batter will be on the wet side.
  • Pour batter into prepared pan and bake for about 25 to even 30 minutes, until a toothpick inserted into the center comes out without raw batter on it. Oven temperatures can vary so watch carefully after 20 minutes.
  • Cool slightly before cutting and serving. Enjoy!

Care package chocolate chip cookies

Hi there! Fall for many of us means our kids are heading back to college. This year my daughter is a sophomore. Last year was a tough one. She ended up transferring from her dream school to a college closer to home. Transferring is never easy but during a pandemic it is even harder. So this year it is like she is almost like a freshman again. Along with getting into a routine, meeting two new room mates and taking on a full academic load comes some homesickness. What could be better than a care package to cheer her up? Cookies have to be part of it, but most of recipes create cookies that break easily or crumble. Not a problem at home, but throw UPS into the mix and she would have a mess by the time she opened the package. So, after experimenting a bit, I am sharing the perfect care package chocolate chip cookies.

What makes these cookies perfect for care packages?

These cookies are thick and chewy with some heft. They won’t break easily and are compact diameter wise. After completely cooling them, I put them into small zip lock bags and packed them snugly. I used UPS to send them to her dorm, and she received them two days later and said they were “yummy.” Apparently the room mates loved them too.

What are other items to put in a care package?

For my girl, I decided to add her favorite candy along with some hair styling product that I picked up inexpensively at TJ Maxx. I had some paper basket filler so I filled the bottom with it. Then I added a card and some funny print outs with reminders such as “share with your room mates.” Other ideas could include gum, other favorite foods that will keep a few days such as granola bars, dried fruit. Nail polish or self care items could work too.

A few other notes on missing your college student

Did you know that 70% of freshman are homesick the first semester? Don’t be surprised if this happens and frankly with the pandemic I can tell you it is hitting sophomores and other classes too who were online last year and now readjusting to college. If you are the one missing your kid, don’t feel bad. This is a huge adjustment for you too. I have been really enjoying articles from Grown and Flown and in particular the following posts:

How to Help Your College Freshman When They’re Homesick (grownandflown.com)

With My Daughter in College, It’s the Little Stuff I Miss the Most (grownandflown.com)

Nine Keys to College Success: What the Research Shows (grownandflown.com)

So much to learn and think about…parenting really is a lifelong journey! Without further ado, make these perfect care package chocolate chip cookies…save a few for yourself if you are feeling blue and send some to your student. He/she will thank you for them!

The Perfect Care Package Chocolate Chip Cookies

Chocolate chip cookies that are easy to make, withstand travel and taste delicious. Make a batch for your college student or anytime you wish to send some love (or just eat some delicious cookies!).
Course Dessert, Snack
Cuisine American
Keyword Care package, Cookies, Dessert
Prep Time 20 minutes
Cook Time 10 minutes

Equipment

  • Cookie sheets
  • Mixing bowls
  • Electric or stand mixer
  • Parchment paper (or baking liner)

Ingredients

  • 2 1/3 cups all-purpose flour
  • 2 teaspoons baking powder
  • 1/2 teaspoons baking soda
  • 1 teaspoon salt
  • 10 tablespoons unsalted butter 1 stick plus 2 tablespoons softened
  • 2/3 cup brown sugar packed
  • 1/3 cup granulated sugar
  • 1 egg
  • 2 teaspoons vanilla extract
  • 12 ounce bag semi-sweet chocolate chips
  • 1/2 cup of semi-sweet mini chocolate chips

Instructions

  • In a medium mixing bowl, whisk together the flour, baking powder, baking soda, and salt and set aside.
  • In a large mixing bowl (or the bowl of a stand mixer), cream the butter, brown sugar, and granulated sugar together with an electric mixer on medium speed until light and fluffy (about 5 minutes). Add the egg and vanilla and beat until combined.
  • Add the flour mixture and beat at medium speed just until combined. Stir in the chocolate chips. Note: the dough will be very firm and a bit crumbly but should form a ball when pressed together.
  • Shape cookies into small balls.
  • Preheat the oven to 375F.
  • Watch cookies carefully after about 10 minutes. I usually switch trays from top to middle and spin them around so far side is now the close side to the oven door for even baking. Remove when firm and with just the hint of toasted light brown tops.
  • Allow the cookies to cool on the cookie sheet for 5 minutes, then remove to a cooling rack to cool completely.
  • The cookies can be served warm or at room temperature.
  • Allow to cool completely before putting into zip locks bags or another wrapping for your care package.

Easiest strawberry shortcake recipe

Hi there! Not sure where the time goes…college girl came home and my youngest is busy finishing up school. Hard to believe the year is approaching halfway through and we are almost in June! Checking in today to say hello and share the easiest strawberry shortcake recipe that I brought to friends last weekend. In CT, strawberry season is right around the corner in June but we start to get some delicious strawberries from California this time of year too. I also find myself really craving spring desserts and fruit in particular. Strawberries are also so good for you. I do buy the organic versions as apparently strawberries are one of the most sprayed for conventional produce.

This recipe creates a light, crumbly shortcake that can be made in one bowl – so super easy. It also looks really pretty on top of a cake plate (and needless to say it was a big hit!). So, without further ado, here is the recipe for the easiest strawberry shortcake recipe.

easiest strawberry shortcake recipe

Easiest strawberry shortcake recipe

Delectable, crumbly shortcake is the perfect base for ripe, sweet strawberries and cloud-like soft whipped cream.
5 from 1 vote
Print Pin
Course: Dessert
Cuisine: American
Keyword: Dessert, Fruit dessert
Prep Time: 20 minutes
Cook Time: 25 minutes
Servings: 6
Cost: $5

Ingredients

  • 1 1/2 pounds strawberries hulled and sliced in half or quarters
  • 5 tablespoons sugar
  • 2 cups all-purpose flour
  • 2 teaspoons baking powder
  • 1/4 teaspoon baking soda
  • 2 tablespoons sugar
  • 3/4 teaspoon salt
  • 1 1/2 cups heavy cream
  • 1 1/2 cups heavy cream chilled
  • 2 tablespoons confectioners sugar

Instructions

  • Mix strawberries with 3 tablespoons of granulated sugar and refrigerate while juices develop (for at least 30 minutes).
  • Preheat the oven to 400 degrees F.
  • Sift together the flour, baking powder, baking soda, remaining 2 tablespoons sugar, and salt in a medium bowl. Add heavy cream and mix until just combined. Place mixture in an ungreased 8-inch square pan and bake until golden, 18 to 20 minutes.
  • Remove shortcake from pan and place on a rack to cool. Slice in half.
  • Spoon some of the strawberries with their juice onto the shortcake bottom then add the shortcake top. Spoon more strawberries over the top, add the whipped cream and serve.
  • Whipped Cream:
  • Using a mixer, beat the heavy cream, sugar, vanilla until soft peaks form, about 1 1/2 to 2 minutes. If you put your mixing attachments and bowl in the freezer the whipped cream will be fluffier.

Chocolate Hazelnut Cake with Nutella Frosting

Hi all. I could not wait to share this special recipe with you. Chocolate. Toasted hazelnuts. Nutella. Need I say more? Yes, today I am sharing the most spectacular chocolate hazelnut cake with Nutella frosting. I was looking for a decadent cake for our Christmas Eve celebration. This recipe fit the bill perfectly. Both girls sighed after the first bite and then mumbled through mouthfuls…”really, really yummy mom.” Coming from two teens that is about as good as it gets! Trust me this recipe will be on rotation for all of your special events.

Tips for making chocolate hazelnut cake with Nutella frosting

This cake is not hard to make but it does have a few steps.

  1. I bought roasted, unsalted hazelnuts at Trader Joes (you can buy these anywhere of course). I took a cup and about an 1/8 of a cup and spread them out on a cookie sheet with a non-stick pad. Roast the nuts at 350 degrees for about 10 minutes. Watch the nuts carefully as they cook fast and can burn. I also turn them over by shaking the cookie sheet gently about halfway through.
  2. Do not add hot chocolate to your cake batter or it will melt the butter and not come out properly. I let the chocolate cool (I used my microwave to melt the chocolate) and then added the Nutella (I took a little sample to make sure it was the right temperature:).
  3. If you would like even cake layers you can slice off the top with a serrated knife. For this version I made the cake in tiny pans but I have made it as both a bundt cake and a layer cake. The layer recipe is below.

Recipe for chocolate hazelnut cake with Nutella frosting

Chocolate Hazelnut Cake with Nutella Frosting

A spectacular cake full of toasty hazelnut flavor topped with a Nutella chocolate frosting. A perfect cake for any occasion. Enjoy the accolades!
Course Dessert
Cuisine American, French
Keyword Birthday, Cake, Chcocolate, Dessert, Hazelnuts, Holiday, Nutella
Prep Time 30 minutes
Cook Time 50 minutes
Servings 18 servings
Cost $8

Equipment

  • Cookie sheet
  • Cake pans or cupcake pan
  • Electric or stand mixer

Ingredients

  • For the hazelnut cake:
  • 1 cup unsalted butter at room temperature
  • 1 3/4 cup granulated sugar
  • 4 large eggs
  • 1 Tbsp vanilla extract
  • 2 tsp baking soda
  • 1 tsp baking powder
  • 3/4 tsp salt
  • 1 1/2 cups milk
  • 3 cups all purpose flour
  • 1 1/4 cups ground toasted hazelnuts see notes above
  • For the frosting:
  • 6 ounces about half a bag of semisweet chips or semisweet chocolate, chopped
  • 3/4 cup Nutella
  • 1 cup unsalted butter room temperature
  • 3 cups confectioner’s sugar sifted
  • 1 pinch salt
  • 3 Tbsp heavy cream the cream should not be cold
  • For decorating:
  • Confectioner’s sugar for dusting
  • White chocolate optional for decorating
  • 1/4 cup ground toasted hazelnuts

Instructions

  • For the hazelnut cake
  • Preheat oven to 350F. Butter two 8-inch cake pans and line the bottom of the pans with a circle of parchment paper. Note: make sure your cake pans have full 2 inch sides to accomodate this cake batter. You can also use a springform pan or even make cupcakes. Make sure you thoroughly grease pans. Non stick pans also work well.
  • In the bowl of a stand mixer or with electric beaters, cream the butter and sugar together until very light and fluffy (4-5 minutes).
  • Add the eggs and vanilla extract, and beat for another minute, scraping down the sides of the bowl to get everything incorporated.
  • Add the baking soda, baking powder, and salt, and mix briefly to combine.
  • Next, add the flour in a few stages, alternating with the milk, mixing until all of the ingredients are combined. Then mix in the ground hazelnuts. I like to finish mixing by hand with a silicone spatula to make sure everything on the bottom and the sides of the bowl is well mixed.
  • Divide the batter evenly between the two prepared cake pans and bake for about 35-40 minutes, until risen, golden on top, and the cake springs back when pressed lightly.
  • Allow the cakes to cool for 10 minutes or so in the pan, then remove the layers and place on a baking rack to cool completely before frosting. (Cake layers can also be made a day ahead, and wrapped and kept in the fridge until ready to frost.)
  • For the frosting
  • Melt the chocolate in a double boiler or in the microwave using short bursts. Stir until smooth and allow to cool to room temperature before adding to the frosting. Note: this is important because you don’t want warm chocolate to melt the butter. Once warm. Add in the Nutella and mix.
  • Cream the butter and confectioner’s sugar in the bowl of a stand mixer with the paddle attachment or mix with an electric mixer.
  • Add the salt, the cooled melted chocolate mixed with the Nutella, and beat together until the mixture is smooth and uniform. Add the cream and mix until smooth. Make sure the cream is room temperature.
  • Frost between the cake layers, and then frost the sides and top of the cake. Decorate with curls of white chocolate, a dusting of confectionary sugar and the hazelnut crumbs.

My Favorite Gingerbread Cookies Recipe

Hi there! Today I am sharing my favorite gingerbread cookie recipe.  The cookies have the perfect mix of warming spices and are soft in the center, but crispy on the outside.   We love to use our favorite cookie cutters and then decorate with sprinkles or icing or possibly some raisins or currants.  You can make the dough ahead of time and refrigerate for up to a couple of days or even freeze for later use. This year I made them twice. Once for our Christmas Tree Cutting Tailgate Menu and another batch for gift giving and eating at home!

Making gingerbread cookies is a holiday tradition

I have been making this recipe ever since I was in elementary school!  I would make them for eating of course but also for decorating our Christmas tree or putting into pretty containers for a holiday gift.  My mother loved these cookies and I used to make her a plate just for her!  She liked them with tea and called them “spice” cookies and always said the cookies were not overly sweet and perfect with a cup of tea.

Tips for making my favorite gingerbread cookie recipe

A few tips for making what will become your favorite gingerbread cookies:

  •  Be sure to use plenty of flour on your cutting board or counter where you roll out the dough.  The flour melts into the cookie during baking so you do not have to worry about it detracting from the look of the cookie.
  • I recommend a non-stick rolling pin.  I have had this Kitchen Aid version for years, and it rolls the dough out evenly and without letting it stick.
  • When you cut out the dough, place your cookie cutter at the edge as far as it will go.  This will allow you to maximize the number of cookies you can cut out at once so the process will be more efficient.
  • Like all cookies, you need to watch the baking time carefully.  The tops of the cookies should not be too shiny.  I usually bake one batch and then try a cookie to determine the best time to bake.
  • If you like a soft cookie, make the dough thicker.  If you prefer something crispy, roll it out more thinly and cook slightly longer.  When I am using dough to decorate I tend to make the cookies crisper so they easily hold their shape.  For eating, I prefer a chewy cookie so I adjust the thickness and baking time accordingly.
Favorite Easy Gingerbread Cookie Recipe

Favorite Gingerbread Cookies

These gingerbread cookies have the perfect mix of warming spices and are soft in the center, but crispy on the outside. Use your favorite cookie cutters and decorate with sprinkles or icing. Perfect holiday treats that are as delicious to eat as they are to look at!
Print Pin
Course: Dessert
Cuisine: American
Keyword: Baking, Christmas, Christmas Cookies, Cookies, Holiday
Prep Time: 25 minutes
Cook Time: 10 minutes
Servings: 24
Cost: $3

Equipment

  • Nonstick rolling pin
  • Parchment paper
  • Cookie cutters

Ingredients

  • 3 cups flour
  • 2 teaspoons ground ginger
  • 1 1/4 teaspoon of ground cinnamon
  • 1 teaspoon baking soda
  • 1/4 teaspoon ground nutmeg
  • 1/4 teaspoon salt
  • 3/4 cup 1 1/2 sticks butter, softened
  • 3/4 cup firmly packed brown sugar
  • 1/2 cup molasses
  • 1 egg
  • 1 teaspoon pure vanilla extract
  • Sprinkles and raisins or currants if you like for decorating

Instructions

  • Mix flour, ginger, cinnamon, baking soda, nutmeg and salt in large bowl. Put to the side.
  • Beat butter and brown sugar in large bowl with electric mixer on medium speed until light and fluffy. Add molasses, egg and vanilla and mix well. Gradually beat in flour mixture on low speed until well mixed. Press dough into two thick flat disks. Wrap in plastic wrap. Refrigerate 4 hours or overnight or up to a couple of days. You can also freeze dough and then thaw it out when you are ready to use it.
  • Preheat oven to 350°F. Roll out dough to 1/4-inch thickness on lightly floured work surface. Cut into gingerbread men and women or desired shapes with a cookie cutter. Place 1 inch apart on ungreased baking sheets. If you are using sprinkles or raisins/currants then decorate before baking (raisins and currants won’t stick to baked cookies).
  • Bake 8 to 10 minutes or until edges of cookies are set and just begin to brown (See tips on how to avoid overcooking). Cool on baking sheets 1 to 2 minutes. Remove to wire racks and cool completely. Decorate cooled cookies as desired. Store cookies in airtight container up to 5 days.

One Bowl Pumpkin Bars with Cream Cheese Frosting

Hi friends.  I hope your week is going well.  I have been cooking and baking and can’t wait to share some recipes with you.  Today, I will be sharing one bowl pumpkin bars with cream cheese frosting.  I really do not like pumpkin pie but I love pumpkin desserts such as pumpkin crisp and pumpkin bars.  These bars have a brown butter cream cheese frosting which is simply divine and very easy to make.

Pumpkin is good for you!

Pumpkin is very nutritious with tons of beta carotene which helps your body convert vitamin A and help your vision and brain function.  Pumpkins were discovered 7,500 years ago in Central and South America.  Today of course we use pumpkin for pies, desserts, soups and more.  

Pumpkins were discovered 7,500 years ago in South and Central America

A note about brown butter

Browning the butter adds a complexity to the flavors of this frosting and is very simple to do.  Melt the butter in a small saucepan.  I recommend using a light colored bottom so you can monitor the browning.  You do not want it to burn (and that is easy to do).  You will need to watch the butter carefully and stir occasionally.  I like to leave the brown bits as it adds flecks to the frosting (and tastes delicious).  You could strain it if you do not like that effect.

What do you need to make one bowl pumpkin bars with cream cheese frosting?

  • I used a 10x15x1 silpat jelly roll pan and mat.
  • Spices.   I use a pumpkin spice blend by McCormick.  You can find this or other brands easily at the supermarket

My girls loved the pumpkin bars and have even been eating them for breakfast for a change and a treat.  I am also planning on bringing them to a friends’ fall fest party.  

Pumpkin bars with cream cheese frosting

One Bowl Pumpkin Bars with Brown Butter Cream Cheese Frosting

Simply delicious, one bowl pumpkin bars with brown butter cream cheese frosting are delectable!  Tender pumpkin bars full of pumpkin spice flavor topped with a generous amount of browned butter cream cheese frosting.  Perfect for dessert, a treat or even breakfast.
Print Pin
Course: Breakfast, Dessert
Cuisine: American
Prep Time: 20 minutes
Cook Time: 35 minutes
Servings: 20
Cost: $4

Equipment

  • Jelly roll pan or high edged cookie sheet
  • Electric mixer

Ingredients

  • 2 cups all purpose flour
  • 1 cup sugar preferably organic cane
  • 1/2 cup brown sugar
  • 1 tbsp pumpkin pie spice
  • 1/2 tsp salt
  • 1 tsp baking soda
  • 2 tsp baking powder
  • 4 eggs room temperature, lightly beaten
  • 1 cup vegetable oil I used avocado oil
  • 15 oz can pumpkin puree. NOT pumpkin pie filling
  • Brown Butter Cream Cheese Frosting
  • 1/2 cup butter
  • 8 oz cream cheese softened
  • 2 tsp vanilla extract
  • 5 to 6 cups powdered sugar
  • 1 teaspoon or so of pumpkin pie spice to dust on top

Instructions

  • Instructions
  • Preheat oven to 350F. Spray a jelly roll pan or cookie sheet with high edges with nonstick cooking spray and line with parchment paper. Set aside.
  • In a large bowl, whisk together flour, sugar, brown sugar, pumpkin pie spice, salt, baking soda, and baking powder.
  • Stir in eggs, vegetable oil, and pumpkin puree until combined.
  • Pour batter into prepared pan. Smooth out batter so it is even in pan.
  • Bake for 25 to 30 minutes or until an inserted toothpick comes out clean. Cool completely on a wire rack before frosting.
  • Frost with brown butter cream cheese frosting.
  • Refrigerate unless serving immediately.
  • Brown Butter Cream Cheese Frosting
  • Heat butter in a small saucepan with a light bottom over low heat until completely melted. Continue heating, stirring occasionally, until light golden brown in color. Remove from heat and let cool.
  • Combine cooled brown butter and cream cheese in a medium bowl. Beat on medium speed until light and fluffy.

Fall Weekend Wrap Up + Apple Crisp

The weather was gorgeous this past weekend, and we did a second round of apple picking at our favorite orchard which made the most delicious apple crisp (recipe below!).

Friday I realized that I had dozens of eggs in the fridge (don’t ask) and decided to make a quiche. Then I realized I did not have prepared crust so did a quick recipe search and found this simple recipe for pie crust. Could not have been easier, was delicious and I used real ingredients like organic flour and butter so am guessing was much healthier too and without the preservatives in refrigerator crust! French guy was impressed although we both agree we need to find a low-cost source of gruyere cheese which is one reason why quiche in France is so delcious (I used sharp cheddar as that is what I had on hand).

We also had our last day at the shore which was bittersweet. Even during the pandemic, it was so great to escape to sail, kayak and hit the beach and socialize safely outside. It has been a silver lining to discover the beatuiful, CT shore and go back to my roots of sailing (and now teaching the girls to sail).

While hiking will be great during the fall, I told Mr. SB that we need a winter escape (am asking for cross country skis for Christmas). Downhill skiing may be challenging as the pandemic continues.

Sunday afternoon I tackled cleaning the basement. I actually organized the spot two years ago, and while it looked terrible in recent days, it only took me about an hour to remove unwanted items and put others away in the labeled spaces I had created years ago. I used my 5 step organization method for a particularly messy part. So nice to go in and not have stuff everywhere! I also realized that end of season or any major event should be an alert. That is the time to empty beach bags, wash towels etc. (anyone ever clean out a kid’s backpack and find 3 month old hummus?…surely not me:).

Now what about that apple crisp?

Apples from apple picking

So all in all a good weekend. The apple crisp was a perfect way to end Sunday dinner. I used a mix of Jonah Gold, Granny Smith, Cortland and Mutsu apples. Typical recipes use far more sugar – while this recipe is plenty sweet I like to taste the apples. The top is a delicious mix of oats, brown sugar, cinnamon and butter. If you love crisps as much as I do, be sure to check out last week’s pumpkin crisp recipe which is also easy, perfect for fall and delicious. Super easy…enjoy!

Apple Crisp

Best Homemade Apple Crisp

Sunday’s bread recipe for warm, homemade apple crisp.  Nothing says home like apple crisp.  Top with some vanilla ice cream or whipped cream for the perfect, sweet comfort food.
Print Pin
Course: Dessert
Cuisine: American
Keyword: Apple, Dessert, Fall, Fruit dessert
Prep Time: 35 minutes
Cook Time: 40 minutes
Servings: 8 servings
Cost: $3

Equipment

  • 8 by 8 pan
  • Peeler
  • Sharp knife

Ingredients

  • 4 cups apples sliced thinly. I leave a little skin on for texture.
  • 1 tablespoon flour
  • 1/2 cup sugar I use Costco organic
  • 3/4 cup brown sugar
  • 1/3 cup butter cold and cut into smaller tablespoon sized slices
  • 3/4 cup flour
  • 1/2 cup oats
  • 1/4 tsp baking soda
  • 1/2 teaspoon salt
  • 1 teaspoon of cinnamon

Instructions

  • Preheat oven to 350 degrees
  • Combine the first three ingredients and place in a greased 8×8 baking dish.
    Sliced apples
  • Combine the remaining ingredients. I use kitchen gloves to work the butter into the dry ingredients. Mixture should look crumbly. Spread over the top of the apple mixture.
  • Bake for 30 minutes. Apples should be juicy and bubbling but hold their shape. Test with a fork or knife to determine that the apples are tender. Bake for another 5 to 10 minutes if necessary.
    Apple crisp from the oven

Apple Crisp Bars with Salted Caramel Drizzle

This weekend I made Apple Crisp Bars with Salted Caramel Drizzle after a fun morning picking apples (Cortland, Jonah Gold were in the orchard). I used the basic recipe for the topping and crust from my Blueberry Crumble Bars recipe. It worked perfectly with the apple topping. I have recently discovered the ease of making salted caramel (promise it is easy!) so I decided to top the Apple Crisp Bars with some Salted Caramel (recipe coming tomorrow I promise!).

What kinds of apples do you use to make Apple Crisp Bars with Salted Caramel Drizzle?

This time of year Cortland and Jonah Gold are available for picking in Connecticut so I used both of those. I also had a Granny Smith apple from the supermarket which I threw in for some tartness. A mix of apples will give you the most complex flavors.

Were they hard to make?

No! Remember to use cold butter for that extra crumbly texture. I also love a pinch of ground ginger and of course cinnamon. You should also line your pan with foil. That makes it easy to remove the bars and then I use a pizza cutter to cut them into squares.

What to serve with the bars?

In our house we love ice cream so we had French vanilla ice cream as a side. Whipped cream would have also been delicious and if you love chocolate I don’t see any reason why you could not serve chocolate ice cream or even drizzle a little chocolate sauce on top.

Apple Crisp Bars with Salted Caramel Drizzle

Apple Crisp Bars with Salted Caramel Drizzle

Addictive salted caramel drizzled apple crisp bars have a tender apple-pie like filling on a buttery shortbread crust and crumbly topping. The best apple crisp but in bar form!
Print Pin
Course: Dessert, Snack
Cuisine: American
Keyword: Apple, Bars, Dessert, Salted Caramel
Prep Time: 20 minutes
Cook Time: 45 minutes
Servings: 16 bars
Calories: 240kcal
Cost: $3

Equipment

  • 8 by 8 pan
  • Mixing bowls
  • Standard oven

Ingredients

  • For the Apple Layer
  • 4 cups 500 g apples peeled, cored and thinly sliced (about 4-5 medium apples2)
  • 2 Tablespoons all-purpose flour
  • ½ teaspoon of cinnamon
  • 1/4 cup 50 g granulated sugar
  • For the Bottom Layer & Top
  • 1 and 1/4 cup all-purpose flour spooned & leveled
  • 1/2 cup granulated sugar
  • 1/2 teaspoon baking powder
  • 10 tablespoons unsalted butter cold 1/2 cup plus 2 tablespoons. It is very important that the butter is cold as that is what helps keep the topping crumbly.
  • 1 large egg
  • 1 tablespoon packed brown sugar
  • 1 tablespoon granulated sugar
  • 1 teaspoon of cinnamon
  • teaspoon of nutmeg
  • ¼ teaspoon of dried ginger optional

Instructions

  • Preheat the oven to 375F degrees. Line an 8×8 inch square baking pan with aluminium foil and grease with butter or shortening.
  • In a separate large bowl whisk together the flour, 1/2 cup granulated sugar and the baking powder.
  • Cut in the butter & egg yolk using a fork until the mixture is crumbly.
  • Press about two thirds to three quarters of the mixture into the bottom of the prepared pan. Pour the apple mixture over top.
  • To the rest of the flour mixture, stir in the brown sugar and remaining 1 tablespoon of granulated sugar.
  • Crumble the remaining dough over the apple mixture using your hands to distribute on the top.
  • Bake in the oven for about 45 minutes, until you see the juices from the apples and the crumble layer starting to turn golden.
    Apple Crisp Bars with Salted Caramel Drizzle
  • Allow to cool fully to room temperature and ideally put in the refrigerator to chill . Then lift the bars out of the pan using the aluminium foil overhang and cut into squares. I used a pizza cutter which worked well. I also let the bars warm to room temperature which really brings out the flavors.
  • Make the salted caramel and while warm drizzle on top!

Notes

Using a mix of apples will give you the most complex apple flavor.  I love pairing tart Granny Smith with a milder Jonah Gold or Cortland.

Nutrition

Calories: 240kcal

Blueberry Crumble Bars

Blueberry Crumble Bars are full of tangy blueberries with a hint of lemon atop a rich, shortbread crust and covered in a delectable, crumbly topping.

July is blueberry season, and Mr. SB picked up a huge container at Costco which ended up in the back of the fridge. Luckily I caught the berries before they went bad! And, even luckier, I found Deb Perelman’s (of Smitten Kitchen) recipe for Blueberry Crumb Bars to make a batch of delicious creations – think rich, short-bready, crumbly with a deep blueberry scrumptiousness that tastes like a summer’s day.

A few notes

Blueberry crumble bars were easy to make too, and will be part of our shore picnics for the rest of summer (if they make it past breakfast). I adapted the recipe slightly. As I made these in the evening I was feeling a bit lazy so I used bottled lemon juice and skipped the zest. I am sure it would be that much better if I used fresh lemon juice and took the time to grate the zest. Good news – the bars are unbelievable even with this shortcut.

I also ran out of granulated, white sugar so I had to sub in some brown sugar which actually I think added some depth. I also love a touch of cinnamon with any fruit dessert, and the amount I add does not clash with the lemon at all. And I used an entire egg. Part of me hates wasting the egg white when recipes call for just the egg yolk. Thriftiness took over this time and again, the results were amazing.

I refrigerated the bars overnight, and then took them out so they were room temperature for breakfast. I had a cup of coffee with mine on the deck. The girls each grabbed one too as part of breakfast. Great way to start the day – or end it. There is no bad time for a blueberry crumble bar!

Blueberry Crumble Bars

Blueberry Crumble Bars

Delicious, crumbly, tangy blueberry bars. Easy to make and taste like a summer's day.
Prep Time: 20 minutes
Cook Time: 45 minutes
Course: Dessert
Cuisine: American
Keyword: Bars, Dessert, Dessert bars, Fruit dessert
Servings: 9
Calories: 278kcal
Cost: $5

Equipment

  • 8 by 8 pan
  • Mixing bowls
  • Standard oven

Ingredients

For the Blueberry Layer

  • 2 cups fresh blueberries
  • 2 teaspoons cornstarch
  • 1 tablespoon lemon zest if you have the patience
  • 1 tablespoon freshly squeezed lemon juice or bottled lemon juice lazy girl’s way turned out just fine with the bottled
  • 1/4 cup granulated sugar I used organic cane sugar

For the Bottom Layer & Top

  • 1 and 1/4 cup all-purpose flour spooned & leveled
  • 1/2 cup granulated sugar
  • 1/2 teaspoon baking powder
  • 10 tablespoons unsalted butter cold (1/2 cup plus 2 tablespoons). It is very important that the butter is cold as that is what helps keep the topping crumbly.
  • 1 large egg
  • 1 tablespoon packed brown sugar
  • 1 tablespoon granulated sugar
  • ¼ teaspoon of cinnamon
  • teaspoon of nutmeg

Instructions

Instructions

  • Preheat the oven to 375F degrees. Line an 8×8 inch square baking pan with aluminium foil and grease with butter or shortening.
  • In a medium bowl toss together the ingredients for the blueberry layer (blueberries, cornstarch, lemon zest, lemon juice & sugar). Put aside.
  • In a separate large bowl whisk together the flour, 1/2 cup granulated sugar and the baking powder.
  • Cut in the butter & egg yolk using a fork until the mixture is crumbly.
    Crumbly dough for blueberry crumble bars
  • Press about two thirds to three quarters of the mixture into the bottom of the prepared pan. Pour the blueberry mixture over top.
    Blueberry mixture on top of dough
  • To the rest of the flour mixture, stir in the brown sugar and remaining 1 tablespoon of granulated sugar.
  • Crumble the remaining dough over the blueberry mixture using your hands to distribute on the top.
  • Bake in the oven for about 45 minutes, until you see the blueberries bubbling and the crumble layer starting to turn golden.
    Blueberry Crumble Bars
  • Allow to cool fully to room temperature and ideally put in the refrigerator to chill . Then lift the bars out of the pan using the aluminium foil overhang and cut into squares. I used a pizza cutter which worked well. I also let the bars warm to room temperature which really brings out the flavors.
    Blueberry Crumble Bars how to cut
  • Enjoy!

Video

Notes

Bars are best stored in the fridge.

Nutrition

Serving: 1g | Calories: 278kcal
Tried this recipe?Let us know how it was!