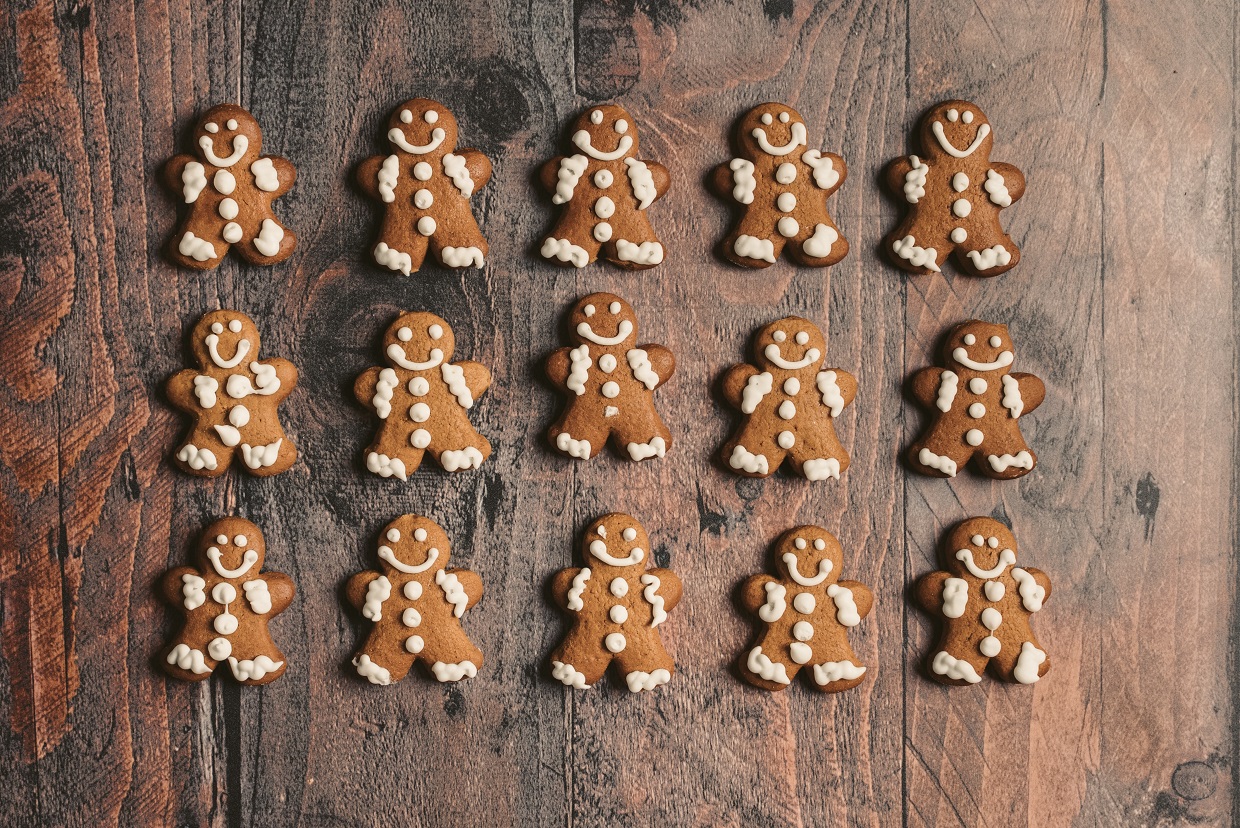
My Favorite Gingerbread Cookies Recipe

Hi there! Today I am sharing my favorite gingerbread cookie recipe.  The cookies have the perfect mix of warming spices and are soft in the center, but crispy on the outside.   We love to use our favorite cookie cutters and then decorate with sprinkles or icing or possibly some raisins or currants.  You can make the dough ahead of time and refrigerate for up to a couple of days or even freeze for later use. This year I made them twice. Once for our Christmas Tree Cutting Tailgate Menu and another batch for gift giving and eating at home!

Making gingerbread cookies is a holiday tradition

I have been making this recipe ever since I was in elementary school!  I would make them for eating of course but also for decorating our Christmas tree or putting into pretty containers for a holiday gift.  My mother loved these cookies and I used to make her a plate just for her!  She liked them with tea and called them “spice” cookies and always said the cookies were not overly sweet and perfect with a cup of tea.

Tips for making my favorite gingerbread cookie recipe

A few tips for making what will become your favorite gingerbread cookies:

  •  Be sure to use plenty of flour on your cutting board or counter where you roll out the dough.  The flour melts into the cookie during baking so you do not have to worry about it detracting from the look of the cookie.
  • I recommend a non-stick rolling pin.  I have had this Kitchen Aid version for years, and it rolls the dough out evenly and without letting it stick.
  • When you cut out the dough, place your cookie cutter at the edge as far as it will go.  This will allow you to maximize the number of cookies you can cut out at once so the process will be more efficient.
  • Like all cookies, you need to watch the baking time carefully.  The tops of the cookies should not be too shiny.  I usually bake one batch and then try a cookie to determine the best time to bake.
  • If you like a soft cookie, make the dough thicker.  If you prefer something crispy, roll it out more thinly and cook slightly longer.  When I am using dough to decorate I tend to make the cookies crisper so they easily hold their shape.  For eating, I prefer a chewy cookie so I adjust the thickness and baking time accordingly.
Favorite Easy Gingerbread Cookie Recipe

Favorite Gingerbread Cookies

These gingerbread cookies have the perfect mix of warming spices and are soft in the center, but crispy on the outside. Use your favorite cookie cutters and decorate with sprinkles or icing. Perfect holiday treats that are as delicious to eat as they are to look at!
Print Pin
Course: Dessert
Cuisine: American
Keyword: Baking, Christmas, Christmas Cookies, Cookies, Holiday
Prep Time: 25 minutes
Cook Time: 10 minutes
Servings: 24
Cost: $3

Equipment

  • Nonstick rolling pin
  • Parchment paper
  • Cookie cutters

Ingredients

  • 3 cups flour
  • 2 teaspoons ground ginger
  • 1 1/4 teaspoon of ground cinnamon
  • 1 teaspoon baking soda
  • 1/4 teaspoon ground nutmeg
  • 1/4 teaspoon salt
  • 3/4 cup 1 1/2 sticks butter, softened
  • 3/4 cup firmly packed brown sugar
  • 1/2 cup molasses
  • 1 egg
  • 1 teaspoon pure vanilla extract
  • Sprinkles and raisins or currants if you like for decorating

Instructions

  • Mix flour, ginger, cinnamon, baking soda, nutmeg and salt in large bowl. Put to the side.
  • Beat butter and brown sugar in large bowl with electric mixer on medium speed until light and fluffy. Add molasses, egg and vanilla and mix well. Gradually beat in flour mixture on low speed until well mixed. Press dough into two thick flat disks. Wrap in plastic wrap. Refrigerate 4 hours or overnight or up to a couple of days. You can also freeze dough and then thaw it out when you are ready to use it.
  • Preheat oven to 350°F. Roll out dough to 1/4-inch thickness on lightly floured work surface. Cut into gingerbread men and women or desired shapes with a cookie cutter. Place 1 inch apart on ungreased baking sheets. If you are using sprinkles or raisins/currants then decorate before baking (raisins and currants won’t stick to baked cookies).
  • Bake 8 to 10 minutes or until edges of cookies are set and just begin to brown (See tips on how to avoid overcooking). Cool on baking sheets 1 to 2 minutes. Remove to wire racks and cool completely. Decorate cooled cookies as desired. Store cookies in airtight container up to 5 days.

Pillowy Soft Sugar Cookies

We love to decorate cookies for Christmas, Valentines and pretty much any holiday or celebration. Sugar cookies are a natural go-to recipe but through the years I have found most recipes result in crispy or even hard cookies. This recipe tweaks the standard sugar cookie recipe with the addition of cream cheese. The other secret is using cake flour instead of regular flour. The result? Pillowy soft sugar cookies that melt in your mouth! With snow coming later today I am planning on making a second batch!

Tips for Making Pillowy Soft Sugar Cookies

The first tip, which actually applies to all cookies, is to soften both the cream cheese and butter. I usually leave it out on the counter or use the soften function in my microwave. Softening allows the cream cheese and butter to mix in with your dry ingredients and gives an even texture to the cookie.

Second, as I noted above, cake flour is super fine flour. You can find this in the baking aisle at your local supermarket. I find King Arthur makes excellent flours for baking, and they have a cake flour version. My local supermarket also carries Swan’s Down and Soft As Silk. Either brand would work well too.

Lastly, you need to watch the baking time carefully. In order to get that soft, pillowy texture you will not want to over cook. I usually bake two trays at once and then switch the cookies from top to bottom racks midway through baking. You will need to work with your oven. The second the edges become the slightest brown, take the cookies out to cool.

Decorating soft sugar cookies

These cookies are perfect for dipping into sprinkles or some powdered sugar. As Christmas is next week I used a mix of red, green and multi colored sprinkles for an assortment. I have also used red and pink at Valentines day. My girls love to decorate cookies too so we have also frosted these cookies. Would love to hear if you have tried the recipe and how it came out. Please comment below!

Soft Sugar Cookies Recipe

Pillowy Soft Sugar Cookies

Pillowy soft sugar cookies melt in your mouth. Decorate with powdered sugar or sprinkles and you have the perfect sweet treat for holiday or anytime baking.
Print Pin
Course: Dessert, Snack
Cuisine: American
Keyword: Baking, Christmas, Christmas Cookies, Cookies, Holiday
Prep Time: 20 minutes
Cook Time: 10 minutes
Servings: 36 cookies
Cost: $4

Equipment

  • Cookie sheets

Ingredients

  • 1/2 cup butter softened (1 stick)
  • 4 ounces cream cheese room temperature
  • 1 cup granulated white sugar
  • 1 egg
  • 1 teaspoon vanilla extract
  • 1 teaspoon almond extract
  • 1/2 teaspoon baking powder
  • 1 3/4 cup cake flour see note on suggested brands
  • Sprinkles optional

Instructions

  • Line baking sheet with parchment paper or a silicon mat (I like Silpat)
  • Combine flour with baking powder in a bowl.
  • Cream together butter and cream in a separate bowl with electric or stand mixer.
  • Add sugar to butter/cream mixture and beat for 1 minute. Add egg and beat to combine. Add extracts and beat until combined. Add in baking powder and cake flour (in three sections), mixing to combine.
  • Once incorporated, refrigerate dough for at least an hour.
  • Preheat oven to 375 degrees F.
  • Dough will be sticky so use flour on your hands or wear gloves to roll out 1-2 inch balls.
  • If using sprinkles, dip into sprinkle mixture gently.
  • If you would like a dome shape, you can use the bottom of a cup to gently flatten the top of the balls but don’t flatten too much or the cookies won’t puff up or be pillowy soft.
  • Bake for 9-11 minutes. Remove cookies when you see the underside edges turning golden. You will have to watch carefully after about 8 minutes as it happens quickly. The time may also might vary for your oven and altitude.
  • Let cool on a baking rack. If frosting, let cool completely.
  • Enjoy!

Weekend Wrap Up: Holiday Decorating and Buffalo Check Style Finds

Happy Monday all, and welcome to the holiday weekend wrap up.  It was a busy one!  This weekend I finished decorating, baked my favorite gingerbread as well as soft sugar cookies (that taste as good as they look) and wrapped gifts.  I am focusing today’s post on holiday decorating and Buffalo check style finds but promise to share my recipes and gift wrap ideas in the coming days.

It’s a Buffalo Check Christmas

Buffalo check wired ribbon
Buffalo check wired ribbon trims my pine garland on the deck

As I shared before in my wreath tutorial (making your supermarket wreath look good:) I love this year’s trend of buffalo check.  I am craving a homey, warm Christmas atmosphere inside and out.  The cheerful red combined with the black check fits the bill.  Never one to be reticent I will admit right now that I may have gone overboard.  Is it bad to buy a matching buffalo check scarf for your dog?  GG and I had some fun (and there were plenty of treats for her patience!).  I found both the dress and scarf at Old Navy which is always a good source of affordable fashion and usually right on trend.  I bought a sweater too.

Buffalo Check Ribbon

I love using ribbon to decorate, and I used the buffalo check ribbon to trim my garland on the deck and found an adorable basket with…you guessed it buffalo check.  I picked up some bright red pillows too.  This little scene is what I see from our kitchen sink so I try to always have something cute to look at for every season.  As I mentioned in my how to make your supermarket wreath beautiful – I also used the buffalo check ribbon and trimmed the wreath with berries and pine cones.

Me and GG sporting our buffalo check style

Deep Red Berries in a White Pitcher

It is the small things in life right?  And, sometimes the best decorating is simple and inexpensive.  I found these artificial stems at Michaels and put them in this white pitcher. The pitcher was a wedding gift and from the Museum of Modern Art in New York (I like this one from Target too)  I love the deep red of the berries next to the white pitcher. I keep moving it around the house as it adds such a nice pop of color.  I could see these berries in vintage jars as well.

Faux red berries for holiday decorating
Faux red berries in a white pitcher add a nice touch for holiday decorating

Holiday Tablescape

We had a nice family dinner Saturday night.  I adore the white village theme that Pottery Barn showcased this year.  I found these mini ornaments with a similar look at Christmas Tree Shop (see below).  Paired with a pine cone, some red candles and with my jacquard Santa and his sleigh Williams Sonoma tablecloth, it made such a cozy and festive table. 

Ornaments are a fun way to add some festive touches to your holiday table and are often inexpensive and easier to store than an entire village.

Pottery Barn Christmas village theme
Christmas village theme tablescape

Holiday Mantle Decorating Tutorial

Lastly, I love using natural products to decorate.  First, I like to support our local farms and nurseries.  Second, I do not have to store anything – I just add to our compost when the holiday is over.  If you are in the Fairfield County area, Town and Country nursery has a lovely Christmas shop.  I purchased fresh magnolia and boxwood bunches.  I prefer these greens as they do not leak sap!  One year it took me forever to remove the sap from the mantle after using pine branches.  Here is how I decorated our mantle (see below for pictures):

  1. Lay down the magnolia branches.  Step back to see what it looks like and adjust the leaves accordingly.  Also, trim any errant stems.
  2. Layer on the boxwood using the same technique of stepping back.
  3. I love candles and use our existing candles to flank either end.  chasing some faux lighted candles.
  4. Add touches.  You can be creative here.  I used some vintage looking ornaments from Magnolia home mixed in with some pinecones and silver ornaments sprinkled throughout.
  5. You could add some lights too with a strand of white battery operated lights.
Decorating your mantle with fresh greens for the holidays

Well I hope you enjoyed this post on holiday decorating and Buffalo check style finds. Please check back in for some recipes and more and I would love to hear about your holiday decorating and planning.

Best ever sliders with caper mayo

Happy Wednesday friends. The holidays may be quieter this year but I am still so busy! I received our holiday cards (see picture of the SB family at the beach last fall). Here is a holiday planning secret. I always order a regular Christmas card and a New Year’s card. That way I can send New Year’s cards to friends or contacts who may have sent us a card that was unexpected (or oops if I forgot someone!). It makes it look intentional versus sending a Christmas card after Christmas which always bothers my Type A personality. In all of the holiday busyness, I also realized that I had not yet shared Mr. SB’s recipe for his best ever sliders and amazing caper mayo from our Christmas tree cutting tailgate! Read on for the recipes, details, and here is the full tailgate post too.

Tips on making great sliders

It is not easy to get Mr. SB to reveal his secrets but I promise these are the most delicious sliders, and it was worth my cajoling (OK nagging) to get him to share his recipe. Here are a few of his tips too on making the best ever sliders with caper mayo.

First, try to buy locally sourced grass fed beef. We have a share with Walden Local which delivers monthly. This is not a sponsored post. From my experience with being a customer for over two years, I can assure you that their products are sustainable, grass fed (for the beef…they also offer seafood) and most importantly delicious. You do not have to worry about antibiotics or hormones in the meat as all of their meat comes from local farms that are strictly vetted. I also like knowing that the livestock is humanely raised. Ideally you will want 80% lean for the best sliders. Grass fed beef can be on the very lean side but what we buy from Walden Local has always made delicious sliders and burgers. If this sort of beef is not available, then simply buy the best quality you can at 80% lean.

Prepare the sliders ahead of time

Second, the sliders actually taste better if you prepare them a few hours in advance and refrigerate. The time allows for the spices to meld with the other ingredients. This is ideal for tailgating as you will want to have your burgers already mixed and formed into sliders.

Mr. SB always has a meat thermometer to test the right internal temperature. Frankly he prefers his meat on the rare side (that is very French) but with hamburgers I insist on well cooked as there is a risk of contamination. Check out the USDA’s link for what they recommend for safe cooking.

Toppings suggestions for sliders

He grills on his portable Coleman grill and once the sliders are done we always have an assortment of toppings – baby lettuce, ripe red tomato slices, thin onion for everyone to choose what they prefer. As for buns, we like ones that are firm enough that they are not impossible to eat when outside at a tailgate. Whole Foods always has a great selection in our area. Then of course, Mr. SB insists that the best topping is the caper mayo (and I have to agree…do not even suggest BBQ sauce as I did!). As the sliders are small, feel free to eat more than one. There is no point bringing home leftovers after a tailgate!

Best sliders recipe

Best Ever Beef Slider Recipe

Juicy sliders with crisp toppings and a generous dose of caper mayo make the perfect bite sized meal
Print Pin
Course: Appetizer, Main Course
Cuisine: American
Keyword: Game Day, Grilling, Tailgate
Prep Time: 15 minutes
Cook Time: 15 minutes
Servings: 4
Cost: 7

Equipment

  • Grill

Ingredients

  • 1 lb ground chuck 80% lean, preferably grass-fed. We like Walden Local if available.
  • 1 tsp kosher salt
  • 1/4 tsp cracked black pepper
  • 1 tsp onion powder
  • 2 garlic cloves minced
  • 1 tsp freshly chopped thyme If not fresh you can use 1/2 tsp of dried thyme or dried Italian herbs if you like
  • 1/2 cup onion finely chopped
  • 1 TBSP Worcestershire sauce
  • 1 egg
  • 1/4 cup Panko bread crumbs
  • Slider buns

Instructions

  • Combine all ingredients except slider buns. Mix with your hands and form into 1 1/2 inch to 2 inch mini burgers. Cook to a safe temperature. Top with lettuce, tomato, onion slices, cheese or however you like your burgers.
Caper mayonnaise recipe

Mr. SB’s Caper Mayonnaise

Creamy mayonnaise combined with briny capers, tart lemon and some good kosher salt. You will want to pair this perfect mayo with your favorite burger, sandwich or seafood or eat it as a dip with chips or veggies. It is that good.
Print Pin
Course: Appetizer, Main Course
Cuisine: American, French
Keyword: Condiment, Dip, Sauce
Servings: 8
Cost: 4

Equipment

  • Food processor

Ingredients

  • 1/4 cup capers drained
  • 3/4 cup mayonnaise
  • 1 tablespoon Dijon mustard
  • 1 tablespoon freshly squeezed lemon juice
  • 1 cup plus 2 tablespoons avocado or canola oil
  • Kosher salt

Instructions

  • In a food processor, pulse the capers with the mayonnaise, mustard, lemon juice and 2 tablespoons of water until combined. With the machine on, slowly drizzle in the avocado oil until a thick sauce forms.
  • Season with salt and scrape into a medium bowl. Serve with your favorite burger, sandwich, seafood or as a dip. The caper mayonnaise can be refrigerated for up to 2 weeks.

Is there anything better than delicious bite sized sliders with creamy mayo at your tailgate?

The Best Buffalo Chicken Dip in the Slow Cooker

Buffalo dip is everyone’s favorite dip for any tailgate or gathering. It is also great as an après ski appetizer as it is hearty and warm which is always welcome after a day on the slopes. I have tested so many Buffalo chicken dip recipes. I have perfected this one as it is the easiest and most delicious. Buffalo Chicken Dip in the slow cooker is full of tender, shredded chicken, creamy cheese and of course a bit of heat from buffalo hot sauce.

Why is this the best recipe for buffalo chicken dip?

This version is super easy to make as it uses the slow cooker to cook the chicken and to make the rest of the dip. So only one pan to clean up. The dip also tastes better warm so you can serve it right from the slow cooker. I have a mini slow cooker that I also use which makes it easier to serve on my appetizer spread. You can also make the dip ahead of time and refrigerate it. Then simply reheat it on the stove or put it back in your slow cooker. I have also frozen it and it is delicious that way too.

Serve it with some fresh tortilla chips, celery sticks and maybe some carrots too for dipping. You won’t have leftovers.

Best buffalo chicken dip in the slow cooker

Best Buffalo Chicken Dip in Slow Cooker

This Buffalo Chicken Dip Recipe is a favorite at our tailgates and even holiday gatherings. Made with tender shredded chicken, creamy ranch dressing, tangy blue cheese, cream cheese, Buffalo hot sauce, and loads of cheese, This easy and delicious Buffalo Chicken Dip is then slow cooked until golden, bubbly, and perfect for dipping.
Print Pin
Course: Appetizer
Cuisine: American
Keyword: Appetizer, Dip, Game Day, Tailgate
Prep Time: 20 minutes
Cook Time: 3 hours
Servings: 12 servings
Cost: $7

Equipment

  • Slow cooker

Ingredients

  • 1 8 oz block of cream cheese Cut it into smaller pieces so it will melt easily
  • 1 bottle creamy Ranch dressing I use Nature's Promise organic or Hidden Valley Ranch would work too
  • 2 cups Sharp cheddar Mild cheddar or even whole milk mozzarella works too
  • 2 Boneless chicken breasts
  • 1/4 cup Hot sauce Frank's buffalo sauce is usually the brand I use
  • 1/4 cup Blue cheese dressing This can be optional. We love blue cheese so I always add it.
  • 1 tsp Garlic powder

Instructions

  • Put chicken breasts in slow cooker and cook on high for two hours. I always check on the chicken breasts as they are cooking. If they are not cooked through you may need to increase the time. I use a thermometer to check temperature. If cooking breasts from frozen meat you will need to increase the cooking time.
  • When chicken is cooked through take it out and shred with two forks. You will want a nice texture to it – not too big pieces as this will be a dip so sometimes I even chop it a bit after shredding it.
  • Pour out any juices that may have accumulated in your slow cooker. I usually wipe with a paper towel too. Then add your cream cheese and turn the slow cooker back on low. As it starts to melt, add in your ranch dressing, blue cheese dressing if you are using, hot sauce, garlic powder and cheese. Stir and cook on low for another 20 minutes or so.
  • When the mixture is bubbling on the outside, add back in your shredded chicken. Cook on low for about 45 minutes.
  • Stir and taste. If you like it hotter, add more hot sauce in small increments (I keep tasting at this point). If it is too hot, you can add more dressing.
  • Top with chopped green onion or parsley if you like. Sometimes I sprinkle on blue cheese crumbles too at this point. The dip can be served from the slow cooker directly (it is best warm) or reheated in the microwave. We always serve with tortilla chips, celery and carrot slices.

Christmas Tree Cutting Tailgate Menu

It is really starting to look like Christmas in Connecticut. That means it is time for my favorite holiday tradition, a Christmas tree hunting adventure! For years the Sunday’s Bread family has been donning warm winter clothes and sturdy boots to take a hayride into the fields of the Connecticut countryside to cut down a fresh tree.

On our first trip to the farm we noticed families from around CT and NY enjoying delicious tailgate spreads. Given that we are all-in foodies around here we just had to do the same. Read on for our favorite Christmas Tree Cutting tailgate menu, some tips and more about this wonderful tradition. As you can see, GG, was all-in with her favorite tartan scarf.

Christmas tree cutting tailgate menu
GG sporting a tartan scarf before the Christmas tree cutting

Christmas tree cutting tips

We started cutting down a fresh tree twelve years ago. The girls were so young. While now the hayride is optional back then we had to take it as they could not walk that far. So first tip – check the weather and it is likely you will need to wear warm clothes and boots. If the day is going to be cold, you may even want some hand and toe warmers.

The atmosphere is very festive. Where we go they even have oxen (see picture). They also have a cute Christmas market where you can buy ornaments, wreaths and of course trees. We prefer the adventure of walking through the fields to find one. Your own cut tree is as fresh as you can get so they last easily through the holidays. I guess you can tell that I am a fresh tree gal. There has never been a question of fresh versus artificial at the SB house. I love the smell of fresh pine, and the way the white lights glow against the needles.

Oxen at Christmas tree cutting tailgate
Each of the oxen weighs 600 pounds!

As much as I love a fresh tree, there are a few items you may want to bring with you (even if you buy one from the market or local home store). While our tree farm does provide some cord to tie the tree to the roof, we always install our ski rack and bring our own set of cords for tying it securely. As I love the Christmas market and often buy a wreath or other items, I usually bring a plastic bag for the trunk so that the needles do not get everywhere.

Once you find your tree, perhaps the most important tip is to stay next to it. Our girls usually disagree about which tree is coming home with us so that means one of us has to stay with the trees under consideration. Mr SB then uses one of the farm’s saws (they give you those), and we all help securely get it down. At our farm, you are given a tag and part of the tag stays with the tree. You move the tree to the side and then they will pick it up and put it on their wagon to bring it to the parking area.

Christmas tree cutting tailgate menu

A note on Christmas tree decorating

Growing up in Rhode Island, we always had a beautiful tree. As I adore Christmas and all of the preparations I often decorated it. I was the most enthusiastic one especially after my sisters had left for college. You could say I am bit of an expert at this point. Now, I love taking out the antique ornaments. Some ornaments are from my grandparents – at least 100 years old at this point. We have also collected ornaments from around the world. We have brought back ornaments from our tours of the National Parks, Mexico, France, South America and pretty much everywhere we have traveled.

What do I do with the girls’ home made ornaments?

As for the home made ornaments from Sunday School or school – well, it all goes on the tree. I love the memories. I know in the blogging world, the trend is a super coordinated, perfect tree – that is just not me. It does not bring me joy. So, up goes the cardboard cutout with a little photo of my college girl when she was five. I add some beautiful gold ribbon as a garland along with candy canes and gingerbread cookies. At least in our eyes the tree is very beautiful and full of Christmas spirit, memories and meaning.

Christmas tree cutting tailgate tips

Back to the tree cutting, we usually go with other families. As the farms can be crowded, we caravan so we can park next to each other. We all bring our favorite menu items. So here is the menu – it may be a bit eclectic but delicious all of the same and travels easily. Oh, and Mr. SB loves to bring his portable grill.

I am including his recipe too. The caper mayonnaise is to die for, and that leftover Thanksgiving turkey is delectable when dipped in it (shh don’t tell). I also love the mayo slathered on some sourdough bread piled high with turkey for the best sandwich ever. It would even make a delicious dip for crudite or some plain ol potato chips.

Christmas tree cutting tailgate menu

OK our tailgate philosophy is pretty simple. Delicious, easy food that can be consumed ideally with your fingers (finger food:). I love to make it cute with a tartan tablecloth, festive ice bucket decorated with candy canes (a galvanized steel bucket that I picked up at Michaels a few years ago) and matching tartan plates/cups. All easy and no fuss.

Christmas tree cutting tailgate menu
An easy Christmas tree cutting tailgate…plenty of yummy food and drink!

The best ever sliders with caper mayonnaise

Mimi’s buffalo chicken dip with tortilla chips

Vegetarian wraps

Red cabbage and carrot slaw with an apple cider vinaigrette

Bagels and cream cheese

Chocolate cookies with peppermint kisses

Assorted Christmas cookies including gingerbread men/women and Christmas trees

Mimosas

Bloody Marys

Hot chocolate

Soft drinks

We brought the buffalo dip in an insulated cooler and then reheated it on the grill. Mr. SB prepared the meat at home so it was ready to go on site. We used a folding table versus our tailgate as it was just easier to lay out the spread.

Mr. SB grilling the best-ever sliders on his portable grill

After a hearty tailgate we ventured out into the farm. We found our tree and even decorated it that evening (GG was tired!). We had some leftover turkey from Thanksgiving so I made my Turkey Tetrazzini and we chilled out while watching the Christmas Chronicles. Is there a better day than that? Would love to hear your Christmas and holiday traditions. Check back as I will be sharing how to decorate your mantle with natural greens and more!

Christmas tree cutting tailgate menu and tips
GG sleeping after a long day of tree hunting…our tree decorated

Holiday Wreath Tutorial

Hi all! So the holiday decorating bug has hit me. With the pandemic, this year is likely to be a smaller gathering. Normally we host Christmas dinner for twenty! It may just be us or if the weather continues to be warm, a few friends on our deck – nonetheless I want to make it special. With all of this time at home it seems ever more important to make our surroundings as warm and beautiful as possible. Normally I can find a lovely wreath at Costco. This year I am not shopping as much so found myself with fewer options at the supermarket. The pre-made bow that was rather sad looking and crumpled left me realizing that I needed to do some work to make the wreath worthy of our front door. So today, I am happy to share my holiday wreath tutorial.

What do you need for this holiday wreath tutorial?

To make your supermarket wreath beautiful you need the following items that are available at your local Michaels or Hobby Lobby or even dollar store.

  1. Wired ribbon in a pattern of your choice. This year buffalo check has been drawing me in – maybe it is the cozy feel it evokes. I want warm, cozy and luckily I found a spool at TJ Maxx. I also found it on Amazon. I used a 10 yard spool with ribbon left over.
  2. A basic supermarket wreath. If you can find one without the bow then that is better as you won’t need it – you will save money too. They charge quite a bit for those premade ones!
  3. Pinecones and other decorative items. I had some wired cranberry stems from previous holidays. Feel free to be creative. Michaels has a large selection of wired floral that would work well. Pine cones found in nature are lovely too. You will need wire and wire cutters if you go that route. Oh, and all of the ribbon and trimmings can be used again and again. Store them in a dry place and you can use for future wreaths.

Steps to make a beautiful holiday wreath

  1. I took my wreath outside as the needles tend to get everywhere… I laid it down flat to see if any of the greens were sticking out too far (these supermarket wreaths take a beating during transit!). Then I trimmed any errant stems.
  2. I took the spool of ribbon and wrapped it around the wreath. You will want some at the end to tie. Tie the ends in a loose knot. You may want to adjust it so do not tie it too tight in case you need to untie it.
  3. Then you will prepare your bow. Take a separate bit of ribbon and loop the ribbon and place it against the tied off ribbon. Eye ball it to see if you think the bow looks full enough. Once it is to your liking tie it.
Holiday wreath tutorial
Hold your ribbon until tied and guestimate to see that it is the right length

4. Then “fluff” the bows. You will want nice rounded bows and with wired ribbon you can shape the ribbon into the desired look. This usually takes some fussing to get the look I want. I also always trim the ends into a nice double “V” shape.

5. Add your embellishments. If you have wired floral items, it is easy to tuck them in between the rounds of ribbon. If you are using pinecones from nature, you will need to cut some wire and then add your pinecones.

Enjoy your gorgeous supermarket wreath (at a fraction of the price to pay to have it decorated for you!).

Fresh Cranberry Sauce

Hi all. How was your Thanksgiving weekend? The weather was beautiful in CT. While it was just the four of us we went all out on the food. Mr. SB ended up roasting the turkey in our rotisserie oven. It was delicious. I think I also perfected my home made stuffing. The girls and Mr. SB commented on the crisp aspect. While I love Thanksgiving dinner, there is often a lack of diversity in texture so a bit of crunch is unexpected and welcome. I feel the same way about fresh cranberry sauce.

Homemade cranberry sauce balances the meal

With so many rich sauces and flavors, the acidity in the cranberries really balances the rest of the meal. Fresh holiday cranberry sauce is also perfect for Christmas. The deep red of the cranberries complements any festive meal.

Are cranberries good for you?

I adore cranberries so I was thrilled to learn that they are full of antioxidants. In fact, they are one of the top ten antioxidant foods! Interesting fact too – cranberries have been harvested in North America for over 500 years.

Good for you and delicious? All the more reason to make fresh homemade holiday cranberry sauce. Here is my very quick and delicious recipe.

Fresh Cranberry Sauce

Fresh Homemade Holiday Cranberry Sauce

Homemade cranberry sauce is so easy to make that you will never even think of buying a can of cranberry again! Cranberry sauce adds a delicious tartness to any meal and the crimson color is perfect for holiday entertaining. Orange juice adds some zest and depth of flavor.
Print Pin
Course: Side Dish
Cuisine: American
Keyword: Christmas, Cranberry, Holiday, Thanksgiving
Prep Time: 5 minutes
Cook Time: 10 minutes
Servings: 4 1/2 cup servings
Calories: 51kcal
Cost: $3

Equipment

  • Heavy bottom sauce pan

Ingredients

  • 1 12 oz Fresh cranberries Rinsed. Remove any damaged berries.
  • 1/2 cup sugar I use organic cane sugar
  • 1/2 cup orange juice
  • 1/2 cup water

Instructions

  • Combine sugar, orange juice and water in a medium saucepan. Bring to boil; add cranberries, return to boil. Reduce heat and boil gently for 10 minutes, stirring every once in awhile. Cool at room temperature. Refrigerate until serving time.

Nutrition

Serving: 1g | Calories: 51kcal

Our Thanksgiving Menu

Hi all! I am getting excited to cook and have our Thanksgiving menu all picked out. In the spirit of organization, I even did the shopping on Sunday to avoid the crowds. Normally we head to a relative’s for a lovely and large Thanksgiving. This year they are wisely not holding that gathering due to the pandemic. So Mr. SB and I will be cooking Thanksgiving for just the four of us.

We actually always cook our own Thanksgiving as I had found through the years that I love leftovers. We also host a Friendsgiving with a college friend and her children. I also like to make the family favorites that I grew up with as our family always hosted our aunts, uncles and cousins.

Thanksgiving Memories

I have very fond memories of waking up and my mom and dad would already be hard at work. My dad took care of preparing the turkey. My mom would make all kinds of sides – mashed potatoes (a must in our house and quickly depleted when my three cousins arrived), pureed butternut squash, peas, stuffing, creamed onions and at least two or three pies. I remember loving the apple, cranberry pie she made one year.

Conversation would last well beyond dinner. I used to love hearing my mom and aunts telling stories about my grandparents who had died when I was very young. Some holidays there were heated political conversations but always in good humor and with no lasting ill will (life seemed easier in that way back then!).

This year, while our gathering will be small, it will still be special. I am going to use our china and good silverware and pick up some fresh flowers.

The food will include a mix of old favorites and a few new recipes. I love to try one or two new recipes every holiday to keep it fresh.

The 2020 Thanksgiving Menu

I plan to make the following – and am sharing my recipe for the best stuffing ever (home made and easy as can be…just some chopping).

Turkey smoked on the Big Green Egg (Mr. SB’s specialty:)

The best stuffing with celery and leeks. I adapted this from the NYT Cooking and it is delicious. Feel free to experiment with the herbs you like best too. I may even use a bit of my meat share’s bacon to flavor it this year.

Roasted brussels sprouts with bacon

Roasted butternut squash with sage

Home made cranberry sauce

Mashed potatoes

Gravy

And, I am trying out a gratin of celery root, potatoes and rutabaga that I found in this month’s Food and Wine (way out of my comfort zone!).

Pumpkin bread

Pumpkin cake in the slow cooker (am trying this one too for the first time). It looks so easy and with just the four of us I think a homey, easy dessert will be welcome.

What dishes will you be making? Any special family traditions?

Oh, and on Friday we go to cut down our Christmas tree and tailgate with friends. Will be sharing what I make for that too! Happy Thanksgiving everyone.

Thanksgiving stuffing

Best Ever Thanksgiving Stuffing (with a crisp outer edge) with Celery and Leeks

Home made stuffing is easy to make and well worth the effort. This version has a crispy outside and a tender, custard-like interior that is full of fresh flavor from the leeks and celery. Get a good loaf of ciabatta or sour dough and hand tear it for the best results.
Print Pin
Course: Side Dish
Cuisine: American
Keyword: Side Dish, Stuffing, Thanksgiving
Prep Time: 1 hour 20 minutes
Cook Time: 55 minutes
Servings: 8
Cost: $8

Equipment

  • 3 quart baking dish

Ingredients

  • 1 large loaf bread preferably sourdough or ciabatta (about 1¼ pounds)
  • ¼ cup olive oil
  • 8 tablespoons unsalted butter
  • 6 garlic cloves thinly sliced
  • 2 large leeks white and light green parts, chopped
  • Salt and freshly ground black pepper to taste
  • 6 celery stalks chopped
  • ½ cup dry white wine I like Pinot Grigio
  • 2 ½ cups chicken broth
  • 3 large eggs
  • ½ cup finely chopped parsley
  • ¼ cup finely chopped chives
  • 2 tablespoons shredded sage leaves and thyme leaves

Instructions

  • Preheat oven to 375 degrees. In a large skillet over medium-high heat, combine olive oil and 4 tablespoons butter. Once the oil and butter has melted, add the garlic and leeks. Season with salt and pepper and cook, stirring occasionally, until leeks are bright green and softened about 8 to 10 minutes.
  • Then add celery, and season with salt and pepper. Cook, stirring occasionally until bright green and tender, 4 to 6 minutes. Add white wine, and cook until reduced by about three-quarters, 3 to 4 minutes. Remove from heat.
  • Whisk together broth and eggs in a medium bowl. Place bread in a large bowl big enough for mixing. Add the leek and celery mixture, parsley, chives and marjoram. Stir to coat so that everything is evenly distributed. Pour the egg mixture over everything and toss a few times. Let sit a minute or two and give another toss. Repeat twice until all the liquid has absorbed and evenly distributed to each and every piece of bread.
  • Transfer mixture to a 2 1/2- to 3-quart baking dish (a 9-by-13 pan also works), making sure not to pack it too tightly. Dot the top with the remaining 4 tablespoons butter, making sure to pay extra attention to the corners, where the stuffing will get the crispiest.
  • Cover with foil and bake until the stuffing is sizzling at the edges and completely cooked through, 25 to 30 minutes. If it’s not yet time to serve, remove stuffing from oven and set aside.
  • When ready to serve, remove foil and increase temperature to 425 degrees. Bake stuffing until crispy, crunchy and deliciously golden brown on top, 20 to 25 minutes. Sprinkle some chopped parsley on top if desired.

The 5 Best Home Organization Blogs

Hi there. So, yesterday I shared my organization journey. It would not have been complete without the inspiration I received from other bloggers (who continue to inspire me today). How did I find them? One day I think I googled “top organization websites” or something like that and fell into the world of organization blog! These ladies are funny, have great tips and influence my own organization journey. I am happy to share with you the 5 best organization blogs.

A Slob Comes Clean (the best of the top 5 organization blogs if you are starting out)

If you are just starting out, Dana at a Slob Comes Clean is a great place to start. She shares her brutally honest struggle to put some order in her life. She does not sugar coat it either – from the dishes piling up to having to buy garage sale clothes (because the rest of the clothes were dirty), she shares it all along with how she found peace in decluttering.

Easy tips such as just “do the dishes every day” (which I have also found to be true) get even the messiest, cluttered home on a path to order and serenity. She is also very funny and self deprecating which is fun as some of the organizing bloggers might take it all just a bit too seriously. She also a podcast. I enjoy listening while I tackle a decluttering or organizing project (or anytime).

iHeart Organizing

iHeart Organizing created a big Aha moment for me. Jen, the blogger, had such beautiful spaces and was so creative in how she labeled and organized. I love the creative DIY aspect of organizing. It is fun (well if you are me) to play around with fonts, patterns and making your containers and labels special. After decluttering and organizing a space I will treat myself to some beautiful labels and possibly containers (but only if I really need them!). She does not seem to be actively blogging anymore but she still has plenty of ever useful posts that will inspire you.

Andrea Dekker

I found Andrea Dekker’s blog awhile ago likely from one of my internet searches on organization. She is all about leading a simpler life and also has great ideas on living frugally (but fully). I really like her attitude that you don’t need fancy containers or tons of money to lead a simpler, organized and very fulfilling life. In fact she often will share organized spaces that may just reuse some cardboard boxes or tin cans that could be found in anyone’s recycling bin She also has great advice on how to be careful about accumulating stuff to begin with and leading a minimalist, simpler life.

Organizing Junkie

I recently discovered Organizing Junkie. She has tons of content around organizing everything (and I mean everything). I found I had to sift through much of the content but found some great tidbits. I like her idea around pouches and am going to try that out for my office where paper tends to become out of hand. She has been blogging for years so I recommend searching on a specific topic to find exactly where you may be challenged.

Clutterbug

I recently found the Clutterbug blog and love the quiz that helps identify your organizing style. I think I fit more than one profile (definitely a Ladybug but maybe a Cricket too?). It is thought provoking and makes you review what you like/don’t like and where you may have obstacles to overcome.

I hope you enjoyed the top 5 organization blogs and will check them out. Do you have any blogs you go to for organization advice? Check back in frequently as I continue to share resources and my own tips and tricks for a decluttered, more organized, productive and fulfilled you!