5 Ways To Make Frozen Pizza Taste Like Take Out (at a Fraction of the Cost)

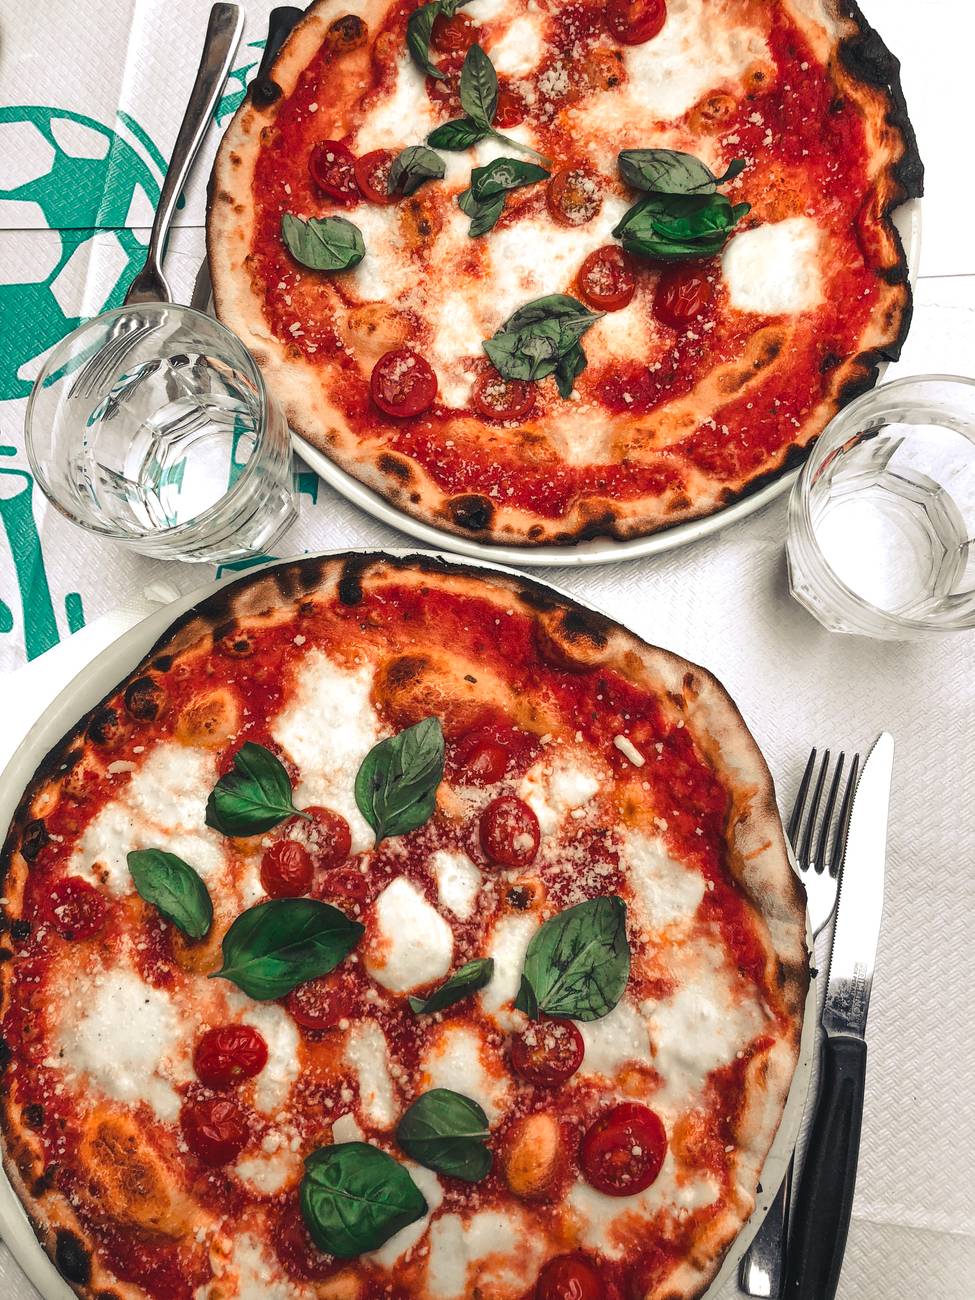
Transforming a cardboard-like frozen pizza into a delicious meal is entirely doable, super easy and economical. In fact, you can easily make your frozen pizza taste like takeout with a few simple steps.

We have all been there…dinner needs to be on the table and we have nothing prepared…

It is also one of those recipes for what I call “on your last nerve” meal ideas. “On your last nerve” recipes do not really qualify as “recipes” but may just save your “last nerve” mid week (or anytime). When I meal plan on Saturdays and Wednesdays (usually) I always factor in a few items that can be stored in the freezer and easily made for mid week. I find these options are particularly handy after a long work day or driving around to extra curriculars.

What is a On Your Last Nerve Recipe?

Sometimes these are items I cook myself and have frozen for a quick reheat in the microwave or instant pot. Occasionally they are freezer favorites from Trader Joes or Costco, and often they may have a base of store prepared food with a few items to doctor it up for something way better than what could be served directly from the freezer. I always keep a few items in my freezer such as Costco’s frozen cheese pizza (4 for $9 in my area) and recommend that you do too.

How to Make a Frozen Pizza Taste Like Something You Want to Eat?

Normally I am not a fan of frozen pizza. The cheese never freezes well (as is usually the case with dairy items), and the crust is like cardboard. Additionally, in my book, there is never enough cheese or any of the toppings that make pizza so delicious. So here are my go-to tips:

  1. Shop your fridge and pantry: Either fresh or leftover vegetables make excellent toppings. Leftover cooked mushrooms, peppers, onions and eggplant are delicious as a topping. In the summer I always have a basil plant too that I will top the pizza with fresh shards of that summery goodness.
  2. Keep ingredients on hand. I also always have onions and garlic. A quick sauté with some Italian seasoning or oregano can really up the flavor. Canned, sliced olives are delicious too. Costco Pesto, and pretty much any brand of pasta sauce are good bases. And, I always have flatbread (Aldi and Trader Joes have good options) as well as the Costco cheese pizza with a breadcrumb crust. Spices are key too. Nothing fancy – just some dried oregano and basil and maybe a bit of garlic salt if you like.
  3. Cheese! If you buy a frozen pizza the cheese is awful. Cardboard shreds. I usually don’t bother to scrape it off but always add either fresh mozzarella or if I don’t have that at least some of the sliced variety.
  4. Freezer toppings. Sliced, uncured pepperoni and salami are always in the freezer. I take them out a few minutes beforehand (or take a few slices and defrost in the microwave). Other toppings might include frozen pre-cooked rotisserie chicken or if we are doing a Meatless Monday we leave out the meat.
  5. Finish with a yummy glaze. Balsamic glaze adds just the right touch of tartness to the melted cheese. I have also known to drizzle a little truffle (fancy!) oil or garlic infused oil too. This pizza is so economical no matter how you finish it that I say go ahead…be fancy!

A Few Last Recommendations to Make Frozen Pizza Taste Like Takeout

We all have those nights when we are on our last nerve. For those moments, I always keep frozen pizza and some add ons to make frozen pizza taste like takeout. Make a quick salad of pre-washed lettuce and some favorite veggies and you are done…very little clean up too!

Fall Weekend Wrap Up + Apple Crisp

The weather was gorgeous this past weekend, and we did a second round of apple picking at our favorite orchard which made the most delicious apple crisp (recipe below!).

Friday I realized that I had dozens of eggs in the fridge (don’t ask) and decided to make a quiche. Then I realized I did not have prepared crust so did a quick recipe search and found this simple recipe for pie crust. Could not have been easier, was delicious and I used real ingredients like organic flour and butter so am guessing was much healthier too and without the preservatives in refrigerator crust! French guy was impressed although we both agree we need to find a low-cost source of gruyere cheese which is one reason why quiche in France is so delcious (I used sharp cheddar as that is what I had on hand).

We also had our last day at the shore which was bittersweet. Even during the pandemic, it was so great to escape to sail, kayak and hit the beach and socialize safely outside. It has been a silver lining to discover the beatuiful, CT shore and go back to my roots of sailing (and now teaching the girls to sail).

While hiking will be great during the fall, I told Mr. SB that we need a winter escape (am asking for cross country skis for Christmas). Downhill skiing may be challenging as the pandemic continues.

Sunday afternoon I tackled cleaning the basement. I actually organized the spot two years ago, and while it looked terrible in recent days, it only took me about an hour to remove unwanted items and put others away in the labeled spaces I had created years ago. I used my 5 step organization method for a particularly messy part. So nice to go in and not have stuff everywhere! I also realized that end of season or any major event should be an alert. That is the time to empty beach bags, wash towels etc. (anyone ever clean out a kid’s backpack and find 3 month old hummus?…surely not me:).

Now what about that apple crisp?

Apples from apple picking

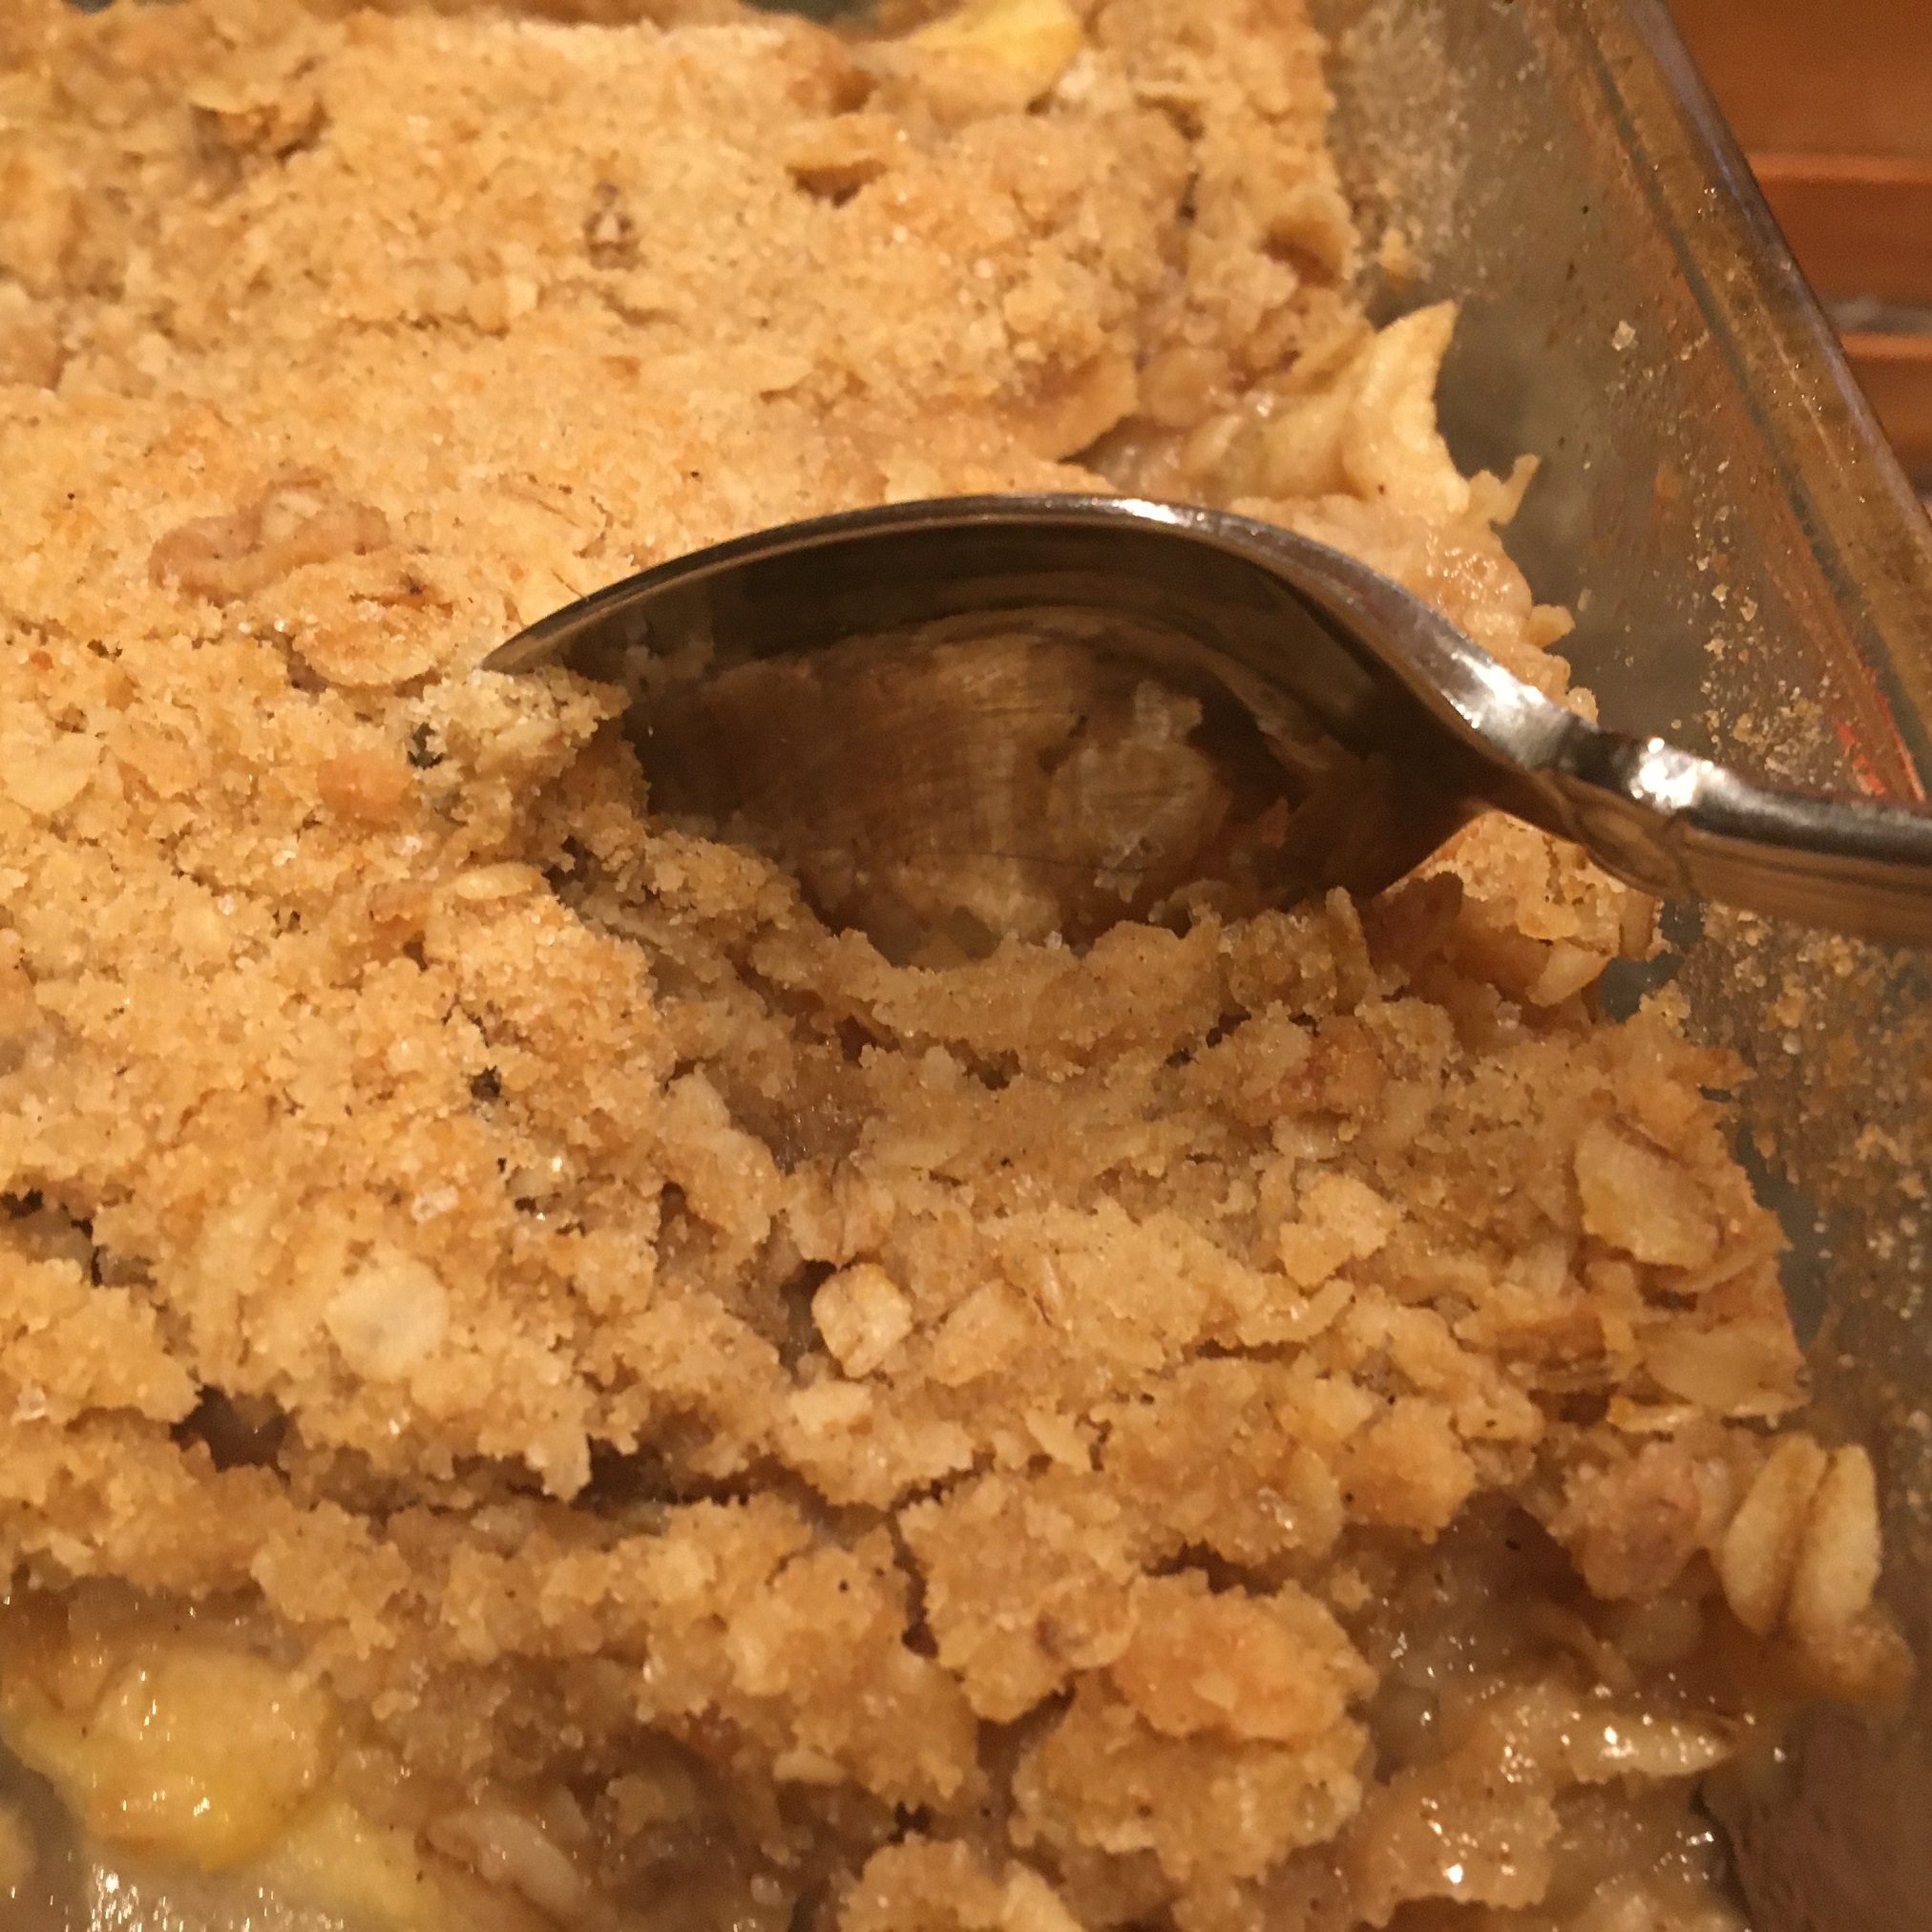
So all in all a good weekend. The apple crisp was a perfect way to end Sunday dinner. I used a mix of Jonah Gold, Granny Smith, Cortland and Mutsu apples. Typical recipes use far more sugar – while this recipe is plenty sweet I like to taste the apples. The top is a delicious mix of oats, brown sugar, cinnamon and butter. If you love crisps as much as I do, be sure to check out last week’s pumpkin crisp recipe which is also easy, perfect for fall and delicious. Super easy…enjoy!

Apple Crisp

Best Homemade Apple Crisp

Sunday’s bread recipe for warm, homemade apple crisp.  Nothing says home like apple crisp.  Top with some vanilla ice cream or whipped cream for the perfect, sweet comfort food.
Print Pin
Course: Dessert
Cuisine: American
Keyword: Apple, Dessert, Fall, Fruit dessert
Prep Time: 35 minutes
Cook Time: 40 minutes
Servings: 8 servings
Cost: $3

Equipment

  • 8 by 8 pan
  • Peeler
  • Sharp knife

Ingredients

  • 4 cups apples sliced thinly. I leave a little skin on for texture.
  • 1 tablespoon flour
  • 1/2 cup sugar I use Costco organic
  • 3/4 cup brown sugar
  • 1/3 cup butter cold and cut into smaller tablespoon sized slices
  • 3/4 cup flour
  • 1/2 cup oats
  • 1/4 tsp baking soda
  • 1/2 teaspoon salt
  • 1 teaspoon of cinnamon

Instructions

  • Preheat oven to 350 degrees
  • Combine the first three ingredients and place in a greased 8×8 baking dish.
    Sliced apples
  • Combine the remaining ingredients. I use kitchen gloves to work the butter into the dry ingredients. Mixture should look crumbly. Spread over the top of the apple mixture.
  • Bake for 30 minutes. Apples should be juicy and bubbling but hold their shape. Test with a fork or knife to determine that the apples are tender. Bake for another 5 to 10 minutes if necessary.
    Apple crisp from the oven

Fall Weekend Wrap Up + Pumpkin Crisp

We had beautiful, crisp weather in the New York area this weekend. The weekend was full of cooking autumn dinners and dessert (pumpkin crisp recipe to follow!). I also tackled organizing the bathroom top to bottom so will be sharing that as well. Of course I used my foolproof steps to do so. But let’s talk food.

What did I cook this weekend?

Fridays as always are evenings where my Mr. SB comes in late. Last week was a stressful one (hence my lack of blog posts) so cooking something yummy on Friday was a great stress reliever. I admit – I love pumpkin both in savory and sweet dishes (with the exception of pumpkin pie…not sure why I do not like pumpkin pie!). So I went in search of a savory, pumpkin-based sauce and found a great recipe from Rachel Rae. Rachel is famous for her 30-minute meals and this recipe for pasta with pumpkin sage sauce and sweet Italian sausage was delicious. It also refrigerated well so we had leftovers last night:)

Saturday morning meant looking in the fridge/freezer at leftovers and figuring out what kind of home made soup to make. It turns out the easiest pot roast recipe in the world also makes a fantastic Beef and Barley soup. I promise recipes to come. In the meantime a quick photo.

Beef and barley soup from leftover pot roast.  Delicious and hearty.

Pumpkin Crisp – the perfect fall dessert

So here’s the deal – I love pumpkin bread, pumpkin spice and most pumpkin desserts (except pumpkin pie). A few years back I had pumpkin bars which had this delicious, gingerbread crust and tender filling. It made me think about why not having a pumpkin crisp with those same flavors. Combine all that gingery goodness into a crumbly mixture and layer it on top of the yummy part of pumpkin. It came out delicious. So here is the recipe…enjoy!

Pumpkin Crisp

Pumpkin Crisp

Creamy custard, pumpkin spice goodness topped with a gingerbread crisp. Nothing better on a fall day and a great addition to Thanksgiving too!
Print Pin
Course: Dessert
Cuisine: American
Keyword: Crisp, Dessert, Fall, Pumpkin
Prep Time: 25 minutes
Cook Time: 40 minutes
Servings: 8
Cost: 4

Equipment

  • Deep square or rectangle pan.

Ingredients

  • 1 15 ounce can pumpkin puree
  • 2/3 c sugar
  • 1 5 oz can evaporated milk
  • 3 eggs
  • 1 tsp vanilla extract
  • tsp of nutmeg
  • ¼ tsp of cinnamon
  • 2 tsp pumpkin pie spice or more if you love pumpkin spice!
  • 1/4 tsp salt
  • 1 c Gingersnap cookie flour made by putting Gingersnap cookies in the food processor
  • 1 c quick oats
  • 1/3 c brown sugar
  • 1/4 tsp baking soda
  • 1/4 tsp baking powder
  • 1/2 c butter softened
  • ½ tsp of pumpkin pie spice

Instructions

  • Preheat oven to 350°F.
  • Grease a deep square or rectangular pan or a 2-3 qt casserole dish.
  • In a large bowl, whisk together the first ingredients through salt, and then pour into the prepared dish.
    Pumpkin custard
  • In a medium bowl, combine the ground up gingersnap cookies, oats, brown sugar, pumpkin pie spice, baking soda and powder. Then, use a fork to incorporate the butter into the dry mixture.
  • Bake the custard for 20 minutes. Once you see it start to harden at the edges and set, you can add the crumble topping. If you add the crumble mixture right away it may sink!
  • Bake for another 20 to 25 minutes, or until the center of the pumpkin pie filling reaches 175°F. The center will still have a little wiggle, but it won’t be super runny.
    Pumpkin Crisp from the oven
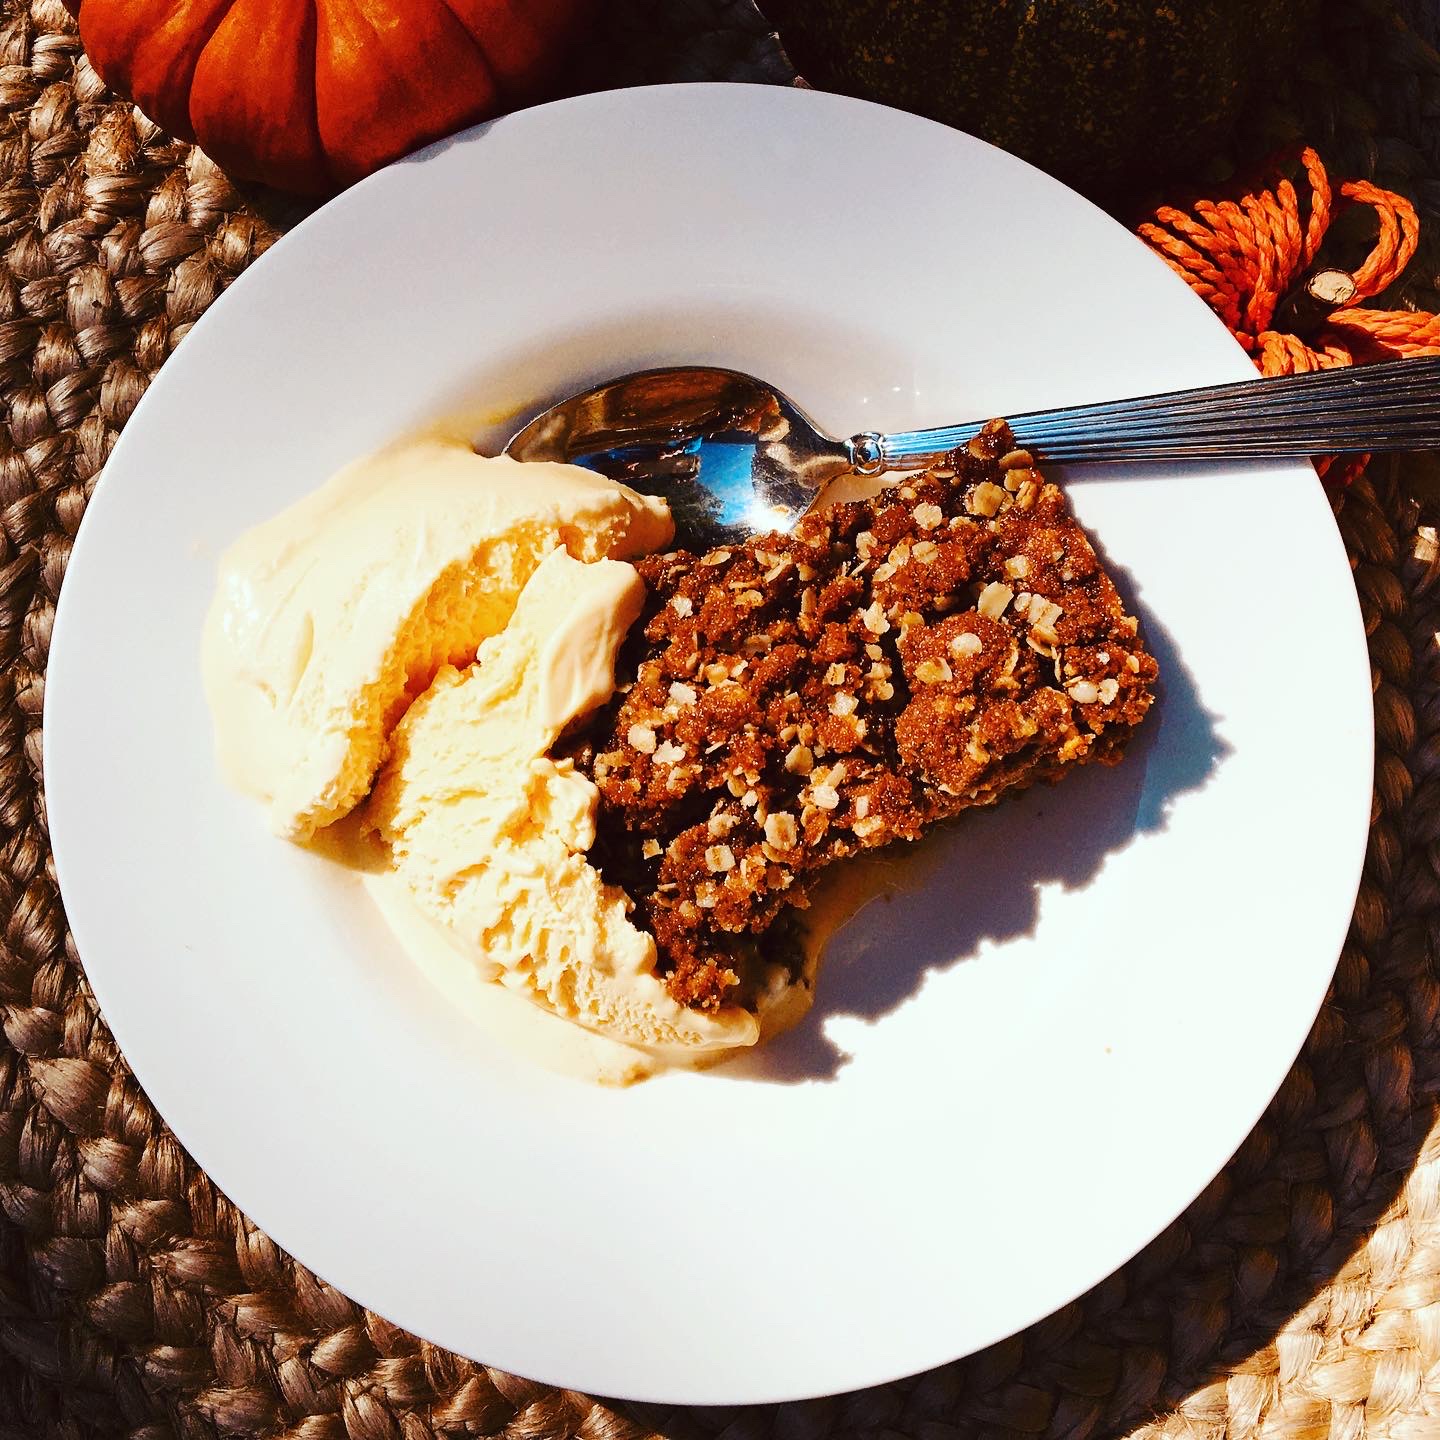
  • Serve with ice cream and a drizzle of caramel sauce if you so desire.

Notes

Pumpkin crisp is best served warm with some ice cream or whipped cream on the side.  

Kale Salad with Crispy Chickpeas and Tahini Dressing

Hi there! We are enjoying fall around here and have been doing plenty of seasonal cooking. Kale is a hearty fall green that goes so well with many of the stews, soups and other fare you find this time of year. I love kales salad with crispy chickpeas and tahini dressing. Both kale and chickpeas are super healthy too. Kale is full of anti-oxidants.

Fall weekend cooking and eating

Fridays tend to be a late night for my husband so I usually cook in the Instant pot or slow cooker. The girls and I tend to eat earlier, and then when he comes in the meal is still warm. The sauces in these types of recipes make his serving as fresh as if he ate with us.

Kale salad goes well with my regular, Friday night rotations such as slow cooker pot roast, chicken marsala, meatballs or even Indian style chicken curry. This week it was foolproof pot roast (recipe coming soon).

Fall weekend look back

The weekend was full of activity. We had warm temperatures here so were thrilled to enjoy the shore, and even went clamming/oystering (with a license of course!). I finally set up my fall table took out the autumn, pumpkin dishes. I figure if we are still spending so much time at home we may as well make it pretty.

Fall pumpkin centerpiece

How do you make Kale Salad with Crispy Chickpeas and Tahini Dressing?

So moving on to my fall salad recipe – first step is to wash the kale and strip out the tough center fibers. Kale is very different than lettuce. It is heartier. As such, you will need to cut it into smaller pieces and ideally let it sit in the dressing for at least twenty minutes to marinate. I use a kitchen shears to cut the kale into smaller ribbons. Then I make the dressing:

1/2 cup of mild olive oil (or I like avocado oil)

Juice from one lemon (or 2 to 3 tablespoons or more if you like it very lemony)

2 tablespoons of tahini

1 teaspoon of sugar (mellows out the lemon)

Salt to taste

Shake in a container to mix, and then pour on your cut up kale leaves. Set aside while you make the crispy chickpeas. Enjoy!

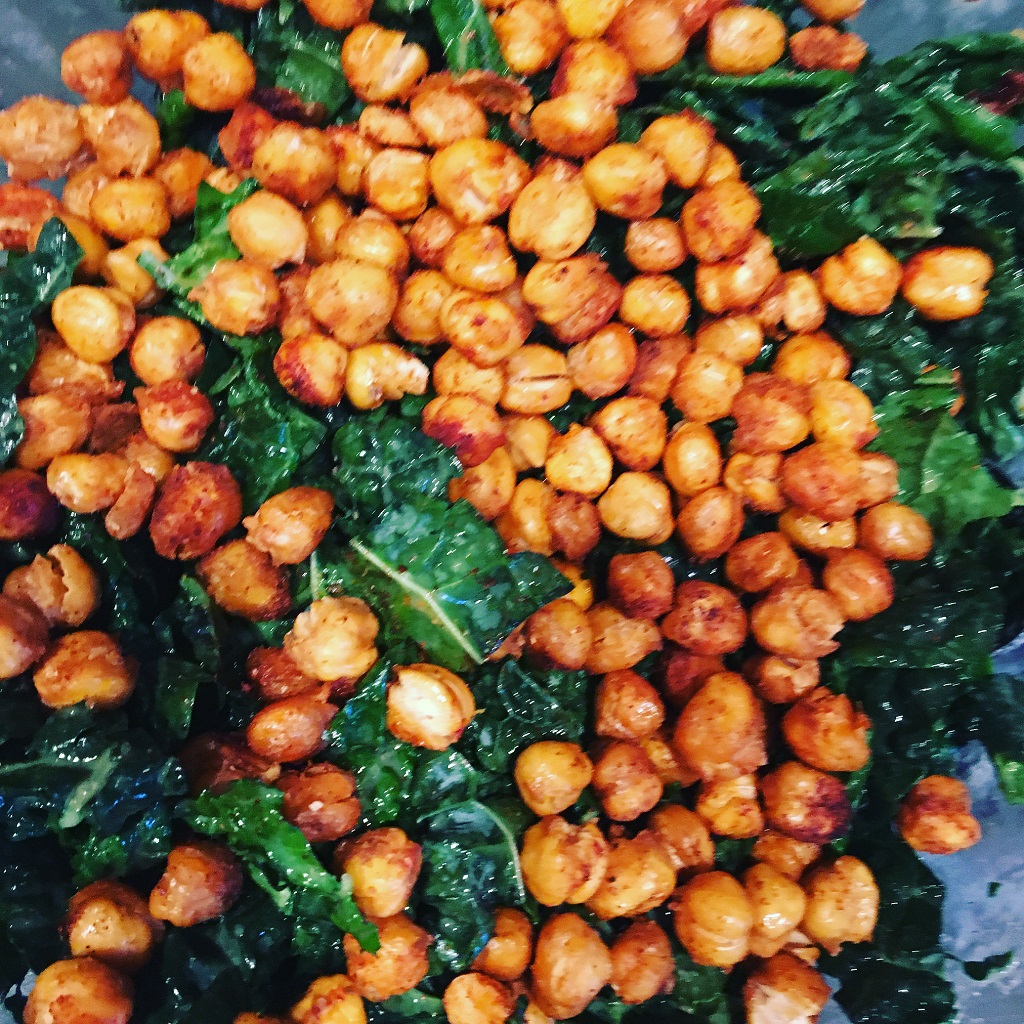
Kale salad with crispy chickpeas and tahini dressing

Roasted Crispy Chickpeas

Crispy, spiced chickpeas are healthy and a delicious snack or topping for salad or anytime you want some crunch and texture.
Print Pin
Course: Appetizer, Snack
Cuisine: American
Keyword: GF, gluten free, vegan, vegetarian
Prep Time: 7 minutes
Cook Time: 40 minutes
Servings: 4
Calories: 75kcal
Cost: $1.50

Equipment

  • Sheet pan
  • Standard oven

Ingredients

  • 1 can of chick peas
  • 1 tablespoon of avocado or another oil that can cook at high temperature
  • 1 teaspoon of cumin
  • Salt and pepper to taste

Instructions

  • Preheat oven to 400 degrees
  • Drain chickpeas
  • Pat with paper towels and let dry. It is important that the chickpeas dry before cooking or else you will steam them when you go to roast them.
  • Toss chickpeas with the oil and cumin powder.
  • Lay evenly on a baking sheet. I like to line my baking sheet with foil to avoid mess.
    Crispy roasted chick peas
  • Put pan in middle of preheated oven and cook for thirty to forty minutes. Shake to turn halfway through cooking.
  • Let cool and chickpeas will continue to crisp.

Notes

Serve over salad or as a snack.  Chick peas are best eaten day of preparation.  If refrigerated they may soften.  You can also vary the spices.  Curry powder or smoked paprika are also delicious spices to try.

Nutrition

Calories: 75kcal

HomeMade Salted Caramel Sauce (No Thermometer Required)

So I have been baking since I was ten years old. I sort of enter a transcendental state when mixing up butter, sugar, flour and creating something delicious and decadent to eat. I love to bake cakes, cookies, bars, muffins…you name it. But candy (which may not really be considered baking?) has always been off the list. It seems intimidating and too complicated with the requisite thermometers and equipment. Then I figured out how to make homemade Salted Caramel sauce (Without a Candy Thermometer). As they say, necessity breeds invention so let’s take a moment to visit Brittany, France a beautiful seaside region known for its sel (salt!).

Salted Caramel Paradise in Brittany

We visited Brittany in France last summer. I promise to share our fantastic trip at some point. We stayed in a seaside village called Concarneau. In addition to eating plenty of fresh seafood and shellfish we discovered French salted caramel (By the way, Brittany or Bretagne is known as a shellfish capital with the most incredible oysters!).


The American craze for salted caramel sauce is apparently pre-dated by several centuries in France. Salted caramel can be found in many Breton shops and is absolutely delicious thanks to something called Guérande sea salt which is an essential ingredient along with the famous Breton beurre (butter!) which is another main ingredient to caramel.

Of course the Sunday’s Bread family brought home a case of the Breton salted caramel drug…oops I meant sauce but sadly it was all gone far too soon. My thoughts turned to how can I make this delectable treat? ? And, what about my aversion to candy thermometers? Is it even possible

Yes it is. This recipe for salted caramel sauce is so delicious, and it does NOT need a thermometer. I adapted the recipe for caramels from the Fannie Farmer cookbook (which my mom gave me when I was about 18).

Not saying I will not try candy recipes requiring a thermometer at some point but as a first step, this is perfect – and it comes out so delicious every time. Oh, and it takes about 15 minutes to make – and you may just want a spoon handy! And if there is any left over, homemade salted caramel sauce is a lovely gift!

Breton Salted Caramel Sauce No Candy Thermometer Needed

Mimi’s HomeMade Salted Caramel Sauce

Print Pin

Ingredients

  • 1 cup granulated sugar
  • 6 Tablespoons salted butter cut into six tablespoon pieces Room temperature
  • 1/2 cup heavy cream You could use light cream (but not milk)
  • 1 teaspoon of sea salt or to taste

Instructions

  • Melt the sugar in a heavy bottomed saucepan stirring constantly and watching carefully to make sure it does not burn. Sugar will turn into an amber colored substance at this point.
  • Once sugar is completely melted, immediately add the butter. Be careful in this step because the caramel will bubble rapidly when the butter is added.
  • Stir the butter into the caramel until it is completely melted, about 2 minutes. If you notice the butter separating or if the sugar clumped up, remove from heat and stir quickly to combine it again. I wear gloves and use a splatter screen at this step. Keep whisking until it comes back together, even if it takes 3-4 minutes. It will eventually– just keep whisking. Return to heat when it’s combined again.)
  • Very slowly drizzle in 1/2 cup of heavy cream while stirring. Since the heavy cream is colder than the caramel, the mixture will rapidly bubble when added. Allow the mixture to boil for 1 minute. It will rise in the pan as it boils. Watch that it does not boil over.
  • Remove from heat and stir in 1 teaspoon of salt. Allow to slightly cool down before using. Caramel thickens as it cools.
  • Cover tightly and store for up to 1 month in the refrigerator. Caramel will thicken in the refrigerator. You can reheat in the microwave or on the stove to desired consistency.

Notes

This recipe can be made ahead and stored in the refrigerator for a few days.  You can also freeze it for 3 months in an airtight container.  
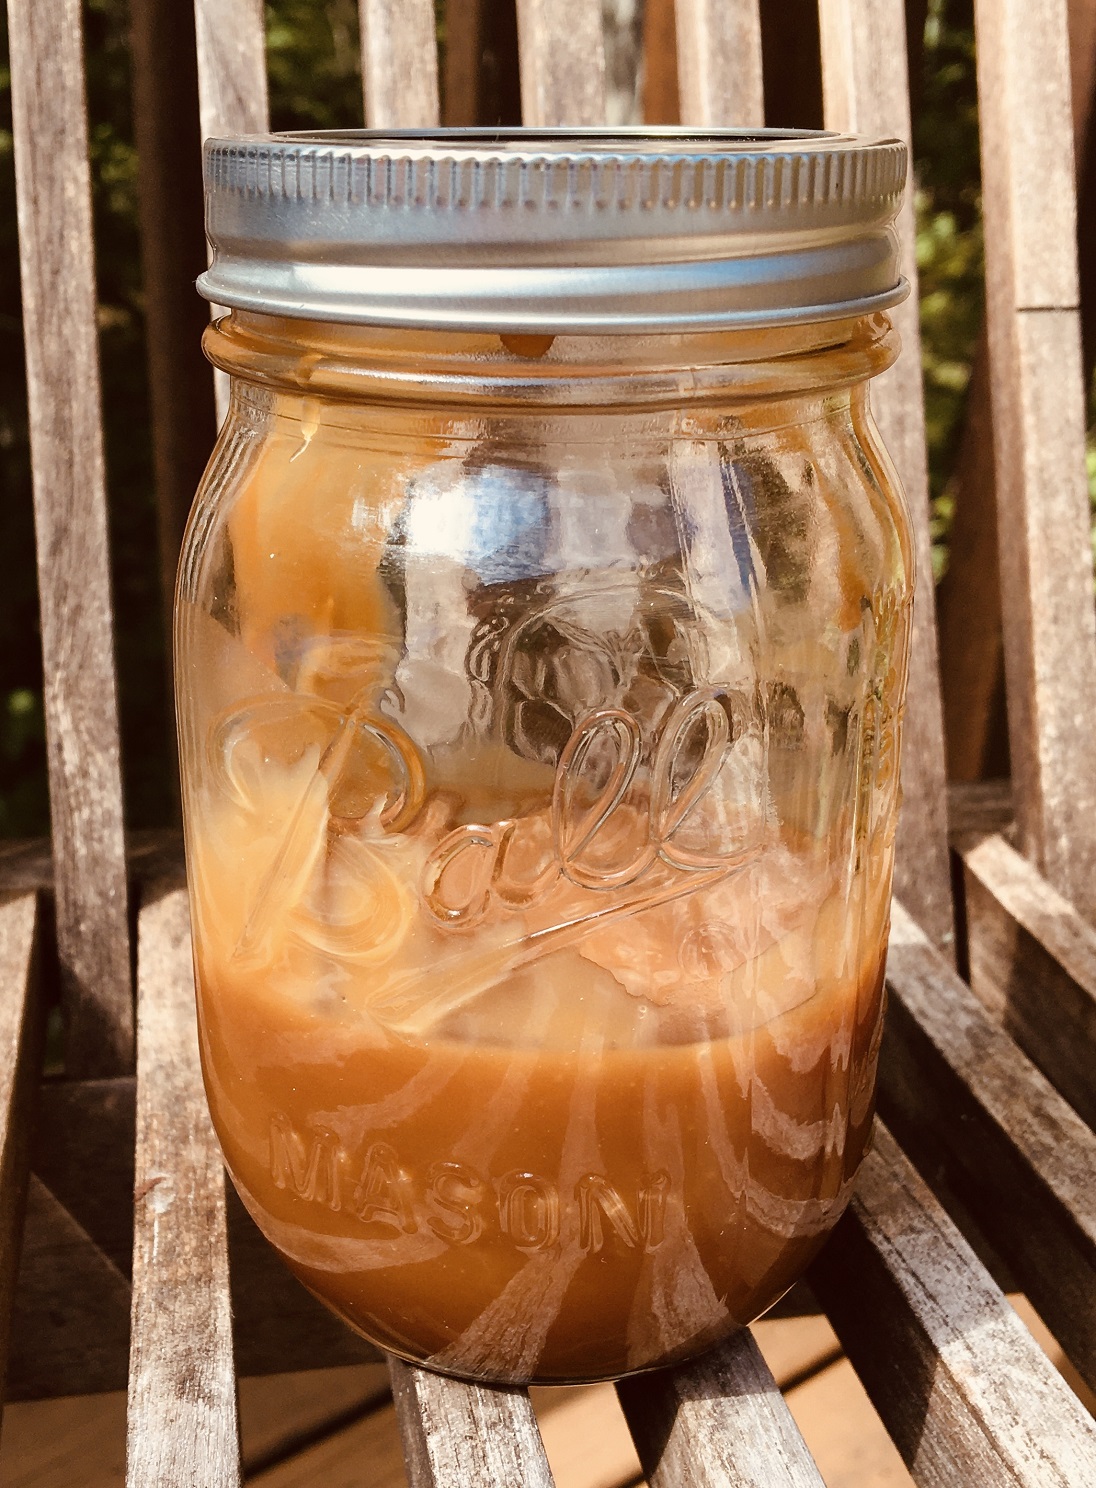
I love storing my caramel in a Mason Jar (see photo).  As it makes a lovely gift, I have been known to make my own labels too.
 

Apple Crisp Bars with Salted Caramel Drizzle

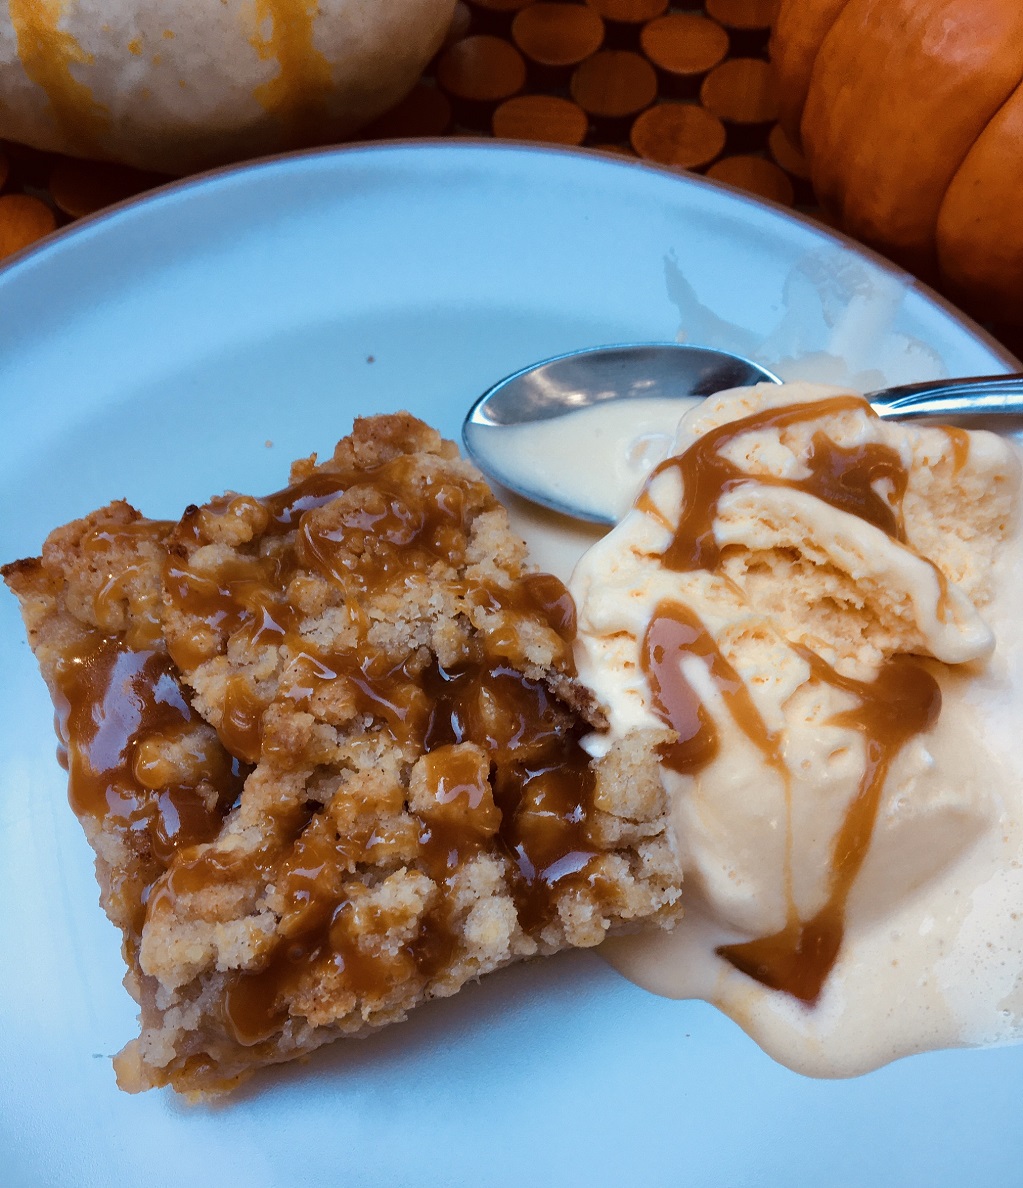
This weekend I made Apple Crisp Bars with Salted Caramel Drizzle after a fun morning picking apples (Cortland, Jonah Gold were in the orchard). I used the basic recipe for the topping and crust from my Blueberry Crumble Bars recipe. It worked perfectly with the apple topping. I have recently discovered the ease of making salted caramel (promise it is easy!) so I decided to top the Apple Crisp Bars with some Salted Caramel (recipe coming tomorrow I promise!).

What kinds of apples do you use to make Apple Crisp Bars with Salted Caramel Drizzle?

This time of year Cortland and Jonah Gold are available for picking in Connecticut so I used both of those. I also had a Granny Smith apple from the supermarket which I threw in for some tartness. A mix of apples will give you the most complex flavors.

Were they hard to make?

No! Remember to use cold butter for that extra crumbly texture. I also love a pinch of ground ginger and of course cinnamon. You should also line your pan with foil. That makes it easy to remove the bars and then I use a pizza cutter to cut them into squares.

What to serve with the bars?

In our house we love ice cream so we had French vanilla ice cream as a side. Whipped cream would have also been delicious and if you love chocolate I don’t see any reason why you could not serve chocolate ice cream or even drizzle a little chocolate sauce on top.

Apple Crisp Bars with Salted Caramel Drizzle

Apple Crisp Bars with Salted Caramel Drizzle

Addictive salted caramel drizzled apple crisp bars have a tender apple-pie like filling on a buttery shortbread crust and crumbly topping. The best apple crisp but in bar form!
Print Pin
Course: Dessert, Snack
Cuisine: American
Keyword: Apple, Bars, Dessert, Salted Caramel
Prep Time: 20 minutes
Cook Time: 45 minutes
Servings: 16 bars
Calories: 240kcal
Cost: $3

Equipment

  • 8 by 8 pan
  • Mixing bowls
  • Standard oven

Ingredients

  • For the Apple Layer
  • 4 cups 500 g apples peeled, cored and thinly sliced (about 4-5 medium apples2)
  • 2 Tablespoons all-purpose flour
  • ½ teaspoon of cinnamon
  • 1/4 cup 50 g granulated sugar
  • For the Bottom Layer & Top
  • 1 and 1/4 cup all-purpose flour spooned & leveled
  • 1/2 cup granulated sugar
  • 1/2 teaspoon baking powder
  • 10 tablespoons unsalted butter cold 1/2 cup plus 2 tablespoons. It is very important that the butter is cold as that is what helps keep the topping crumbly.
  • 1 large egg
  • 1 tablespoon packed brown sugar
  • 1 tablespoon granulated sugar
  • 1 teaspoon of cinnamon
  • teaspoon of nutmeg
  • ¼ teaspoon of dried ginger optional

Instructions

  • Preheat the oven to 375F degrees. Line an 8×8 inch square baking pan with aluminium foil and grease with butter or shortening.
  • In a separate large bowl whisk together the flour, 1/2 cup granulated sugar and the baking powder.
  • Cut in the butter & egg yolk using a fork until the mixture is crumbly.
  • Press about two thirds to three quarters of the mixture into the bottom of the prepared pan. Pour the apple mixture over top.
  • To the rest of the flour mixture, stir in the brown sugar and remaining 1 tablespoon of granulated sugar.
  • Crumble the remaining dough over the apple mixture using your hands to distribute on the top.
  • Bake in the oven for about 45 minutes, until you see the juices from the apples and the crumble layer starting to turn golden.
    Apple Crisp Bars with Salted Caramel Drizzle
  • Allow to cool fully to room temperature and ideally put in the refrigerator to chill . Then lift the bars out of the pan using the aluminium foil overhang and cut into squares. I used a pizza cutter which worked well. I also let the bars warm to room temperature which really brings out the flavors.
  • Make the salted caramel and while warm drizzle on top!

Notes

Using a mix of apples will give you the most complex apple flavor.  I love pairing tart Granny Smith with a milder Jonah Gold or Cortland.

Nutrition

Calories: 240kcal

BEST FALL 2020 COOKING, RECIPES AND DECORATING

Hi there from me and G, my darling dog and best work-at-home buddy!  The temperatures dropped in the New York area, and it is feeling like autumn!  I love fall but have to say, I do not want summer to go especially with the pandemic likely forcing us all inside.  On the bright side, I absolutely love this time year for decorating, cooking and entertaining.   So today I am starting a series of posts on Best Fall 2020 Cooking, Recipes and Decorating.

Apple Crisp Bars with Salted Caramel Drizzle

This weekend was perfect for apple picking, and we picked a bunch.  I decided to adapt my blueberry crumble bar recipe to make a divine apple crisp bar.  I could not stop there though, so I also made some homemade salted caramel to drizzle on top (and of course had to have some French vanilla ice cream on the side).  These apple crisp bars are divine – with their sweet, salty, caramely drizzle, soft apple filling and decadent shortbread crust and topping – as you may have guessed, they did not last one day.  Recipe to come!  

Apple crisp bars with salted caramel drizzle

The easiest Crockpot Butternut Squash Soup

It was not all sweet stuff though.  College girl told me that she loves butternut squash (who knew?), and that she wanted butternut squash soup.  So I made the easiest butternut squash soup ever in the crockpot.  Shh…it also has carrots, onion and other healthy ingredients (she normally hates carrots…picky toddlers can grow up to be picky teens!)

We headed to the shore Sunday and came back on the late side so to have that soup ready was fantastic.  I served the soup along with a green salad and Mr. SB’s famous roast chicken.  His roast chicken always comes out perfectly.  There is something about being French that gives you natural talent for creating a perfect roast chicken…must be genetic!   I also served my roast fingerling potatoes coated with Penzey’s Northwood’s spice which is a favorite.  Will post these recipes soon (except the roast chicken…he won’t disclose his secrets).

More cooking and recipes!

In the blog world, apparently you need to be thinking ahead so I also cooked a test batch of turkey soup with wild rice – also delicious and super cheap to make if you have leftovers (can easily sub chicken for the turkey).   But I will save sharing the recipe until after Thanksgiving when you will be pulling your hair out trying to figure out what to do with all that leftover turkey!

About a year ago, I started this blog and guess what?  My first post was the best-ever pumpkin bread!  Life got in the way (#2020) so I had to put my blog dreams on hold until recently, but am happy to share that recipe.  It is delicious and healthier than the usual you find out on Pinterest.  

Fall online shopping

Lastly, I had to do some fall shopping online (well maybe not “had to”).  As the budget minded girl I am I headed to Target.com and found this awesome long sweater.  It is so cozy.  I decided to buy it in another color too.  I love the yellow, teal and aqua and will pair that one with black and grey. At 5 foot 4, I am an extra small. It does run long but I love the fit (see above pic).

Fall decorating

I finally cleared the deck of dead plants (keeping it real here!) and bought some mums for that space and the front step.  I also dug out my fall wreath.  I found this one that would work well on Amazon but I am re-using one from a season past.  More to come on the decorations.  I just ordered these darling pumpkins from Target.  At $5 each they are a steal, and I love the neutral colors and texture which will work well with my other fall entertaining. Well I promise recipes will be up soon! Check back for more best fall 2020 cooking, recipes and decorating.

How are you preparing for fall 2020?  Any good recipes or tips to share?

Thanks for stopping by!

Instant Pot Chicken Curry

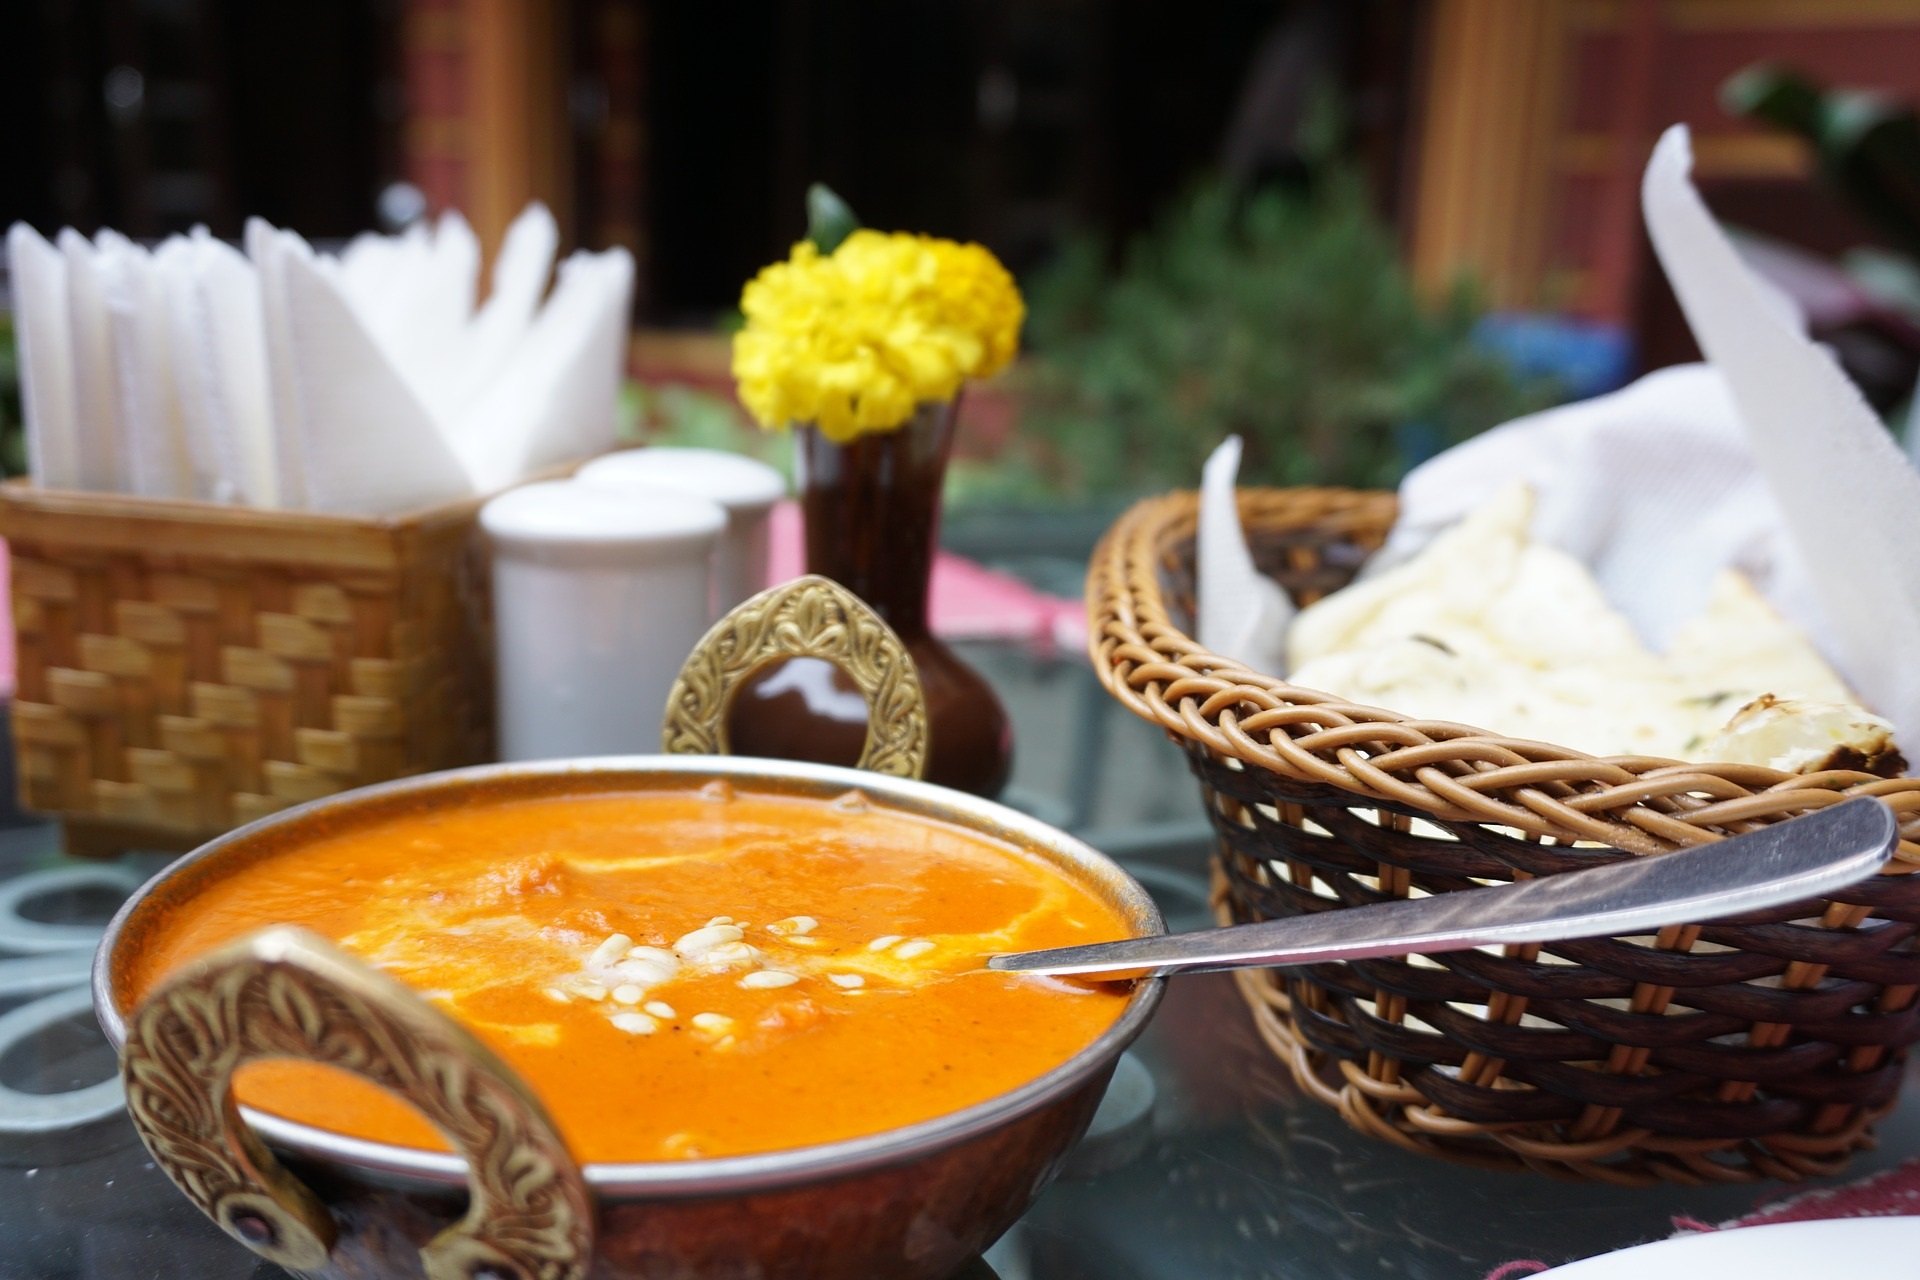
Instant pot chicken curry has quickly become a family favorite around here.  It is creamy, simple, flavorful and can be made in 30 minutes flat.  This recipe is also gluten, dairy free and low-carb so it checks a lot of boxes.  I use a mild curry powder (which you can add heat to if you prefer your curry spicier). 

What is curry?

Curry means sauce with spice.  It also refers to any variety of dishes in a number of countries that uses a combination of spices.  The word “curry” was created by the British in the 19th century when India was still a British colony.  Curry is actually anglicized for kari, a word that means sauce.

Curries can be found in India, Southeast Asia and the Caribbean.  Indian style curry powder dates to the 18th century when it is thought that Indian merchants prepared spice blends for the British Colonial government and army who would return to Britain.   The primary spices found in Indian style curry powder are coriander, cumin and turmeric (which gives the blend the signature yellow color).  By the way, traditional Indian chefs and cooks do not use curry powder.  This recipe is admittedly an Americanized Indian curry (but I am OK with that as it is delicious).

Is curry healthy?

This dish has numerous healthy ingredients.  Indian style curry powder typically has turmeric in it.  Turmeric has been shown to reduce inflammation.  There are over 12,000 peer reviewed studies that show the benefits of turmeric! 

Other healthful ingredients include onions which are high in antioxidants.  Chicken provides vitamins, minerals and protein.  This dish is also versatile so you could add in some peas or other vegetables.  Carrots, celery and peppers would all make nice additions.

What do you need to make this Instant Pot Chicken Curry?

Spices are at the heart of any curry, and this Instant Pot Chicken Curry is no different.  Toasting the spices in coconut oil extracts the spices’ flavors (please do not skip that step!).  

This dish calls for a few spices that you should be able to find at any major grocery store chain.  If you can not, I highly recommend Penzey’s spices which are always fresh and delicious.

Here are the spices you will need:

Indian Curry Powder:  Make sure you check the spice level.  Typically you can find hot or sweet curry powder (or if it is not marked, it is likely on the milder side).  The last time I made Indian Chicken Curry I used McCormick’s brand which was not too hot and should be widely available.

Garam Masala:  Garam Masala is a warming spice blend which can vary dramatically depending on the location in India.  You should add the Garam Masala at the end of a dish.

Ground Cumin:  Cumin is from a plant found from India to the Middle East and has a nutty, distinctive taste (it is also often used in Mexican cuisine).  I used my local supermarket’s brand which worked well.

A note on other ingredients:

I used Costco’s Kirkland organic chicken tenderloins which cook quickly and are easy to chop and are well priced.

I also use full fat coconut milk (canned).  Fresh lime and chopped cilantro add some freshness, and cut the richness of the curry.

How do you make Instant Pot Chicken Curry

I started off by saying how easy this recipe is – and it is!  The full recipe is below but here are a few notes.

First you toast the spices (all except Garam Masala) in coconut oil for a couple of minutes which really adds a great flavor dimension.  As it is made in the Instant Pot you can simply do this with the saute function (love my Instant Pot…one pan to clean!).  Another important step is to deglaze the pan of the brown bits.  This is a classic step in many dishes and once again with an Instant Pot it is super easy. 

Instant Pot Chicken Curry

Instant Pot Chicken Curry

Instant pot chicken curry is easy, full of flavor and a recipe the entire family will love. Creamy curry sauce with tender chunks of chicken and vegetables make a go-to weeknight dinner as you can have it on the table in 30 minutes flat.
Print Pin
Course: Main Course
Cuisine: Indian
Keyword: budget friendly, curry
Prep Time: 10 minutes
Cook Time: 15 minutes
Servings: 6
Calories: 375kcal
Cost: $10

Equipment

  • Instant Pot
  • Small Bowl
  • cutting board
  • Sharp chopping knife

Ingredients

Ingredients

  • 3 Tbsp coconut oil
  • 3 Tbsp curry powder
  • ½ tsp garam masala
  • 2 tsp cumin
  • 1 tsp turmeric
  • 3 tsp fresh ginger
  • 2 cloves garlic finely minced
  • 2 Tbsp tomato paste
  • ½ cup chicken broth
  • 1 yellow onion
  • 2 lb boneless skinless chicken breast or tenderloins I like Kirkland, organic chicken tenderloins
  • 1 tsp salt
  • 1 Tbsp cornstarch
  • 1 can coconut milk full fat
  • Cilantro and/or parsley chopped to taste
  • Fresh lime juice to taste

Instructions

Instructions

  • Press the “Saute” function on your Instant Pot. Add coconut oil and heat for a minute or two. Add in the curry powder, cumin and turmeric. Stir continuously to toast the spices, 1-2 minutes.
  • Add the onion, garlic, and ginger. Stir to coat in the spices and saute for 2 minutes. Watch carefully to ensure the mixture does not scald (add a spoonful of water if it seems to be over cooking).
  • Add the tomato paste and stir with the onions. Cook 1-2 minutes.
  • Add ½ cup chicken broth to the pot. Stir and scrape up any browned bits.
  • Add the diced chicken and salt and stir all ingredients.
  • Press the “Cancel” button to turn off the “Saute” setting. Secure the lid, ensure the pressure valve is set to “Sealing” then program to High Pressure for 5 minutes. It will take 8-10 minutes for the pot to come to pressure. Perform a quick release once the timer goes off.
  • Mix the cornstarch with one tablespoon of water in a small bowl. Whisk briskly until smooth. Pour the cornstarch mixture and coconut milk into the pot, then stir; simmer 2-3 minutes or until the sauce has thickened. Add the Garam Masala with one minute left.
  • Add the fresh lime juice and cilantro. Taste for seasoning and add salt if needed. Serve immediately over steamed rice or serve with Naan or pita bread.

Notes

Instant Pot Chicken Curry

Nutrition

Calories: 375kcal

Potato Salad Recipe (No Mayo)

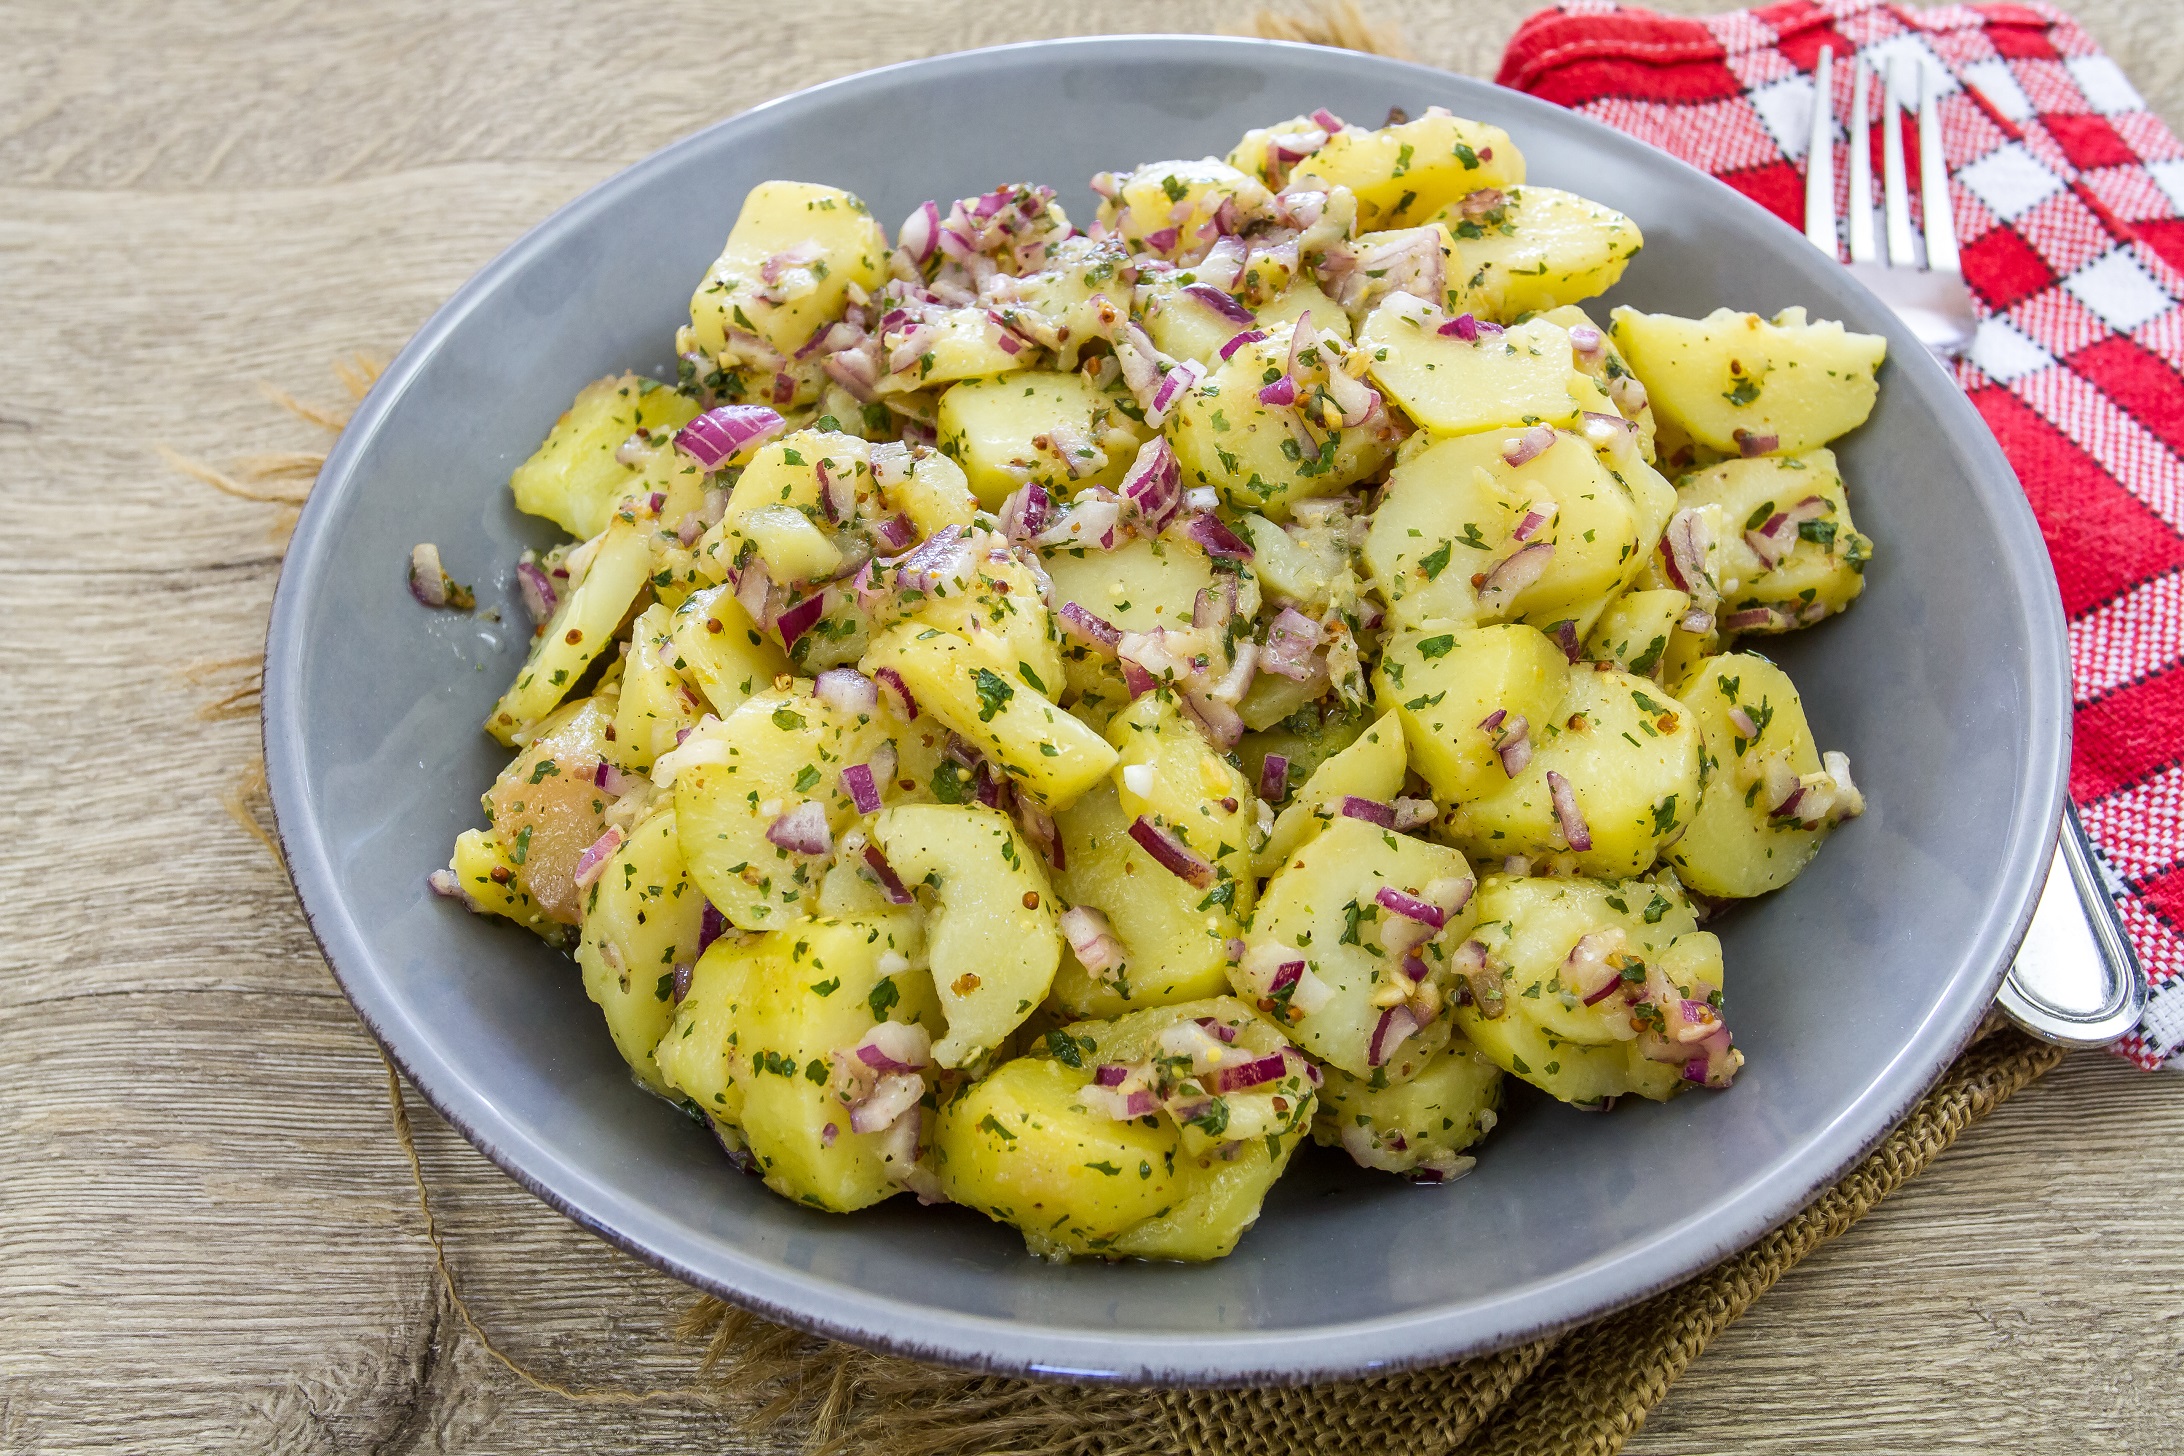
I prepared this super flavorful, easy potato salad recipe (No Mayo) this morning.  It is delicious, full of flavor, and I promise it comes out perfect every time!  No mushy, watery potatoes here.  The tangy vinaigrette is French inspired with a hint of Dijon mustard and plenty of herbs.  This is the sort of potato salad I grew to adore on my many trips to France.  I also like mayo sometimes but not on my potato salad.

I serve this potato salad warm, at room temperature or chilled.  Furthermore, it will last in the fridge for up to five days (if you do not eat it all at once…it is that good!).  And, it is vegan, vegetarian and gluten free so it will please many eaters.

Creamy new (or thin skinned) potatoes are paired with an herby vinaigrette dressing which combines virgin olive oil, wine vinegar and Dijon mustard.  Add a crunch of red onion, a bit of chives and a generous dose of herbs and you have a perfect potato salad recipe.  And bonus – if you can find a mix of potatoes as I did, the purple variety is particularly healthy!

Where does potato salad originate?

Potato salad is German but varieties also come from France.  Americans have embraced potato salad, and there are many varieties both with mayo and no mayo.  Historians believe that potatoes originated in South America.  Peru is well known for having many varieties of potatoes – up to 400!

Are potatoes healthy for me?

Potatoes have a bad rap as adding to weight gain and being full of carbs.   However, the way you prepare them makes a huge difference.  Deep fried potatoes for chips and fries are high in carbs, fats and calories, and the deep-frying removes much of the nutrition.  Simply boiled or baked potatoes are full of fiber and contain plenty of vitamin C.  I used a mix of heirloom fingerling potatoes today, and was happy to find out on Dr. Axe that they are very high in vitamins and antioxidants.

Can I substitute some of these ingredients?

Yes.  This potato salad recipe is very versatile.  You can add in chopped celery, hard cooked eggs, other fresh herbs such as basil and cilantro.  Experiment with what you like best!

Potato Salad Recipe (No Mayo)

Potato Salad Recipe (No Mayo)

Tender, creamy new potatoes are combined with a tangy, French inspired dressing. Finely chopped red onions add crunch and fresh and dried herbs add bold bursts of flavor.
Print Pin
Course: Salad, Side Dish
Cuisine: American, French, German
Keyword: Potato, Salad, Sides
Prep Time: 20 minutes
Cook Time: 11 minutes
Servings: 6
Cost: $5

Equipment

  • Equipment
  • Large Saucepan
  • Small mixing bowl
  • Whisk

Ingredients

Ingredients

  • 2 pounds heirloom potatoes or thin skinned red potatoes
  • 2 TBS granulated sugar plus a ½ teaspoon for vinaigrette
  • 4 TBS white wine or red wine vinegar – divided in half
  • Kosher salt
  • Freshly ground pepper
  • Garlic salt to taste
  • 1 TBS of Herbes de Provence
  • ½ cup extra virgin olive oil I like Kirkland
  • 3-4 cloves garlic – minced
  • 2 tsp Dijon mustard Grey Poupon works well
  • ¼ – ½ tsp crushed red pepper flakes
  • ½ cup fresh parsley – gently packed & chopped
  • ¼ cup fresh dill – gently packed & chopped
  • 2 TBS of fresh chives chopped
  • 1 small red onion – finely diced about ¾ cup

Instructions

Instructions

  • Wash and quarter potatoes: It is important that you half or quarter the potatoes (depending on their size) so that all of the pieces are close to the same size. If the sizes vary, then some of the potatoes will become over cooked (this is where mushy potatoes happen!). You will also want to wash and chop your herbs, onion, garlic at this point too so that making the dressing moves quickly.
  • Cook the potatoes: Cover potatoes with cold water in a large sauce pan. Add potatoes and bring the water to a gentle boil over high heat. Once boiling add in 2 tablespoons of salt, 2 tablespoons of the sugar and 2 tablespoons of vinegar. Reduce heat to maintain a simmer and cook, stirring occasionally, until the potatoes are fork tender, about 9-11 minutes. Drain the potatoes in a colander and transfer to a large mixing bowl.
  • While the potatoes are cooking, make the dressing: In a small bowl, whisk together oil, garlic, remaining 2 tablespoons of vinegar, Dijon, crushed red pepper flakes, Herbes de Provence and a ½ teaspoon of sugar. Season with 3/4 teaspoon of kosher salt and ¼ teaspoon ground black pepper. Whisk until fully combined. Add in the parsley, chives and dill. Stir until combined. Set aside.
  • Finish the potato salad: Drizzle half of the dressing over the warm potatoes and gently toss to combine. Add in the red onion. Combine gently again. Drizzle in the remaining dressing to taste. Gently combine until everything is coated. Taste and adjust for seasoning with salt and pepper.
  • Serve the salad: Serve warm, at room temperature or chilled. If serving warm and right away, let it sit out on the counter for at least 10 minutes for the flavors to come together.

Notes

Do NOT continuously boil the potatoes at a high heat or you run the risk of the potatoes falling apart, and becoming mushy/watery.
As soon as you drain the potatoes toss in the dressing. Warm potatoes soak up the dressing. Cold potatoes will not (and the dressing could become congealed when it hits the cold potatoes).

Camping and the Best Mediterranean Pasta Salad

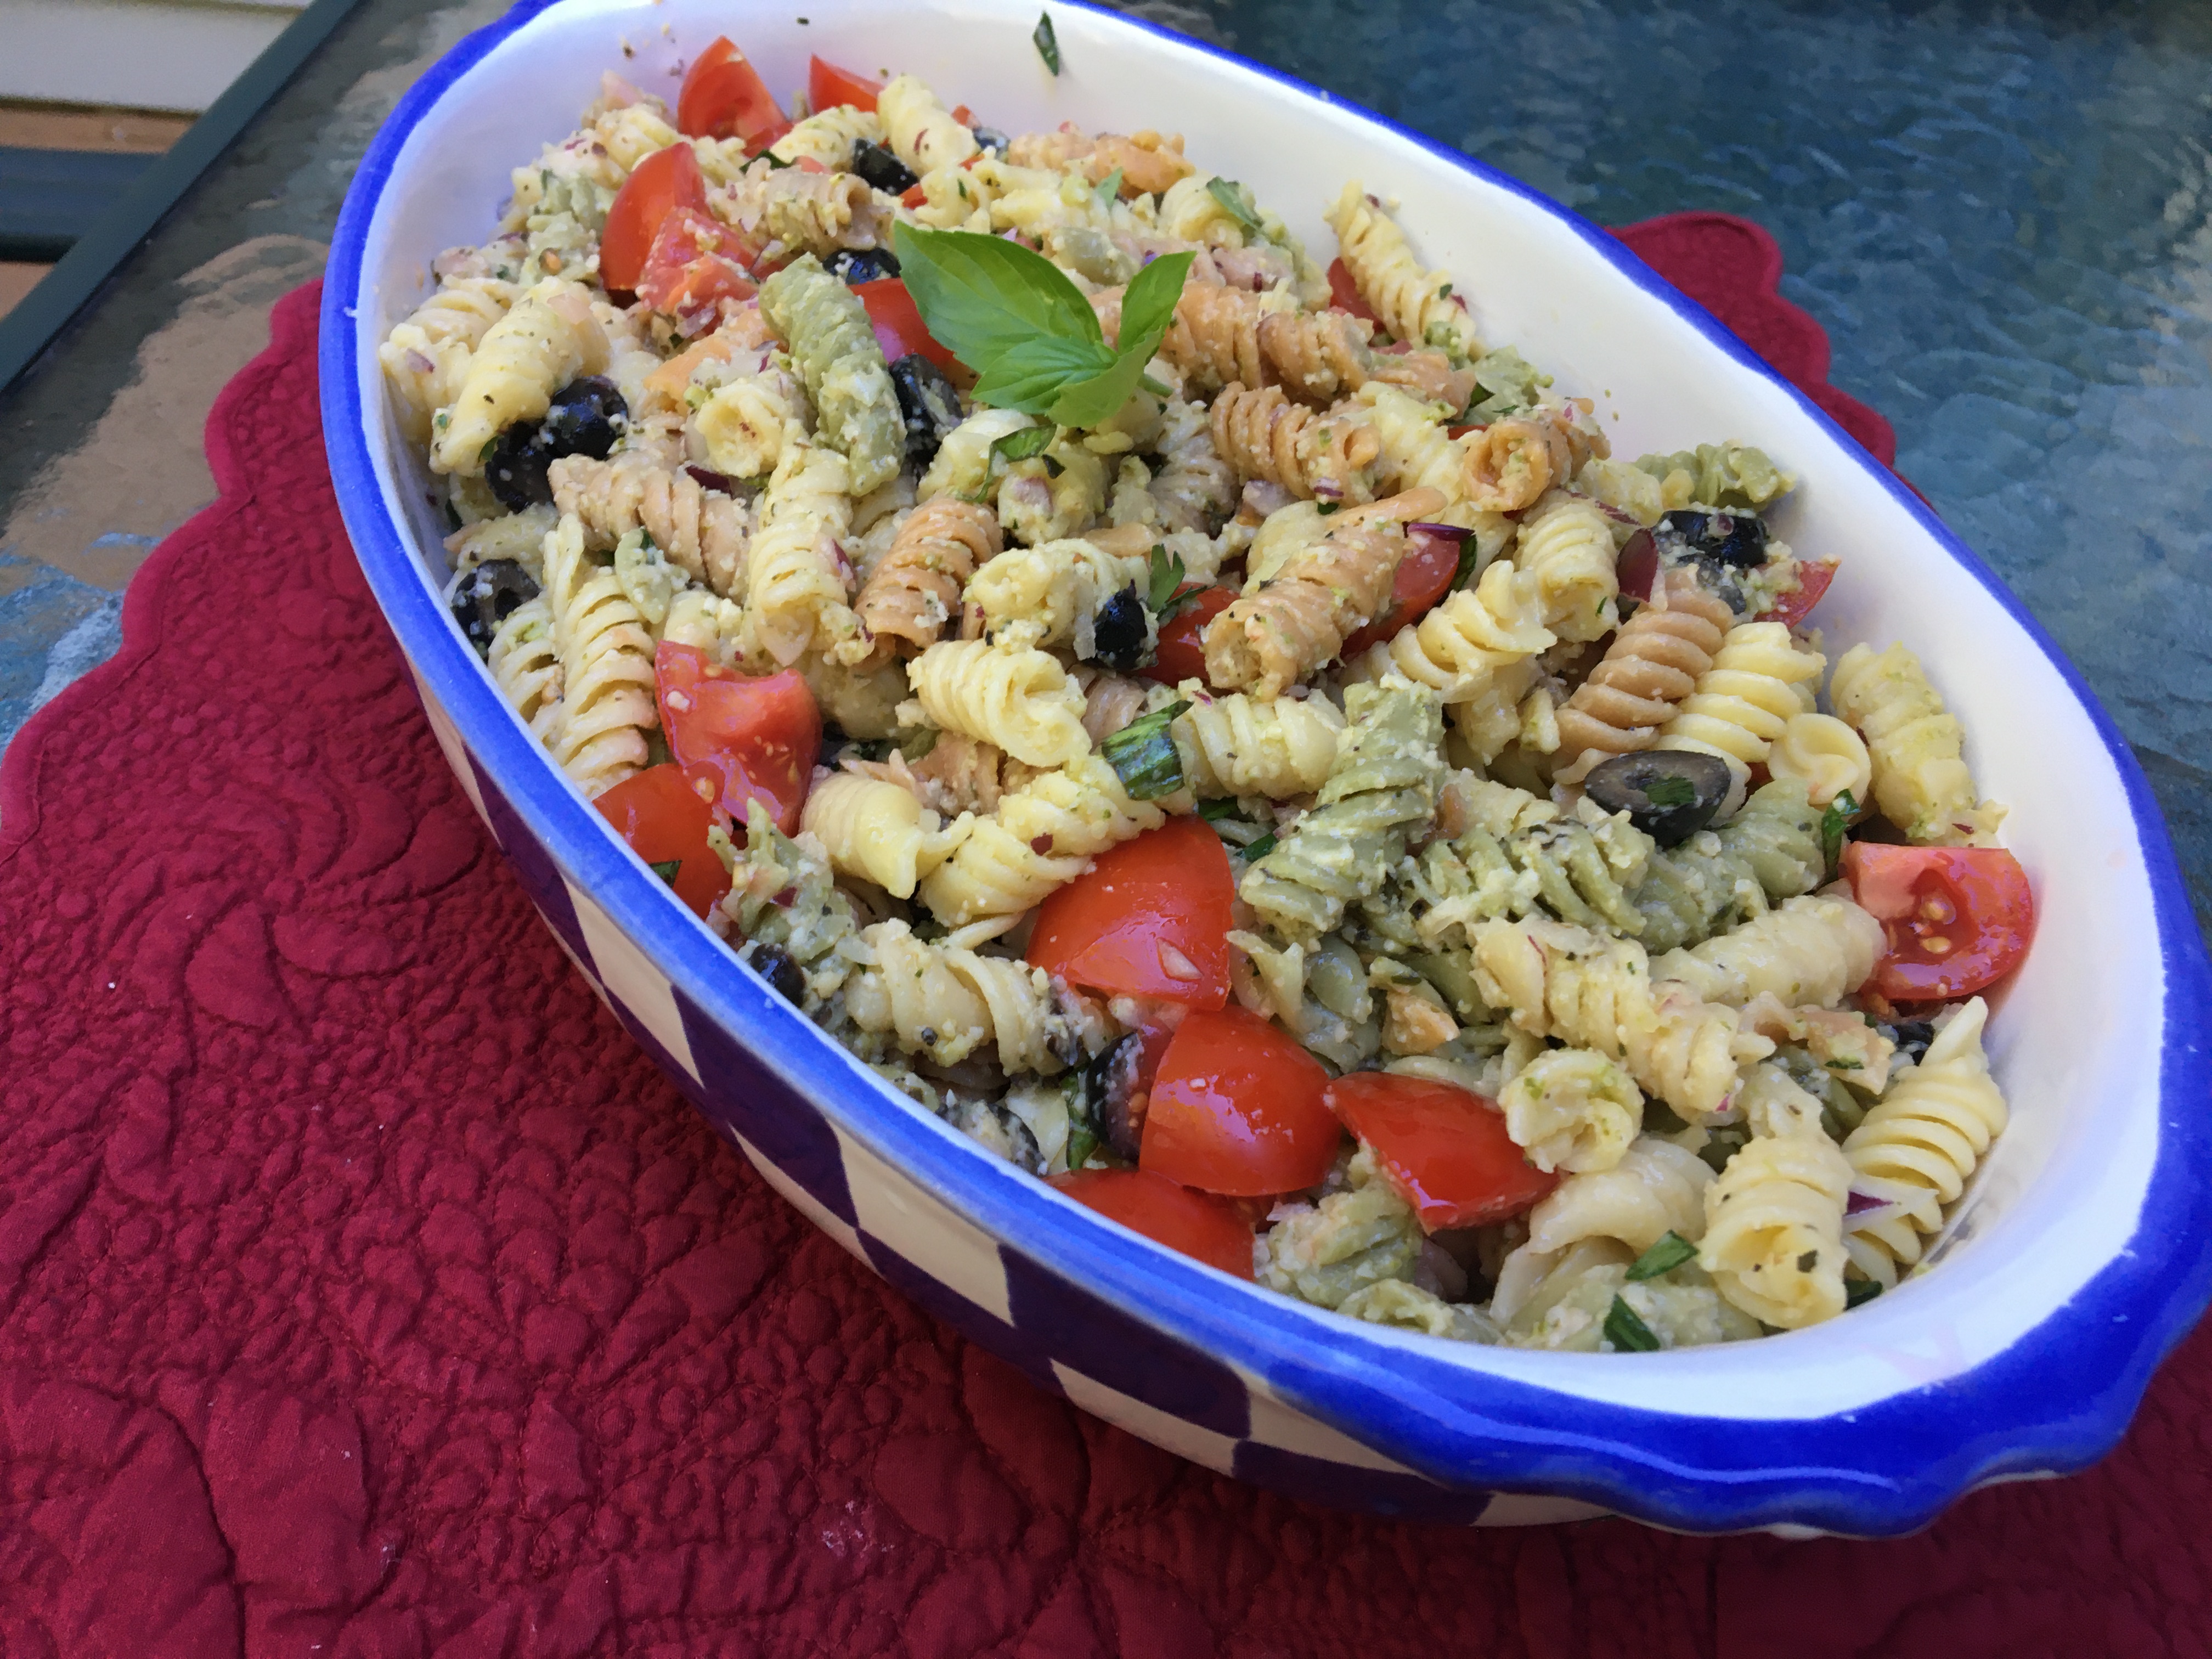
Nothing says summer picnic or cookout like pasta salad, and this Mediterranean pasta salad is my absolute favorite. I made it this weekend for a cookout and camping trip with friends.

Labor Day weekend was absolutely beautiful in CT, and we were blessed to be able to camp by the shore. While I have been a Girl Scout leader for both of my girls and have camped plenty of times at Girl Scout camp sites, I have never slept in a tent. Frankly I was worried…would I be able to sleep?

Would I Like Camping?

Well friends – I realize that I had always had mixed feelings about camping because I hated the cabins. They were often dusty, buggy and usually paired with a less than ideal restroom. While I adored the girls in the troop…they never would go to sleep!

The tent we borrowed from friends was airy, clean, and I could hear the bell on a channel marker out on Long Island sound. I loved it! (Don’t get me wrong a night or two is probably my limit…my bed felt pretty good the day after!).

Also, as you can see from my photos below, the sunrise was spectacular. I woke up when I heard the fishing boats leave at the crack of dawn.

Ribs and Mediterranean Pasta Salad

Of course we ate very well. Mr. SB made his famous ribs (someday I will get the recipe for his top secret basting sauce and share) and I made the Mediterranean Pasta Salad recipe below. It has a Mediterranean influence as it pairs black olives, tomatoes and basil with a creamy pesto, Caesar dressing. This recipe takes all of twenty minutes to make (I prep mix ins while the pasta is cooking). It is a family favorite.

Mediterranean Pasta Salad

Mediterranean Pasta Salad

Tri-color rotini coated in a delicious pesto, creamy Caesar dressing with thinly sliced olives, tomatoes, red onion and basil. A family favorite at family cookouts, camping trips and potlucks.
Print Pin
Course: Side Dish
Cuisine: American
Keyword: easy, Pasta, Side Dish, vegetarian
Prep Time: 20 minutes
Cook Time: 12 minutes
Servings: 6 people
Cost: $5

Equipment

  • colander
  • sauce pan

Ingredients

  • 12 ounce package tri-color rotini pasta cooked and drained
  • 1 cup creamy Caesar dressing I like Kens or Wishbone
  • 1/2 teaspoon coarse kosher salt
  • 1/4 teaspoon black pepper
  • 1 teaspoon garlic powder
  • 1/2 tablespoon of dried basil
  • 3 roma tomatoes diced
  • 1 6-ounce can black olives, drained and sliced (I like the Pearls brand which has a version that comes all sliced)
  • 1/4 cup finely diced red onion
  • ¼ cup of finely chopped red pepper
  • 3/4 cup shredded parmesan cheese
  • 6-10 fresh basil leaves cut into strips or torn into pieces, plus more for garnish, if desired
  • 1/4 cup basil pesto (Costco's Kirkland brand is my preferred)
  • 1/2 to 1 cup toasted pine nuts optional but adds a nice crunch

Instructions

  • Cook the pasta in a large pot of boiling, salted water according to package directions. Drain and coat with the creamy Caesar dressing while still warm.
  • Add the rest of the ingredients, except for the pine nuts if you are using them and extra basil. Toss well to combine. Add additional salt and pepper to taste, if needed.
  • Refrigerate until ready to serve (4-8 hours). If the pasta salad seems dry after refrigerating, add a little more Caesar dressing and stir to combine. Before serving, top with pine nuts and fresh basil, if desired.