Happy New Year!

Hi there friends. Yes, it has been months since I have blogged. A few tech difficulties (don’t use Bluehost if you are planning a blog!) and just busy. So, given that it has been so long, today’s post is a look back on 2023, in particular the holiday season and a few notes about 2024. So here goes!

2023 Highlights

Well like every year, there was a mix of good and not so good. The good:

  • This year we were back to traveling. College girl 1 (CG1) was in Florence so CG2 and I visited for a fantastic trip to Italy (read my full post here).
  • Mr SB and I celebrated our 25th anniversary with a trip to Bermuda.
  • CG2 really flourished second semester which was so fun to see – lots of new friends (and a few visits back home to CT with them)
  • Summer at our shore club was as amazing as always – lots of entertaining, sailing, clamming and beach.
  • Fall brought tailgates at my alma mater (and where CG2 attends) as well as a fun visit to VT to see CG1.

On a the list of not so great – we lost our wonderful cat Harry. Not a day goes by without thinking of him. He had such a personality and was with us since 2011 and brought us so much joy. He was also a Christmas cat as I adopted him as an adult cat from our local shelter just in time for Christmas. I miss you Harry. RIP my little guy.

Holidays 2023

The holidays were very full – exhausting but fun. Through the years I have figured out a system – I call it the holiday waves – waves of organizing and planning to stay sane and enjoy the Christmas season.

  • Wave 1 – this starts in October or possibly sooner when I start thinking about the holiday card. Some years I order our card before Halloween! I also do some organizing in October/early November. Clean out the pantry, take stock of clothing etc. to prepare for thoughtful gift giving and entertaining.
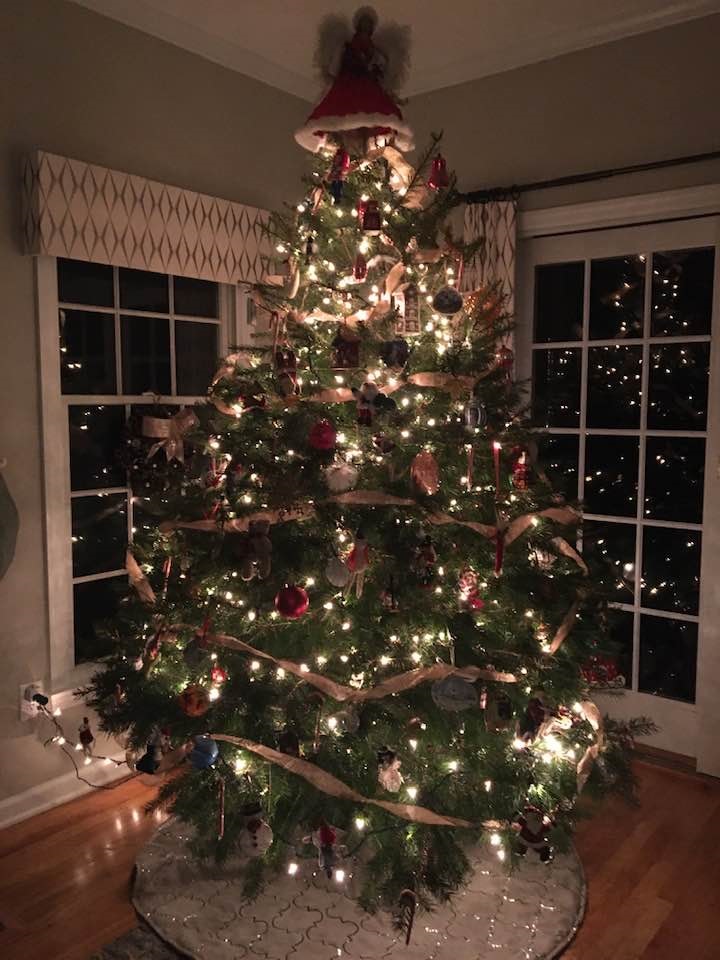
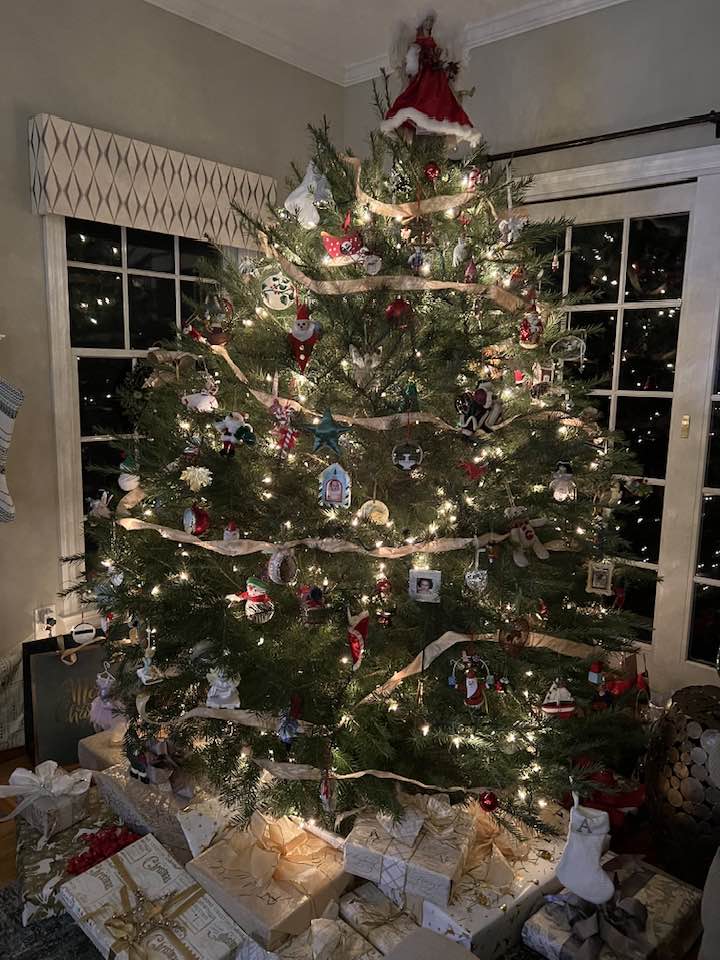
  • Wave 2 – Thanksgiving weekend. We cut down our own tree the Saturday of Thanksgiving weekend. You can read all about our tailgate party where the sliders and caper mayo take center stage. This is literally my favorite day of the year. We gather with friends for a low stress tailgate party. Getting the tree up early makes the house smell great and get’s the holiday decorating underway. I also order as many gifts as I can online for Black Friday and Cyber Monday.
  • Wave 3 – now that tree is up and gifts start to come in I love wrapping presents, watching Hallmark Christmas movies and getting into the holiday spirit! This year these afternoons were some of my favorite holiday memories – sometimes you need to slow down and a sappy movie while wrapping gifts for loved ones is perfect!
  • Wave 4 – food. I usually bake starting a couple of weeks before Christmas. Cookies freeze really well and this year was no exception. I made the following: Gingerbread Latte Cookies, Monster M&M Cookies and Hot Cocoa Cookies all from Half Baked Harvest. They all came out great and I was able to send some in care packages to the girls.
  • Wave 5 – getting ready for Christmas guests and dinner. This year we hosted 18 for dinner! I set the table a few days before. I get out platters, silverware, holiday linens about a week or so earlier to see if I need to polish, replace or buy extras. This year I did not buy anything except some new papergoods.
  • Wave 6 – Buy food. With guests at home I have learned to go to Costco early. This year I went Thursday for a Monday Christmas. This was good timing and I escaped the worst of the crowds. Here was our menu:

Saturday Lunch – sausage on the grill (if weather permits this is a great way to avoid dishes – no pans!), Costco Mac N Cheese, Salad, Christmas Cookies for dessert.

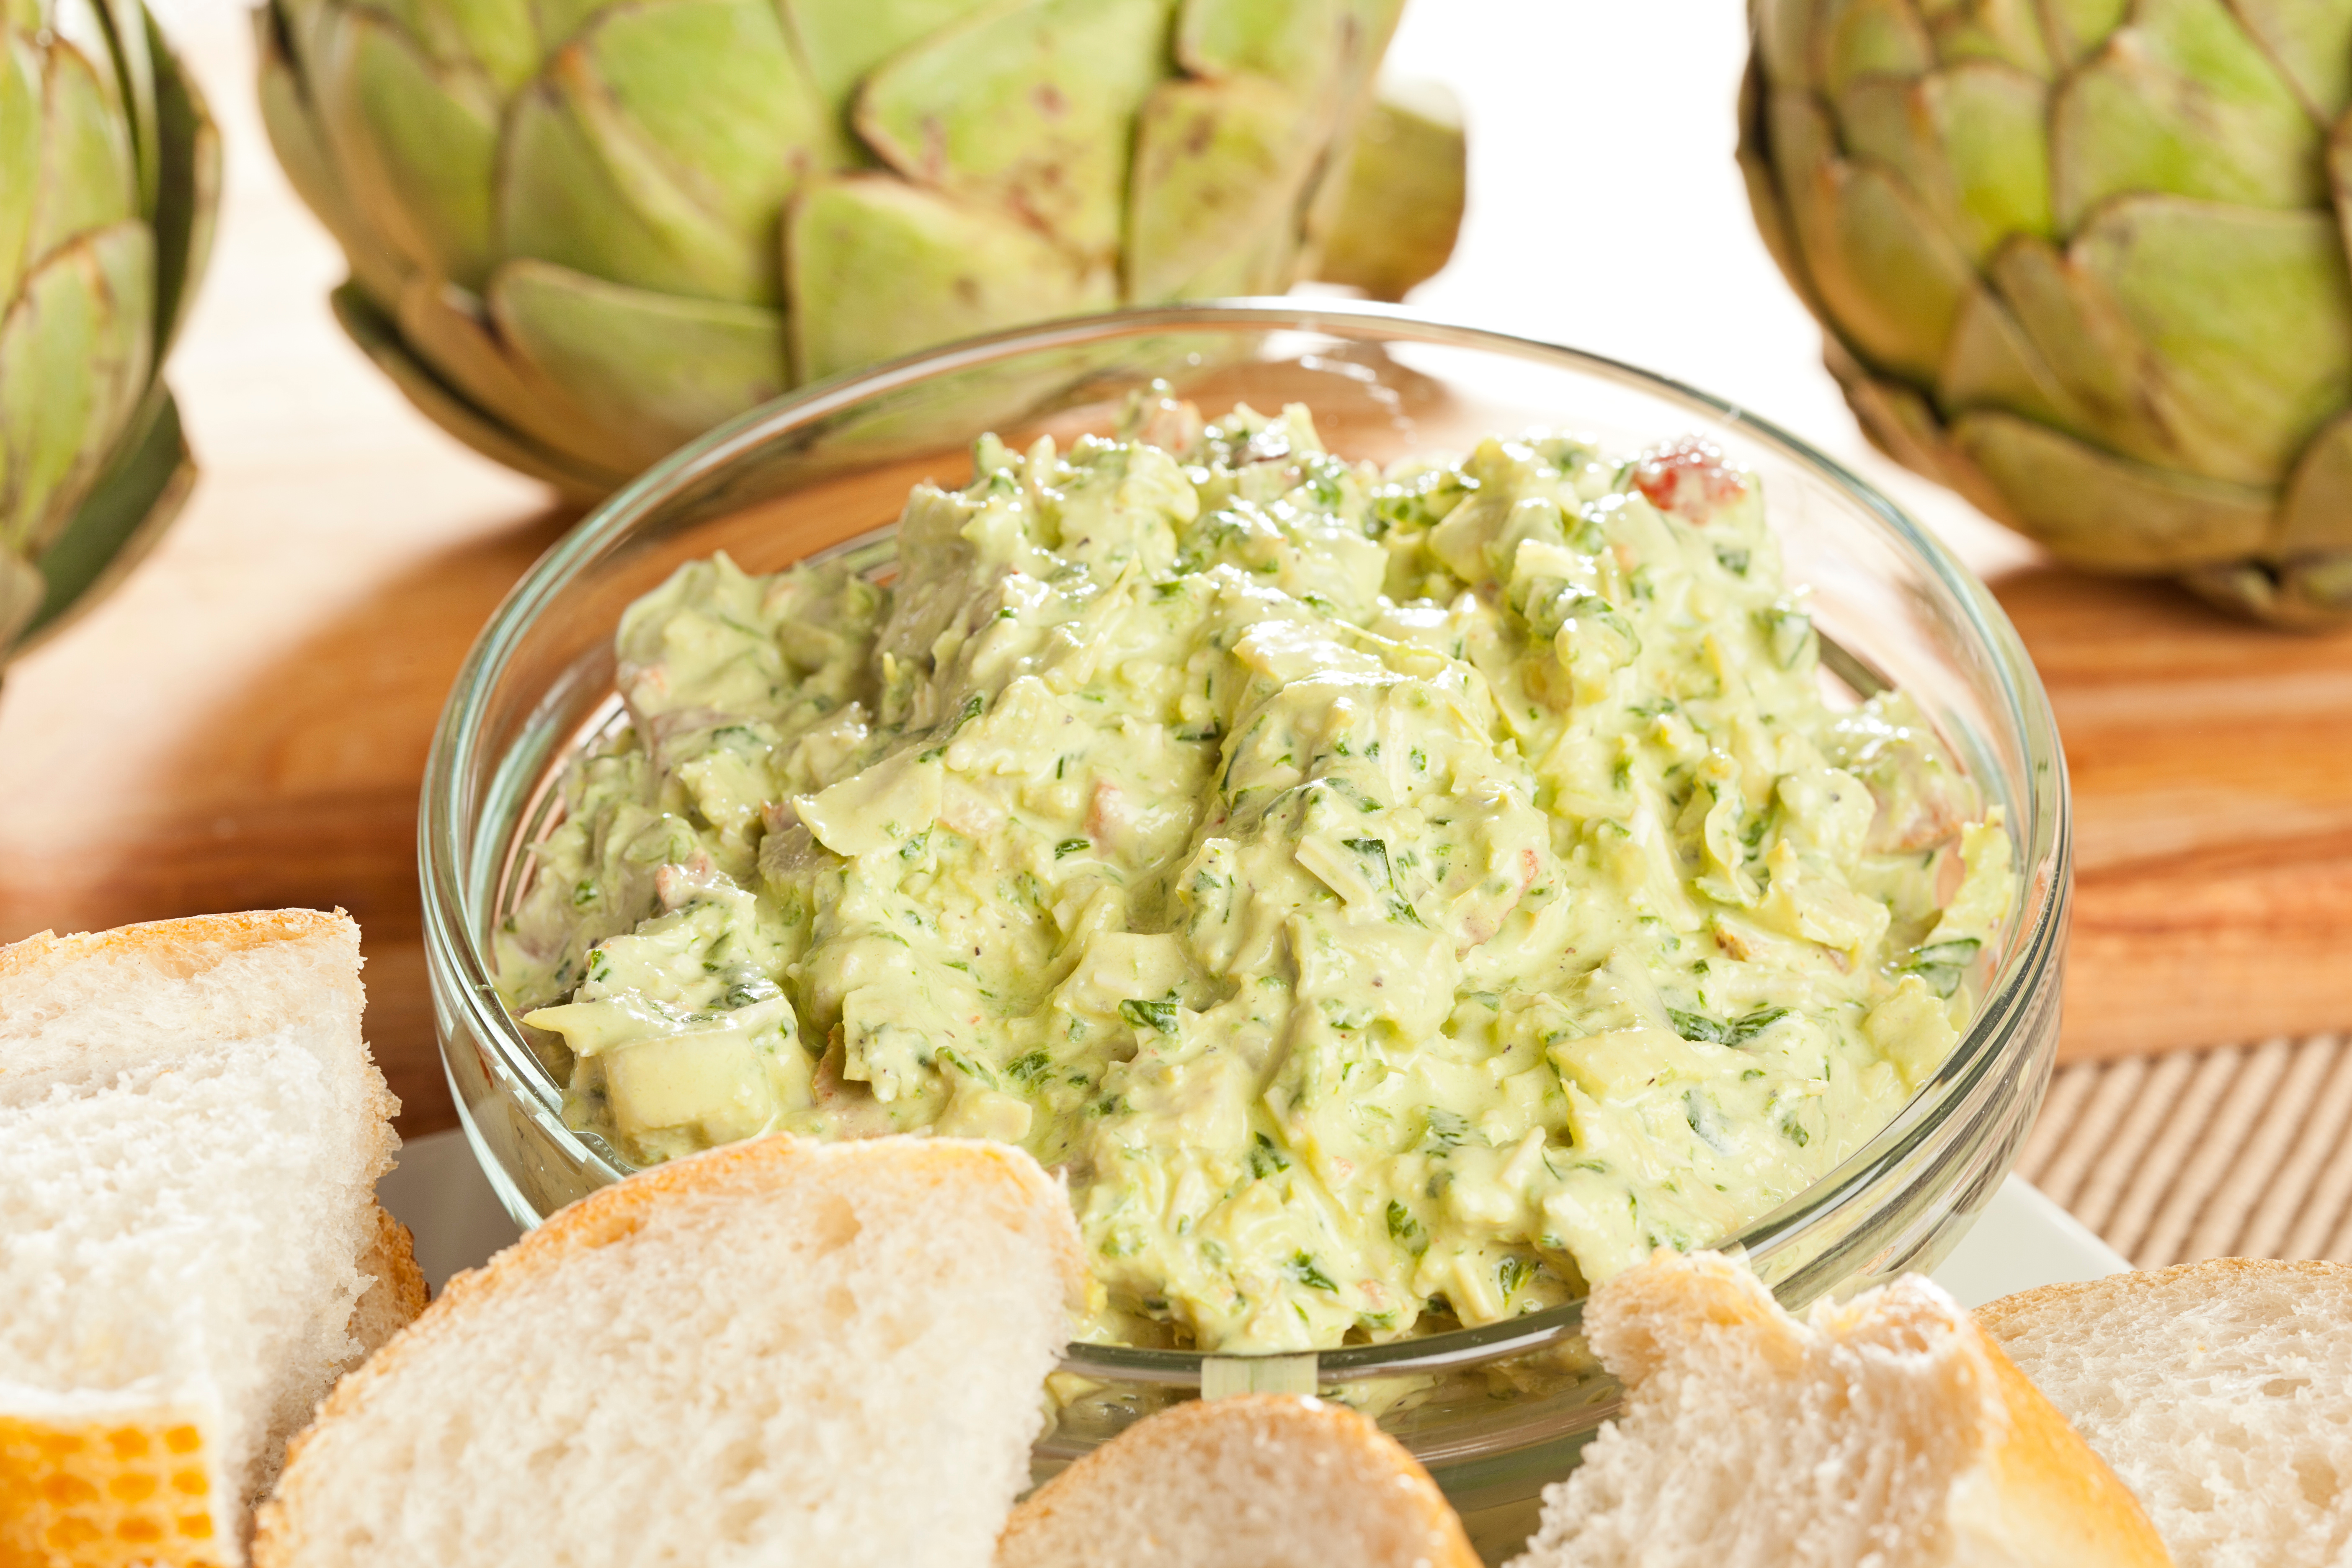
Saturday Dinner – I made this broccoli casserole which was quite good although next time I think I would lighten up on the cheese (great idea to have a casserole that is both vegetable and starch for a crowd). Mr SB had smoked some pulled pork. We had salad, cheese and birthday cake. Appetizers included my famous buffalo dip with a charcuterie board.

Sunday Breakfast – Costco croissants, bread, coffee, yogurts, fresh fruit

Sunday Lunch – leftover pork, salad, casserole, cookies.

Christmas Eve we head to my sister’s for a wonderful dinner. Christmas Eve during the day I cook everything for Christmas. This year our menu included:

Christmas Day – Breakfast casserole (a favorite!). I make the ham and cheese hashbrown casserole – everyone loves it. Could not be easier! For lunch I buy sliced ham, cheese and bread – everyone makes their own sandwich as Christmas dinner is underway!

This year’s Christmas dinner menu:

Appetizers: Smoked Whitefish Pate and Crackers, Duck Pate with Truffles, Charcuterie board with assorted cheese and meat. Baked Brie. Note to self – put more appetizers in the living room near the bar.

Christmas salad – greens with citrus champagne vinaigrette, oranges, pomegranate seeds and goat cheese.

Main: Smoked Brisket (Mr. SB’s special recipe) and Glazed Ham.

Mashed Potatoes (Costco – loaded and regular Yukon Gold)

Smoky Sweet Carrots with Yogurt Sauce.

Crispy Brussel Sprouts in the air fryer

Green Beans – steamed lightly and then roasted.

Assorted desserts – cake, cookies.

Everything was delicious and we had such a wonderful holiday.

So here’s to 2024!

Peach Cobbler with a Hot Sugar Crust

Hi there! How is your summer going? Ours has been a busy one, and fortunately the weather finally turned in CT so we have had some gorgeous weekends. This past week end was pretty close to perfect and a great one to try a recipe I have had my eye on for a few weeks – peach cobbler with a hot sugar crust. I honestly think this is one of the best recipes I have made in a very long time.

This method brings out a crackly sugar crust yet a tender inside to the topping. The fruit just has a bit of lemon and a tiny bit of sugar (which you may not need depending on the fruit you use. I adapted the recipe from chef Renee Erickson’s version and had read about it in the 5 Star Weekend by Elin Hildebrand (she is a great food writer too!). If you have read my blog you know I am partial to fruit desserts – my apple crisp is on repeat all fall, and the blueberry bars are too during the summer. This recipe for peach cobbler with a hot sugar crust will be added to that list!

Ingredients for Peach Cobbler with a Hot Sugar Crust

In addition to spectacular results, I also really liked that the ingredient list was simple. Flour, butter, milk and sugar with some baking powder and a bit of salt. The filling is lemon juice, peaches and a tablespoon of sugar. I also added some blueberries and a plum I had that was not going to keep for much longer in a second batch. I made two dishes in 8 by 8 pans. I made the fruit cobbler in the morning and then heated it up right before dinner after we had been at our club all day. I served it warm with Turkey Hill’s Cookie Butter Ice cream on the side. It was delectable! So here is my version of Peach Cobbler with a Hot Sugar Crust.

Peach cobbler with a hot sugar crust

Peach Cobbler with a Hot Sugar Crust

A crackly sugar crust forms over a tender topping and a mass of juicy peaches. The taste of summer!
Print Pin
Course: Dessert
Cuisine: American
Keyword: Dessert
Prep Time: 30 minutes
Cook Time: 1 hour
Servings: 10
Cost: $10

Equipment

  • Stand or electric mixer

Ingredients

  • 6 to 7 large ripe peaches or a mix of plums, blueberries and peaches
  • 1 lemon
  • 1/2 cup unsalted butter softened
  • 2 cups granulated sugar
  • 1 1/2 cups all-purpose flour
  • 2 teaspoons baking powder
  • 1 teaspoon kosher salt
  • 3/4 cup whole milk
  • 1/2 cup hot water
  • Ice cream for serving (if you can find cookie butter flavor I highly recommend!)

Instructions

  • Heat the oven to 375°F with rack in the center. Line a large rimmed baking sheet with aluminum foil.
  • Arrange the peaches in a 9 by 13-inch or two 8 by 8 baking pans.
  • Cut the lemon in half and squeeze lemon juice over the top. If your peaches and/or fruit is not at ideal sweetness – sprinkle an extra tablespoon of sugar over the fruit.
  • In a stand mixer fitted with the paddle attachment, cream the butter and 1 1/2 cups of sugar on medium speed until creamy but still crumbly, about 1 minute. Add the flour, baking powder, and salt and beat on medium speed until all the flour is mixed in and the mixture is evenly crumbly, about 30 seconds more. Scrape down the sides of the bowl. With the mixer on low speed, slowly pour in the milk. Increase the speed to medium and beat until the batter is light and fluffy, about 2 minutes.
  • Scoop the batter in about 6 large blobs over the peaches. With the back of a big spoon, carefully spread the batter evenly over the fruit so it’s no more than about 1/2 inch thick in any one place.
  • Sprinkle the remaining 1/2 cup sugar over the batter. Drizzle the hot water evenly over the sugar, using it to melt the sugar topping. Trust me – this part seems counter intuitive…just go with it!
  • Set the pan on the foil-lined baking sheet and bake the cobbler until the top is golden brown and cracked about an hour. A toothpick stuck in the topping should come out clean or with just crumbs clinging—be sure to check in a few places.
  • Let the cobbler cool for about 30 minutes to firm up (if you can wait that long!).
  • Enjoy!

Favorite Frosted Lemon Tart or Bars

Summer is in full swing around here (finally) after a rainy start. We are taking the good days when they come! Two fun meals most recently included Mr. SB’s birthday dinner held at our club on the shore as well as my book group (held on our deck and dining room as thunderstorms made it impossible to have at the shore club).

Shore Menu (including lemon tart for the birthday dessert)

Last Sunday was a hot one on the shore. I was on Race Committee for the club and after a long day on the water was looking forward to a yummy dinner and at Mr. SB’s request, I had made his favorite lemon tart. As usually he loves cheesecake and is a picky French guy – a special request for lemon tart means something!

Our friends joined us for both happy hour and a dinner of teriyaki salmon on a cedar plank, caprese salad with fresh basil from my garden, mediterranean pasta salad and the tart! Good club friends stopped in spontaneously and let’s just say you know you are having fun when the club staff tell you they are closing soon and it is time to pack up!

Book Group Menu (including lemon bars)

I made two tarts actually – as this recipe works so well in bar form too – I made one in an 8 by 8 pan. My book group came over on Wednesday so I made the bars and tart on Saturday and froze the bars but did not frost them. They came out great. As we had been planning on going to the shore the rest of the menu was picnic food – but worked well for a summer book group menu. Will make these again – here is the easy make ahead menu.

Charcuterie board with prosciutto, salami, Boursin, dried apricots, nuts and grapes (enjoyed on the deck before a rain storm)

Toasted Israeli cous cous with grilled vegetables

Grilled lemon pepper chicken

Lemon bars and brownies for dessert

Super easy to make ahead and delicious! Here is the recipe for Mr. SB’s favorite frosted lemon tart or bars. Enjoy!

Frosted lemon tart

Frosted Lemon Tart or Bars

Tangy, creamy filling topped with a tart, sweet frosting. Easy to make and with ingredients that can be stored easily (so usually on hand!). Mr. SB requests it for his birthday! I have also made this for book group and two dinner parties. It comes out perfect every time.
Prep Time: 1 hour
Cook Time: 40 minutes
Course: Dessert
Cuisine: French
Keyword: Citrus, Dessert bars, Fruit dessert, Lemon
Servings: 8
Cost: $3

Equipment

  • 1 Tart pan
  • 1 8 by 8 pan

Ingredients

Crust

  • 1 cup Unbleached, all purpose flour
  • 8 tbsp Unsalted butter at room temperature (1 stick)
  • 1/4 cup Confectioners sugar

Filling

  • 1 cup Granulated white sugar
  • 2 Large eggs
  • 2 tbsp Unbleached, all purpose flour
  • 1/2 tsp Baking powder
  • 3 tbsp Freshly squeezed lemon juice
  • 1 tbsp Freshly grated lemon zest

Frosting

  • 2 1/2 tbsp Unsalted butter at room temperature
  • 1 1/2 cups Confectioners sugar
  • 1 tbsp Lemon juice
  • 1 tbsp Freshly grated lemon to sprinkle on top

Instructions

  • Preheat oven to 350 degrees and place a rack in the center of your oven
  • For the tart or bar crust – combine 8 tbsp of butter 1 cup of flour, and 1/4 cup of confectioners sugar with a fork or pastry blender (I prefer the latter) until the flour is absorbed into the butter in a course mixture. Take the mixture and put it into your bar or tart pan. Press it down to an even layer. I like to use a ramekin to press it down. Bake until the crust is a light brown. Watch it carefully after about ten minutes (it will take between 10 to 16/17 minutes).
  • Make your filling by whisking together the eggs, granulated sugar, 2 tbsp of flour, baking powder, 3 tbsp of lemon juice and the lemon zest until combined. Pour over the partly baked crust and continue baking until the filling is firm, about 25 minutes or so. Let the tart or bars cobol completely before frosting. If freezing (and this recipe freezes really well), do not frost.
  • For beat the frosting – beat 2 1/2 tbsp of butter with 1 1/2 cups of confectioners sugar until smooth. Add the lemon juice until the frosting is at a good spreading consistency.
  • Spread icing over the bars once completely cooled (or if you freeze ahead of time, remove from freezer and let thaw). Sprinkle lemon zest on top. Let sit for at least an hour before cutting into squares or slices of tart. Enjoy!
Tried this recipe?Let us know how it was!

Christmas Tree Reveal (and a catch up!)

Hi there!

Well, the weeks fly by, and it is hard to believe it almost mid-December. Today, it is a holiday catch up (and catch up in general). Let’s talk Christmas trees, holiday decorating and food!

Christmas Tree Tailgate

Are you a faux tree devotee or an all-natural tree lover? Not surprisingly we are all in on the natural tree that we actually cut down at a tree farm. We love the atmosphere of tailgating families, hayrides and an adorable holiday village and stores (all at Maple Row Tree Farm in Easton, CT). We like to support thelocal farm (they replant the trees of course).

We also love to tailgate with friends. Every year we always include some favorite menu items – Mr. SB’s sliders with caper mayo and my ever famous buffalo dip. Mimosas are usually the drink of choice. It may just be my favorite day of the year. It is one of the happiest places I have ever experienced!

I adore the smell of fresh pine and the traditional look of it all. However, when I lived in California, I remember thinking a natural tree would not really be my desired look – the warm weather threw me off. However, in a colonial town in CT, it is perfect.

Years ago, my girls decided they wanted colored lights which I happily obliged. But a few years ago, we all agreed that we wanted an all-white light tree. I love how it coordinates with our family room and it fits the many ornaments we have so much better than multicolored. I usually start with the lights and then wrap gold ribbon around the tree for a garland. Our angel goes on top and then the girls and I decorate with the rest of the ornaments – some are over one hundred years old and passed down from my grandparents! I love to collect ornaments from places we have been.

Wrapped presents for under the Christmas tree

I love to wrap presents (see an entire post about it here). A great tip gathered from my favorite mom blogs is to buy some coordinating wrapping paper. I tend to do gold and white with a few accents of dark green. Too much red does not work in my color scheme. Homegoods has beautiful, thick wrapping paper. It is such high-quality that I usually even reuse it the next year for the larger gifts!

I also collect ribbons and ornaments to decorate the packages. Costco, Christmas Tree Shops and TJ Maxx/Homegoods all have beautiful, wired ribbon.

This year’s house decor will follow previous years for the most part. I did buy a new front door mat – has more of a winter theme then holiday so I think we can leave it out until Spring. I used magnolias on my mantle and layered on some decorative elements just like last year.

I purchased this funny sign and plan to put it on the bar for Christmas day when we host 16 for dinner and cocktails beforehand. I have a Santa too that will go right next to it:)

This year’s Christmas dinner menu

This past weekend we hosted friends for dinner. First, we hiked nearby to work up a good appetite. Then back to our house for appetizers and drinks and then dinner. Mr SB made short ribs braised in red wine I made twice baked potatoes (but left out the bacon in the Pioneer Woman recipe and used light sour cream and less butter), smokey sweet carrots (hope to post that recipe soon) and steamed green beans. Delicious, winter meal! My friend brought a delicious apple crisp. It was a perfect night to enjoy the fire and chat afterwards.

We usually host Christmas dinner, so we have a list of favorites that we usually make. This year is no different – here is what I am planning (as of now) –

Glazed ham

Brisket (smoked on Mr. SB’s big green egg)

Seared mushrooms in sherry cream sauce with dill

Mashed potatoes (thanks to Costco just heat, serve and put in a pretty bowl)

Green beans

Tian with zucchini, tomatoes, onions and goat cheese

Smokey sweet carrots (recipe to come!)

Dessert – still thinking about it. Likely assorted holiday cookies and possibly a chocolate cake.

Well that about sums up what has been going on at the SB house. Hoping your holiday season is going well! What are you planning to make the season festive?

Trader Joe’s Mixed Seafood Lemony Alfredo (Hack)

Hi there!

Truth – I wrote this post weeks ago. Just posting now. A few tech issues and too much going on…but happy to share what I made that weekend and wanted to share – Trader Joe’s Mixed Seafood Alfredo (Hack Recipe). By the way, if you have not listened to the Trader Joe’s podcast that features their hacks you are missing something…but I digress.

Also for a bit more recent goings on – we have had a fun but busy fall. Both girls are in college so we have been visiting. CG2 is in the Boston area and there have been so many fun tailgates. CG1 is in Vermont and well, fall in Vermont can not be beat. Trips to the farmer’s market, hiking and soaking in the wonderful New England atmosphere made the weekend perfect. Thanksgiving is around the corner – tonight I am making homemade stock and starting to plan (see my post from last year). My one major tip is to make the stock ahead of time! It freezes beautifully and you will be so happy you do! Something about having to make stock and then do all that cooking takes some of the joy out of preparing the meal. Happy late fall and now –

Here is the post from September.

We had such a nice restful weekend that I was able to do a bit of cooking. We have been tailgating up a storm lately making favorites such as sliders and buffalo dip. These travels to see our girls in college have involved traveling too. With piles of laundry everywhere and a garden in need of some love, it was time to stay put. While I did have time to cook some more elaborate meals, I also whipped up this super easy Trader Joe’s hack – Trader Joe’s Mixed Seafood Alfredo (hack recipe alert!).

All you need is a bag of frozen mixed seafood from Trader Joes, a jar of alfredo sauce, half a lemon, some dry white wine (optional) and some dried tarragon. It is hardly a recipe! But here goes read on for Mixed Seafood with Lemony Alfredo Sauce!

Trader Joe’s Frozen Mixed Seafood Lemony Alfredo Pasta

It does not get any easier than this…tasty seafood that you cook quickly from frozen with a creamy, lemony alfredo sauce. Easy and delicious!
Course Main Course
Cuisine Italian
Keyword easy, Pasta, seafood, Trader Joes
Prep Time 10 minutes
Cook Time 10 minutes

Ingredients

  • 1 Bag Trader Joes Mixed Seafood (frozen) There are other brands too but Trader Joes is the one I used for this recipe
  • 1 Jar of Alfredo Sauce I used Trader Joes but you can use any supermarket brand
  • 1/2 Lemon
  • 1 tsp Dried Tarragon

Instructions

  • Sauté mixed seafood in a wide frying pan. Add in a bit of white wine if using. Once cooked add the alfredo sauce. Simmer until nicely warmed through. Sprinkle tarragon and add in fresh lemon juice at the end. Serve over pasta, with a loaf of bread and salad for a delicious, super easy meal!

Zucchini Tomato Goat Cheese Provençal Tian

Summer flew by! We happily hosted friends all summer long at our club on the shore as well as at home. As I mentioned a few posts ago, Life is Meals right? My trusty blue journal has been filling up with this summer’s favorite menus. I noticed the other day, that more than a few meals had a favorite side dish – zucchini, tomato, goat cheese Provençal tian.

The dish is actually a tian, which is a French dish and really refers to the type of cookware. The main ingredients for this version are zucchini, tomato, onions, goat cheese on a bed of white rice drizzled with olive oil and a balsamic glaze. I also add in a generous handful of fresh, chopped thyme and some dried herbs de Provence.

It is a perfect side dish in the summer with zucchini and tomatoes being at their peak. That said, this dish has also graced my Christmas dinner table too. Even winter zucchini and tomatoes are still tasty prepared this way. The green and red of the dish are festive too. I also love how it is both a vegetable and starch which makes meal planning much easier.

Recipe to follow but let’s talk favorite summer menus first.

Menu #1 Short Ribs, Zucchini Tomato Goat Cheese Provencal Tian

A rundown of our weekends and favorite menus of course –

Late June, good friends of ours from business school made the trip to see us. They are also a couple comprised of a French husband and American wife so we have lots in common. J and Mr. SB are also excellent cooks and in fact J passed along the wonders of sous-vide cooking last year with some delectable lamb chops.

Mr. SB was not to be outdone so this menu features his sous-vide short ribs which are finished on the grill. I served a green salad, the zucchini, tomato goat cheese Provençal tian and this blueberry crisp with a side of vanilla ice cream. Note on the blueberry crisp I would not use as much flour as is called for in the recipe. It was a most memorable meal (in spite of the copious amounts of French Bordeaux we drank with it:)

Saturday arrived with picture perfect weather. Blueberry muffins, fresh orange juice, coffee and eggs were on the menu for breakfast. Dinner that evening included an appetizer of fresh clams and oysters (dug up by J and Mr. SB). The main course was salmon grilled on a cedar plank, grilled zucchini and eggplant, pasta salad. For dessert, well of course we had s’mores at the fire pit while we watched the sunset.

Menu #2 Zucchini Tomato Goat Cheese Provençal Tian

A few weeks later good friends arrived from London. Mr. SB once again decided to cook sous-vide this time, lamb loins. Lamb (and really any meat goes well with this dish), tian Provençal and salad. I also made this peach crisp which was delicious (the pecans really add to the flavor).

Peach crisp with a crunchy, pecan topping

Breakfast once again included: the famous Jordan Marsh blueberry muffins, along with zucchini bread, fresh orange juice, fruit salad and plenty of coffee and tea.

For dinner we headed to the shore for drinks and I made up a charcuterie board. Mr SB once again made his salmon. I made my adaptation of toasted Israeli couscous with grilled vegetables, farm tomatoes with garden basil and fresh mozzarella. For dessert we had the amazing crispy, chewy chocolate chip cookies.

Zucchini Tomato Goat Cheese Provençal Tian Recipe

So enough about meals (or can there ever be enough?) and onto the tian. Years ago, we visited my in-laws, and I first tried Zucchini Tomato Goat Cheese Provencal Tian. The creamy goat cheese, sweet tomatoes and fresh zucchini and onions came together so perfectly. My sister-in-law gave me the magazine copy – it was from a French magazine (which I have since lost and forgotten the magazine name).

Through the years I have adapted it. Their version had the vegetables cooking together and as zucchini takes far less time than onions, there were a number of times when the zucchini was overcooked. She also shared a trick, take a knife to spread the goat cheese onto the zucchini coins. It is much easier than trying to cut goat cheese into slices.

I also shorten the recipe by occasionally using store bought balsamic glaze. If you are a purist (or don’t have glaze on hand), then you can boil down some balsamic vinegar for that part. I also love garlic olive oil, and I use that to coat my dish. As for the dish, I have an Emile Henry 4 quart casserole dish with a cover. You can use any 4 quart dish frankly although I do recommend a cover for part of the cooking.

So here is the recipe. Also, as it is always eaten so quickly, my photo is a “before” I put it in the oven…will try to add the cooked version at a later date!

Zucchini, Tomato, Onion, Goat Cheese Casserole (Tian)

Summer's favorite vegetables, assembled easily with crumbled goat cheese, fresh herbs on a bed of rice. Perfect accompaniment to any meal (and any season!).
Course Side Dish
Cuisine French
Keyword French, Goat Cheese, Provencale, Side Dish, Tomato, Zucchini
Prep Time 30 minutes
Cook Time 40 minutes
Servings 6
Cost $8

Equipment

  • 1 4 quart dish suitable for baking

Ingredients

  • 4 medium zucchini or 2 large
  • 4 to matoes
  • 1 large onion or 2 small
  • 1 log of soft goat cheese Costco has an excellent one that comes in a two pack
  • 15 cl de vinaigre balsamique
  • White rice – enough to cover the base of your casserole about 2 cups
  • 1 clove of garlic
  • 1 teaspoon or more of chopped thyme
  • Herbs de Provence to taste
  • Extra virgin olive oil
  • Salt and pepper
  • Balsamic glaze

Instructions

  • Preheat oven to 350
  • Wash all vegetables and dry. Slice zucchini into 1/4 inch or so coins. Spread goat cheese on top. Slice tomatoes and onions. Put onions in microwave for a minute or two until starting to cook (they should not be fully cooked as you will cook them some more in the oven).
  • Grease casserole with olive oil. Run a sliced garlic clove around greased sides and bottom or use garlic olive oil.
  • Spread rice on bottom of casserole. Layer zucchini, goat cheese, tomato, goat cheese, onion on top. I like to layer so it looks pretty. Sprinkle chopped fresh thyme on top. Sprinkle herbs de provence on top too.
  • Bake covered for a half hour. Uncover and bake some more until vegetables are fork tender.
  • Serve with your favorite main dish. Enjoy!

The Real Jordan Marsh Blueberry Muffin Recipe

If you read my last post you know that for me, memories, places and food have always gone hand in hand. Many years ago, I visited a friend’s home on Wellfleet, Cape Cod for the weekend. After making the long trip from Boston (complete with bumper-to-bumper traffic), we awoke to a brilliant, blue-sky Saturday. This house had a panoramic view of the Atlantic Ocean. Breakfast, served on the deck, was comprised of some good strong coffee, freshly scrambled eggs, sausage and the most delicious blueberry muffins. My hostess shared that the recipe was supposedly based upon the legendary Jordan Marsh blueberry muffin recipe. The “secret” was the addition of mashed up blueberries to the batter.

Maybe it was the sea air, the in-season, local blueberries or maybe it really was the recipe. Fast forward many years, and I have recently found myself on a hunt to know all about these amazing muffins named after the now closed, but once famed Jordan Marsh department store.

What is Jordan Marsh?

Jordan Marsh was a department store, founded in 1841, with a flagship in Boston’s downtown crossing. The store is deeply engrained in my memory. My aunt Mae always bought my Christmas present from “Jordans” when I was a kid. Usually, the gift was a very high-quality wool skirt and matching Shetland sweater (both in a size or two too big with the idea I could grow into it:).

Occasionally my sisters, mom and I would venture into Boston to shop Filenes Basement as well as Jordans. Jordans sadly closed in the early nineties. But the lore of one of the first American department stores and those muffins lives on today.

The legendary Jordan Marsh blueberry muffin recipe was once a coveted and secret recipe. Now there are variations all around the web and dozens of other muffin recipes of course. In fact, I recently made some fresh blueberry muffins for friends joining us for the weekend.

My muffin was well received. My friend bit into the home- made muffin and affirmed that a real blueberry muffin tastes sooo good. Homemade is nothing like the overly sweet, often greasy, tinny, minimal on the blueberries sort of muffin you tend to find at the supermarket.

While my muffin was very good, it was not “twenty years later I still remember it while looking out at the Atlantic Ocean good.” I recalled how so many years ago my friend had said that the mashed blueberries made all of the difference. But there had to be more, so I decided to do some research.

Secrets from the original Jordan Marsh baker

First, the baker, John Pupek, who originally created the recipe was interviewed on TV! John explains, that yes, you want to mash up some of the blueberries. You also use a blend of flours – one is pastry flour (I found the Bob’s brand on Amazon). The interview also indicates that John likely used shortening instead of butter (or maybe a blend). I could not personally bring myself to use shortening knowing all of the adverse health effects. A good sprinkle of sugar on top gives it a crunchy dome as well.

So here is what I think is pretty close to the real Jordan Marsh blueberry muffin recipe. Grab a cup of your favorite tea or coffee, spread with some good butter and enjoy!

The Real Jordan Marsh Blueberry Muffin Recipe

The legendary Jordan Marsh blueberry muffins were a treat for many Bostonians visiting downtown crossing. The recipe was a secret for years. SB researched just what made those muffins so good (hint it is more than mashed blueberries). Read on for the recipe and a bit of history.
Course Breakfast, Snack
Cuisine American
Keyword Blueberries, Breakfast, Muffin, Quick Bread
Prep Time 20 minutes
Cook Time 30 minutes
Servings 12
Cost $7

Equipment

  • 1 Stand or electric mixer This recipe is very easy with a stand mixer outfitted with the paddle attachment. You can use an electric hand mixer if you don't have a stand version

Ingredients

  • 8 Tablespoons unsalted butter room temperature
  • 1 cup granulated sugar plus extra for topping
  • 2 extra large eggs John Pupek refers to fortified eggs. These could be Eggland’s Best. I used farm fresh eggs instead and the muffins came out perfectly
  • 2 teaspoons pure vanilla extract
  • cup bread flour spoon and leveled (substitute with all-purpose flour if not available)
  • ¾ cup pastry flour spooned and leveled (substitute with cake flour if not available)
  • 2 teaspoons baking powder
  • ½ teaspoon salt
  • ½ cup whole milk
  • 2 ½ cups fresh blueberries divided
  • 2 Tablespoons flour used to coat 2 cups of blueberries (can be any flour)

Instructions

  • Preheat oven to 400°F, position oven rack in the center. Spray a muffin tin with non stick spray including the top of the pan. Line with muffin paper liners (due to blueberries, these muffins can stick to the pan)
  • In a stand-alone mixer fitted with a paddle attachment, cream butter (if you don’t have a stand mixer, you can use an electric hand mixer). With the mixer on low, gradually add 1 cup granulated sugar. Scrape the sides down then beat on medium speed until light and fluffy, about 5-7 minutes.
  • Gradually add the eggs, one at a time, and beat until blended. Add the vanilla extract. Beat for a few minutes on medium until light and fluffy.
  • Spoon and level 1¼ cups of bread flour (substitute all-purpose flour) and ¾ cup cake flour (substitute pastry flour), 2 teaspoons baking power and ½ teaspoon of kosher salt. Sift together over a mixing bowl and whisk to combine all the ingredients.
    Jordan marsh blueberry muffins
  • Add the dry and wet ingredients to the creamed mixture alternating between flour and milk, starting and ending with flour and scraping down the sides as you go. Beat on low just to combined. Don’t over mix (or you will have tough chewy muffins)
  • Remove the mixing bowl from the stand-alone mixer and scrape off any batter from the paddle attachment.
  • In a small bowl, mash ½ cup of blueberries. Fold into the batter with a spatula. In a separate bowl, coat and toss whole blueberries with 2 Tablespoons of flour and fold into the batter.
  • Generously fill each muffin cup to the top. Sprinkle a teaspoon or so of granulated sugar over each muffin.
  • Note: I used 1 teaspoon of sugar as a measuring unit, but in the original recipe, enough sugar was spread over the top to completely cover.
  • Bake at 400°F for 5 minutes. Lower temperature to 375 and bake for another 20. Muffins may need another five minutes for a total of 30 minutes. Tops should be lightly golden.
  • Insert a toothpick to test for doneness. If it comes out clean, remove the muffins from the oven and allow to cool in the pan for about 30 minutes.
  • Remove and finish cooling on wire rack.
  • For me the best way to eat these is right out of the oven with some good quality butter. Enjoy!
    Jordan Marsh Blueberry Muffin Recipe

Summer Menus and Musings

Life Is Meals is one of my favorite books. Penned by James and Kay Salter, this delightful book, given to me by a dear friend years ago, takes you through meals and musings from a year of cooking. It really hit home the summer I read it, as I could not enjoy my own summer menus.

Why? Well, I read it during a rough patch when both my husband and I found ourselves out of work during the Great Recession. I took a consulting job in Chicago that summer to tide us over financially. I commuted every week for three months – leaving my first grader and four-year old at home with my husband who was diligently looking for a new job. Up at 3 a.m. Monday to catch a flight, and back at 11 Friday. Home never felt so good those weekends back in CT. I was thankful for Skype too (but a poor substitute to four- and six-year-old hugs).

All I wanted to do was get back to my normal life and this book, which I read on the plane over a few weeks underscored how important my family’s home cooked meals were to my very soul. I was staying in a chain hotel with a poor excuse for a kitchen. Meals were usually pasta with butter and cheese and maybe a salad – or it was take-out.

The good news was that the assignment was only three months, and I returned appreciating our usual routine and all of the delightful summer menus that usually grace our table. Additionally, I took up my own habit of writing down memorable menus in a blue journal. This summer has been particularly fruitful so today’s post I am sharing our latest summer menu (also to be written down in my trusty blue journal).

Clambake and An Easy Dip

This past weekend included the annual clambake at our beach/boat club. It was steamy hot, and I found the perfect (budget friendly Target:) long sundress (the thought of anything form fitting was not going to work) plus lots of room with the maxi skirt for a good meal! Front view below (side view above). Paired with flip flops and my favorite straw hat…this may be a perfect outfit to enjoy a favorite summer menu.

Waiting for the boat launch…and looking forward to lobster! Maxi dress from Target

If you have not had a traditional clambake, you must try it! A summer menu of fresh lobster, quahogs (or steamer clams), mussels, corn on the cob and small red potatoes is the main. Of course, you must have a healthy dose of good quality, melted butter to dip (or drench). In our case, we enjoyed this perfect meal on the beach. Lobster is really best eaten outside, spread out on a picnic table and preferably with a view of the ocean.

Summer menu drinks and appetizers

Friends mixed up fresh margaritas (deadly). Mr SB decided to pick some fresh mint from our garden and whip up mojitos. Of course, we indulged with chips and freshly made guacamole (a must with margaritas right?). I also was looking for something easy to put with some crudité. Traditional clambakes are usually short on vegetables. Slaw in mayo is not my idea of a good fresh veggie option.

Smitten Kitchen is a favorite blog of mine and Deb’s red pepper white bean dip was perfect. I also loved that similar to my very simple artichoke dip (my go to for winter entertaining), I usually have all of the ingredients on hand. The dip uses a can of white beans, a jar of red peppers, lemon and a dab of cream cheese). I tweaked it a bit by adding some Tuscan seasoning from Saratoga Olive Oil and a healthy dose of chives from the garden. I served it in this cute boat bowl (a Homegoods find:).

White bean and roasted red pepper dip
White bean and red pepper dip with Tuscan seasoning served up in a boat for a cute touch

A well thought out charcuterie board is always welcome too. So easy to assemble and perfect with mixed drinks…good to have something a bit more substantial to snack on! Costco is my go-to store for the meat and cheese. I keep Carrs crackers on hand as well as dried fruit and nuts. You can see my version for the clambake above and another below served with friends on our deck.

Top off the evening around the fire pit with traditional s’mores. Don’t try to improve the s’more recipe as they are perfect in their original form.

Is there a better summer menu? And with this view, and some good friends, summer is sweet.
Sunset over Long Island Sound

Fresh Corn Salad with Lime Vinaigrette

Summer is in full swing, and we have been making the most of our beach club on the CT shore. Every weekend we eat dinner there (weather permitting) and this past weekend was no exception. We have had a steady stream of guests too, so I have wanted to mix up the sides from the usual pasta salad. Mr. SB tends to grill (this past weekend it was his famous ribs recipe) so sides are my thing…it is not quite corn season here, but I was able to find some fresh corn from Georgia at Whole Foods and dove in to make fresh corn salad with lime vinaigrette.

What ingredients do I use for Fresh Corn Salad with Lime Vinaigrette?

For last week’s version I used fresh corn (of course but you could use canned or even frozen), tomatoes, cilantro, red onion, chives and black beans. This recipe is super versatile though so you could add some red or green peppers, scallions and mix up the spices too – parsley would work just fine.

The lime vinaigrette is also so easy to make. I used a very mild olive oil (avocado would work well too), fresh lime juice, garlic, some white wine vinegar, salt and some chili powder. If you have access to a Trader Joes I love their chili lime spice (available online too), and have used that too in both the salad and the vinaigrette.

What does the salad go well with?

Most summer fare would work with this salad. We ate it one night with some burgers and then again at our fourth of July celebration. I have been known to put some tortilla chips out and serve it as a dip. It is also delicious as a salad topper. The flavors are the taste of summer!

Fresh Corn Salad with Lime Vinaigrette

Fresh Corn Salad with Lime Vinaigrette tastes like summer! Fresh corn combined with ripe tomatoes, fresh cilantro, black beans, and a hint of red onion with a zesty, lime dressing makes a perfect side for ribs or whatever you are grilling.
Course Side Dish
Cuisine American
Keyword Sides
Prep Time 20 minutes
Cook Time 5 minutes
Servings 6 people
Cost $5

Ingredients

  • Corn Salad
  • 5 ears of corn shucked and steamed or boiled.
  • 1 red pepper cut in small dice
  • 1 cup grape or cherry tomatoes halved
  • 1/2 cup chopped cilantro or to taste
  • 1 can of black beans drained and rinsed
  • 1/4 cup chopped red onion
  • Lime Vinaigrette
  • Fresh lime juice from one lime or to taste
  • ¼ cup of white wine vinegar
  • ¾ cup of mild tasting olive oil
  • 1/8 teaspoon of cayenne pepper
  • 1 teaspoon garlic salt
  • 1 teaspoon of sugar or honey
  • 2 teaspoons of Trader Joe’s chili lime spice mix or 1 teaspoon of chili powder if not available

Instructions

  • Instructions
  • In small bowl whisk lime juice, honey (or sugar), ground cayenne pepper, garlic salt and chili powder or Trader Joe’s spice. Slowly drizzle in olive oil; whisking continuously.
  • Remove corn from cobs (I angle a knife to remove kernels)
  • In a large bowl and add the cooked corn, diced red peppers, grape tomato halves, cilantro, black beans and red onion. Drizzle with the lime vinaigrette and toss to coat.

Notes

If at all possible use fresh corn. Either white, yellow or bi color corn. I cook corn by putting about two inches of water on the bottom. Once it boils the corn steams. I check it after two minutes (early season corn is more tender and takes less time to cook). Then I cut it right off the cob once it cools.
• In a hurry? Make the lime vinaigrette the day before. You can also use leftover corn.
• Dice and cut your vegetables small. You want all your vegetable to complement the corn.

Simple Artichoke Dip and a Catch Up

Hi all. Not sure where winter went (although not quite done here in CT). Super busy at work but not complaining. Having a lot of fun – you know what they say when you enjoy what you do, and they pay you? #blessed. That said this poor little blog has been ignored…so today’s post is a bit of a catch up, and I am sharing what is hardly a recipe it is so easy (but so good)…Simple Artichoke Dip. It is delicious and takes all of 5 minutes to mix up and another 15 or so to cook in the oven. Read on for what may become your go-to dip for whatever entertaining you have planned.

January/February Catch Up

Winter is ski time around here and this winter was no different. We had a great time up at Mount Snow and at Stowe in Vermont. Of course, I made my famous Buffalo Chicken dip. There really is nothing better après ski! Serve with nacho or pita chips or maybe even just some thick slices of bread.

In adorable Stowe, VT, we stayed at the Green Mountain Inn. It is such a cute, historic inn complete with an outdoor heated pool and jacuzzi – nothing better after a day of skiing. Our room was spacious – it was actually two rooms and two bathrooms which worked well as we had our girls with us. We enjoyed afternoon tea and the general vibe of a cute Vermont inn on a cold, snowy day. At night we ate some yummy fondue at Swiss Fondue by Heinz. The vintage ski posters and chalet atmosphere made it a perfect place to dine. I recommend ordering the apples along with the bread to dip into the delicious Swiss fondue.

Simple Artichoke Dip

So that is the highlight of January and February…but let’s get to the good stuff – simple but delicious (as in I can’t stop eating it) artichoke dip.

Where did this begin? I seemed to recall something addictive, cheesy but full of texture that my mom made years ago. I remembered that it used a can of artichokes – yes the plain old ones that you get at any supermarket. Then you add some mayo and parmesan cheese. Mix it up. Maybe add some garlic powder and a bit of cayenne (or not). Bake it. That’s it. Sometimes life is complicated. This is not.

We went to friends for dinner this past weekend, and I made the dip. I prepared it at home but then put in a bowl and microwaved it at their home for a minute – just to reheat. Served with olives, pita chips, baby carrots and some hummus for a platter. There was nothing left. So, without further ado, here is the recipe for simple artichoke dip. It really does not get simpler or more delicious for a dip than this!

Simple Artichoke Dip

Super easy artichoke dip is made in minutes and could not be simpler to make.
Course Appetizer
Cuisine American
Keyword Appetizer
Prep Time 5 minutes
Cook Time 20 minutes
Servings 4
Cost 5

Ingredients

  • 1 cup Mayonnaise (please use full fat not light) I prefer Hellmans
  • 1 cup Parmesan cheese grated Store bought is fine. I like to add some fresh grated at the end if I have it.
  • 1 can Artichoke hearts in water

Instructions

  • Preheat oven to 375
  • Mix ingredients in a oven safe dish
  • Put in oven and bake for 20 minutes

Notes

Add garlic or cayenne for more spice.  This is also delicious on a flatbread (a Boboli or other pizza like crust).  Enjoy!