Saying Goodbye Part 2

So we just returned from dropping CG1 off at college. We are officially empty nesters. If you read my last post about saying goodbye, you know that when we get to this stage with an official goodbye, we are really saying goodbye to all of those other stages that we did not know we were saying goodbye to – that last time we picked them up, read a bedtime story, put out the Easter bunny candy and many more. That tiny baby who could not walk or talk, the kindergartener who soon was graduating from fifth grade or that confident high schooler crossing the stage for her diploma.

All of this was in my mind but I also realized that this milestone is reason for celebration too. CG1 and CG2 are in the right places, both ready to thrive and become the adults we have worked so hard to help them be.

Mentally we moms try to get ready. Packing the memory foam mattress topper, an extra set of Twin XL sheets, surprise snacks and maybe a pillow personalized with her zip code. It keeps us all busy and for us, this was so much fun. Both girls and I love to decorate and plan.

The day arrives, the car is packed and loaded to the top of the Thule. Mr. SB and I are ready right? We arrive at college. Lots of helpers to unpack. And, CG2 and I unpack and decorate the room. Her roommate is super nice, and the roommate’s parents are too.

Oh and CG2 is attending my alma mater. It sure has changed. Really hard to get into (am sure I would be rejected now:) but it is the same in so many ways. This makes it both easier and harder as I recall my own struggles as a freshman.

It is time to say goodbye. We hug, and yes, we are misty eyed. Of course we know that texts and Facetimes await us anytime we want but nothing beats being in person.

Mr. SB and I drive off. I see a dad giving his son a hug. It is an emotional day to say the least.

I call it happy/sad or sad/happy depending upon the day. Happy because seeing your children grow and achieve important milestones is one of life’s greatest joys. Sad, because frankly the day-to-day won’t ever be the same. The “What’s for dinner?” or “Mom I need new ballet shoes can we go after school?” days are mostly over.

I know there is also so much to look forward to. In our case, football games, tailgates and parents weekend in a few weeks. October break where both girls should be home.

And, in my empty nester new life, more time to work peacefully without interruption. Time to exercise (after work which I have not done since the girls were born). Time for new hobbies such as gardening, sailing/kayaking/hiking, skiing for two and more. Travels for Mr. SB and I (and not during summer or breaks when everyone else travels and it is expensive and crowded).

As the saying goes, if you have done your parenting job right, then you are out of a job at some point. We may not be quite there…but hopefully we are on track for that promotion. If not, we have not really done our job now have we?

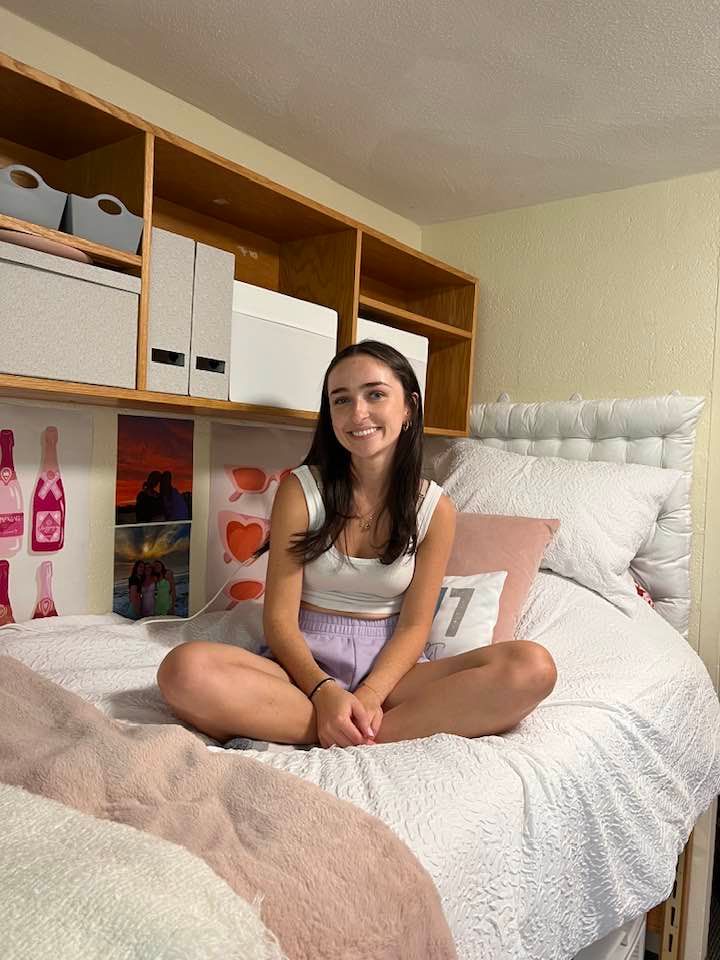
And this was a fun day in spite of the bittersweet feeling. Decorating her college dorm and knowing lots of fun adventures and challenges lay ahead is a memory I won’t forget.

Decorating college dorm room at Boston College Sundays Bread

Organizing Challenge!

Hi there, so 2021 is well under way and like most of you, I have organizing on my mind. I thought I would share a few tips and plans as well as my list of spaces to organize in your home in the new year.

We are on the second week, but some are small (intentionally) so if you double up one week then at the end of the year you will have tackled at least one a week and have an organized home! This will be a two part blog post and you can find the second post here.

A note on organizing large spaces

For larger spaces, I recommend breaking into multiple areas and feel free to go as micro as you wish. One organized shelf is better than none. I use my 5 steps to organize anything for every space. As I mention in that post, a large space can be daunting to empty out all the contents as some pro organizers recommend. I find tackling one shelf or area that you can comfortably organize in a day or weekend is better. Making a bigger mess trying to organize is not the goal!

Disposing of unwanted items

Also, there are multiple ways of decluttering and disposing of your unwanted items. Here is a short summary of what I have found helpful. I plan to add more detail in a coming post.

  1. Discard. The first and easiest is trash. Keep a trash container close to you when tackling a space. Packaging, broken items and other unwanted stuff goes right into the bag.
  2. Donate. I have a wonderful thrift shop in my town where I donate items and then the thrift shop sells them in a lovely shop. All proceeds go to charity. For anything of value that I simply do not want I tend to donate here. Goodwill is also a good option. I find they take everything. Of course friends and family may want your items. But they may not! Be careful about giving old items without asking.
  3. Sell. Selling for me is a good option for items such as sports equipment or children’s toys and furniture. We have a local Facebook group that connects to Facebook marketplace. I would recommend you proceed carefully. I tend to stick to my town and it is easy enough to check out a person’s profile to make sure they actually live locally. For clothing, I have found that teen clothing does very well at Plato’s Closet and there is minimal work involved. Thred Up is another online thrift shop. As you receive little for clothing, I prefer to donate most clothes.

I also give myself a set time to remove the items from my home. I used to struggle with this – I was great at identifying what to get rid of but not so good at actually taking it out! A week is a reasonable time frame in my case.

Also, I recently added a donate box in my laundry room. I try to either identify 5 items a day to either donate or discard. When the box is full I give myself a week to remove it and either donate or sell. So far, it has worked very well. My children also add to it as they outgrow clothing.

Top spaces to organize in your home

With the above in mind, here are my top places to declutter and organize in your home this year.

Office

  1. Desk files. This one could be broken into as many weeks as you need. A few categories I am tackling include old credit card statements, (I keep a year on a rolling basis and organize by month so when the new year’s month is here I throw out the year before), car repair files and medical. Once I get through that I will go through files from former jobs. There is debate on whether to keep these items at all? I prefer to at least have the last year on hand for most categories.
  2. Desk drawer. I have two desk drawers that tend to collect items and plan to go through all the odds and ends, pens (do they work?) and office supplies. I love rewarding myself after decluttering and organizing and have my eye on some coordinated blush pink pens and this acrylic, monogrammed pen holder to display them on my desk. Another organizing tip: if it is pretty you will likely want to keep it that way!

Kitchen

  1. Pantry. This can be a big job. I tend to do a review and clean out every November before the holidays start. On a monthly basis, I take a look at staples to see what is short on supply and buy new items as needed.
  2. Junk drawers. I have three junk drawers. They are actually no longer used for “junk.” One holds cooking related items such as recipes I prefer to have on paper (if they tend to be long, I would rather look at print), chip clips and fridge liners and drying mats for the dishes. The other one has our note pads used for shopping lists, pens, scissors, and a space for take out coupons. The last one stores electronics. These general groupings make it easy for me to go through quickly and remove any items that no longer work or seem out of place.
  3. Tupperware/Storage. This is a big one too. I finally donated any pyrex without lids. We also instituted a system where the lid goes on the container when storing out of the dishwasher. I had a rack for lids but that system did not work at all! Have you found that to be the case?

Attic

  1. Attic. So this one is almost complete for me and it took me three days. I need to add some labels so that the rest of the family knows where to put luggage, extra storage containers etc. I also finally donated my girls’ stuffed animal collection (four bags!) and will confess I just could not do it the first time I faced that the girls were no longer playing with stuffed animals. So I stored them and this time I was more than happy to donate to a place that wanted them. Sometimes you may need a little time mamas…do not be hard on yourself if you do.

Basement

  1. Basement. I tackled the basement over holiday break. It took me three days and like the attic it was a refresher. Post holiday it always tends to accumulate as we decide which Christmas decorations are going up and which stay stored. This time I went shelf by shelf. I labeled areas for each appliance and if something did not fit, donated it. I also tackled some gifts that we simply do not use and gave those to our local thrift shop.
  2. Holiday decorations. This one I tackled a few years ago but every year I do a review. This year I identified items for donation. My girls loved colored lights when they were little. We now have white lights. The thrift shop will be getting some very nice colored lights next year:) I put the box on top with a note to myself, so next season I will remember to bring it over.

Bedrooms

  1. Closets. This one is an ongoing project. I plan to break it into 1) shoes 2) clothes (work and casual) 3) miscellaneous. So far, I have tackled my and Mr. SB dress shoes. I donated shoes we were not wearing. My rule is that if shoes do not fit into the existing racks, then I need to find a few to donate.
  2. Under the beds. Do you store items under the bed? I find this space to be a terrible place to store anything because I forget about it! One solution, is to either not store anything or use clear storage containers. I also will leave myself a note in a prominent place that reminds me that I stored my summer shorts or whatever under the bed!

Living room

  1. Bookshelves. I have two book shelves in our living area and books all over the house. We are book worms. I want to tackle the books as well as display them and other objects from our travels in a beautiful way. I look forward to sharing that project.
  2. Coat closet. We have two coat closets. I bought two new coats at the J. Crew holiday sale (and they are on sale now!). One in pink (The Lady Coat) and one in green (I love them both!). That means I need to donate two of my existing coats. I do try the one in one out for clothing as much as possible. Once you hit your max on storage, that is the only way to maintain an organized, decluttered space. I have also plan to identify any shoes that no one wears any longer and store the summer shoes in the attic.

Garage

  1. Gardening supplies. I have this on the calendar for Spring. We store gardening items in our garage. Every year I seem to accumulate a few more pots so I try to donate some as well.
  2. Tools/Workbench. This may be more my husband’s area but I did buy a pegboard set of attachments on Amazon which will help organize the rolls of tape, wire and other odds and ends.
  3. Cars. Yes, I include cars. In each car, I store snow removal items (during winter), sunscreen (during summer), water bottles, a warm blanket, a bright yellow, reflective vest and some protein bars in case of an emergency. I also have $20 in the glove box where I also keep the insurance and registration. Other items I store include masks (#Covid19), reusable shopping bags and hand sanitizer. That said, there always seems to be other items that are not needed. A regular review of items is warranted every few months.

Check back in for the remaining spaces to organize in your home in the new year. It may just inspire your own decluttering and organizing journey for 2021.

Fall Weekend Wrap Up + Pumpkin Crisp

We had beautiful, crisp weather in the New York area this weekend. The weekend was full of cooking autumn dinners and dessert (pumpkin crisp recipe to follow!). I also tackled organizing the bathroom top to bottom so will be sharing that as well. Of course I used my foolproof steps to do so. But let’s talk food.

What did I cook this weekend?

Fridays as always are evenings where my Mr. SB comes in late. Last week was a stressful one (hence my lack of blog posts) so cooking something yummy on Friday was a great stress reliever. I admit – I love pumpkin both in savory and sweet dishes (with the exception of pumpkin pie…not sure why I do not like pumpkin pie!). So I went in search of a savory, pumpkin-based sauce and found a great recipe from Rachel Rae. Rachel is famous for her 30-minute meals and this recipe for pasta with pumpkin sage sauce and sweet Italian sausage was delicious. It also refrigerated well so we had leftovers last night:)

Saturday morning meant looking in the fridge/freezer at leftovers and figuring out what kind of home made soup to make. It turns out the easiest pot roast recipe in the world also makes a fantastic Beef and Barley soup. I promise recipes to come. In the meantime a quick photo.

Beef and barley soup from leftover pot roast.  Delicious and hearty.

Pumpkin Crisp – the perfect fall dessert

So here’s the deal – I love pumpkin bread, pumpkin spice and most pumpkin desserts (except pumpkin pie). A few years back I had pumpkin bars which had this delicious, gingerbread crust and tender filling. It made me think about why not having a pumpkin crisp with those same flavors. Combine all that gingery goodness into a crumbly mixture and layer it on top of the yummy part of pumpkin. It came out delicious. So here is the recipe…enjoy!

Pumpkin Crisp

Pumpkin Crisp

Creamy custard, pumpkin spice goodness topped with a gingerbread crisp. Nothing better on a fall day and a great addition to Thanksgiving too!
Print Pin
Course: Dessert
Cuisine: American
Keyword: Crisp, Dessert, Fall, Pumpkin
Prep Time: 25 minutes
Cook Time: 40 minutes
Servings: 8
Cost: 4

Equipment

  • Deep square or rectangle pan.

Ingredients

  • 1 15 ounce can pumpkin puree
  • 2/3 c sugar
  • 1 5 oz can evaporated milk
  • 3 eggs
  • 1 tsp vanilla extract
  • tsp of nutmeg
  • ¼ tsp of cinnamon
  • 2 tsp pumpkin pie spice or more if you love pumpkin spice!
  • 1/4 tsp salt
  • 1 c Gingersnap cookie flour made by putting Gingersnap cookies in the food processor
  • 1 c quick oats
  • 1/3 c brown sugar
  • 1/4 tsp baking soda
  • 1/4 tsp baking powder
  • 1/2 c butter softened
  • ½ tsp of pumpkin pie spice

Instructions

  • Preheat oven to 350°F.
  • Grease a deep square or rectangular pan or a 2-3 qt casserole dish.
  • In a large bowl, whisk together the first ingredients through salt, and then pour into the prepared dish.
    Pumpkin custard
  • In a medium bowl, combine the ground up gingersnap cookies, oats, brown sugar, pumpkin pie spice, baking soda and powder. Then, use a fork to incorporate the butter into the dry mixture.
  • Bake the custard for 20 minutes. Once you see it start to harden at the edges and set, you can add the crumble topping. If you add the crumble mixture right away it may sink!
  • Bake for another 20 to 25 minutes, or until the center of the pumpkin pie filling reaches 175°F. The center will still have a little wiggle, but it won’t be super runny.
    Pumpkin Crisp from the oven
  • Serve with ice cream and a drizzle of caramel sauce if you so desire.

Notes

Pumpkin crisp is best served warm with some ice cream or whipped cream on the side.  

Kale Salad with Crispy Chickpeas and Tahini Dressing

Hi there! We are enjoying fall around here and have been doing plenty of seasonal cooking. Kale is a hearty fall green that goes so well with many of the stews, soups and other fare you find this time of year. I love kales salad with crispy chickpeas and tahini dressing. Both kale and chickpeas are super healthy too. Kale is full of anti-oxidants.

Fall weekend cooking and eating

Fridays tend to be a late night for my husband so I usually cook in the Instant pot or slow cooker. The girls and I tend to eat earlier, and then when he comes in the meal is still warm. The sauces in these types of recipes make his serving as fresh as if he ate with us.

Kale salad goes well with my regular, Friday night rotations such as slow cooker pot roast, chicken marsala, meatballs or even Indian style chicken curry. This week it was foolproof pot roast (recipe coming soon).

Fall weekend look back

The weekend was full of activity. We had warm temperatures here so were thrilled to enjoy the shore, and even went clamming/oystering (with a license of course!). I finally set up my fall table took out the autumn, pumpkin dishes. I figure if we are still spending so much time at home we may as well make it pretty.

Fall pumpkin centerpiece

How do you make Kale Salad with Crispy Chickpeas and Tahini Dressing?

So moving on to my fall salad recipe – first step is to wash the kale and strip out the tough center fibers. Kale is very different than lettuce. It is heartier. As such, you will need to cut it into smaller pieces and ideally let it sit in the dressing for at least twenty minutes to marinate. I use a kitchen shears to cut the kale into smaller ribbons. Then I make the dressing:

1/2 cup of mild olive oil (or I like avocado oil)

Juice from one lemon (or 2 to 3 tablespoons or more if you like it very lemony)

2 tablespoons of tahini

1 teaspoon of sugar (mellows out the lemon)

Salt to taste

Shake in a container to mix, and then pour on your cut up kale leaves. Set aside while you make the crispy chickpeas. Enjoy!

Kale salad with crispy chickpeas and tahini dressing

Roasted Crispy Chickpeas

Crispy, spiced chickpeas are healthy and a delicious snack or topping for salad or anytime you want some crunch and texture.
Print Pin
Course: Appetizer, Snack
Cuisine: American
Keyword: GF, gluten free, vegan, vegetarian
Prep Time: 7 minutes
Cook Time: 40 minutes
Servings: 4
Calories: 75kcal
Cost: $1.50

Equipment

  • Sheet pan
  • Standard oven

Ingredients

  • 1 can of chick peas
  • 1 tablespoon of avocado or another oil that can cook at high temperature
  • 1 teaspoon of cumin
  • Salt and pepper to taste

Instructions

  • Preheat oven to 400 degrees
  • Drain chickpeas
  • Pat with paper towels and let dry. It is important that the chickpeas dry before cooking or else you will steam them when you go to roast them.
  • Toss chickpeas with the oil and cumin powder.
  • Lay evenly on a baking sheet. I like to line my baking sheet with foil to avoid mess.
    Crispy roasted chick peas
  • Put pan in middle of preheated oven and cook for thirty to forty minutes. Shake to turn halfway through cooking.
  • Let cool and chickpeas will continue to crisp.

Notes

Serve over salad or as a snack.  Chick peas are best eaten day of preparation.  If refrigerated they may soften.  You can also vary the spices.  Curry powder or smoked paprika are also delicious spices to try.

Nutrition

Calories: 75kcal