How to decorate with digital art ( from Etsy)
Hi all. Today I am excited to share how to decorate with digital art from Etsy. It is inexpensive, creative and with the array of offerings on Etsy, the possibilities are limitless.
Like many of you, the months of hibernating at home has me evaluating every room with a critical eye. Recently I moved a large piece of art out of the foyer and into our dining room, and I love the new placement. However, as I searched around for a replacement for the front hall, to my dismay, I learned that without spending hundreds of dollars I could not find anything. Then I discovered some great matching brushed gold frames at TJ Maxx ($15 for 3 on clearance!). I bought six, and as it turned out, the frames were just the right size for some beautiful vintage and art prints that I downloaded and printed from our color printer. While it was a stroke of luck to find these frames, I have seen similar ones at Michaels and big box stores.
How to decorate with digital art from Etsy – first steps
So the first step is to assess your space. Is it casual? Formal? What is the color scheme? How big is it? For this particular project, the area is an alcove as you enter our main front entrance. Below the wall is a console table with some decorative objects. The feel of the area is slightly formal (but not stuffy) as the rooms that branch off of the foyer is the formal dining and living rooms. The walls area pale ivory with a hint of yellow (Benjamin Moore Niveous) and the floors are natural, hard wood. With that in mind, I started the fun part – searching for art.
Originally I was not looking specifically for digital art but I realized as I entered search terms that this option was available. Some of the art types and terms I considered included:
Asian art
Botanical prints (there are dozens of digital options here)
Abstract art
Mid century modern
Most of the Etsy shops also allow you to sort by color, size and type of art so other categories may appear as you get started. Beware, a few hours can go by as you surf around in Etsy (enjoyable hours I may add).
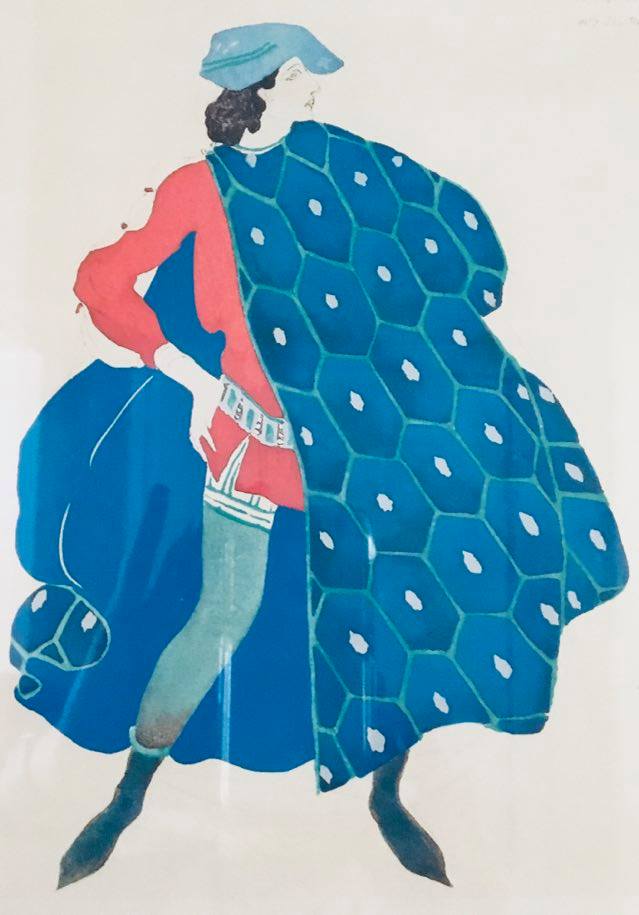
As I was looking for a slightly vintage, formal feel with those specs in mind I finally settled on Wonder and Chaos a delightful shop full of interesting and sometimes whimsical prints at very reasonable prices. Their vintage theatrical prints really caught my eye (see photo). I then found other prints that fit the feel and color scheme of the area.
What size to download?
A great benefit of digital art is that once you download the art you usually have access to multiple sizes. In my case I was searching for roughly 8 by 11 which would be easy to print at home and would fit into my beautiful, bargain frames. I noticed though that you can download a larger size and go to a photo processing site such as Shutterfly to print if you want one of those larger pieces.
Printing and other tips
The first time I printed out one of the prints I used plain white printer paper. This was not a bad idea to get a sense of layout. However, that quality paper is NOT going to give you the best print as I soon found out. I happened to have some very fine Cranes resume paper (remember when people actually used paper for resumes?). It was such a huge improvement to print on very high quality paper. While a box of high quality paper may be pricy compared to regular print paper, it is well worth it. Also, many of the Etsy shops offer printing tips which I highly recommend you read.
After printing out each print (I had chosen six), I grouped them together in different layouts. My bargain frames also had a great bonus of a paper template so I could tape up the gallery before putting in any nails. If you buy frames without that sort of template I would recommend tracing the frames onto craft paper and then cutting them out. A level is also key to ensuring that you hang the templates straight. Lastly, I used double sided tape to lay out the frames to give an idea of how I was going to display the art.

I decided to slightly stagger my middle grouping for some interest. Then I hung the pictures (once again using a level). Here is the finished wall.

Above you can see the finished wall (and yes my photo is a bit cut off…still learning on the photography front!). The entire wall cost $60 which is a fraction of what I would have paid with paper prints and trying to frame them custom. I also have access to the larger sizes or can print multiple copies. All in all I have been so pleased with this find!
I hope you enjoyed this post on how to decorate with digital art from Etsy. Please share with your friends and come back often!