Chicken Tortilla Soup (Instant Pot or Slow Cooker)

Hi all! How are you? I hope well. Busy as I am? Phew…it never stops. Work has been crazy, and now we are almost at the holiday season. Today I will share a favorite soup, chicken tortilla soup in the Instant Pot (but you can make in the slow cooker too) and also a quick catch up.

Fall has just flown. High school girl has been busy applying to colleges and yes, it affects parents too. Long gone are the days when I crammed 6 applications into Christmas break. The tours start as early as sophomore year and beyond. You can catch our tour of a few southern colleges from last summer. We had a few last minute ones too but closer to home. The good news is that she is into one school (IU) as it has rolling admissions.

With my eyes on Thanksgiving, I am already planning my menu and will likely cook much of last year’s menu (which was delicious….that stuffing is the best I promise) as well as trying at least one or two new recipes. This recipe for a fall, butternut, greens salad caught my eye yesterday from Smitten Kitchen (love her!). I am trying it tonight at home so will share the feedback if it is as good as it sounds. I plan to use dried cranberries instead of the pomegranate.

It is also countdown to Christmas. I have learned this is a great time of year to organize. I went through each closet and identified what to give away. Cleaning out the fridge and pantry are next as I prepare for holiday cooking. Now is the time to figure out if you have enough baking supplies and other ingredients. Trust me…am a pro at this point!

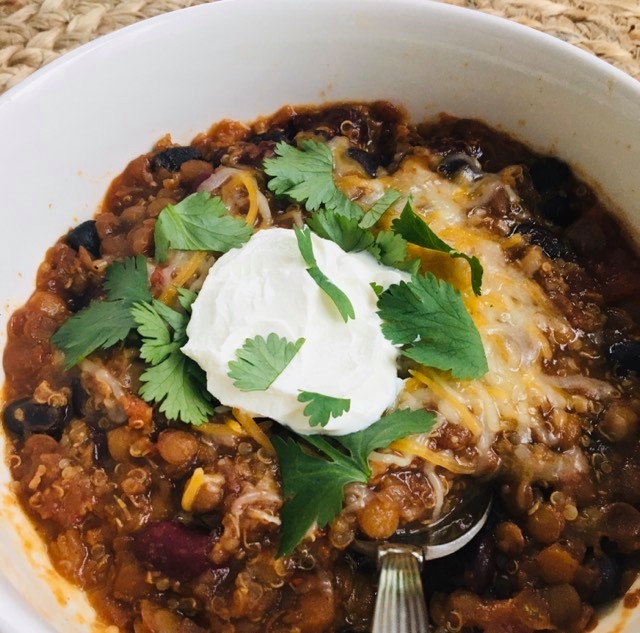
With all that is going on, something easy and tasty for dinner and lunch is a must. I adore soup especially in the fall and winter. Lentil and bean are two favorites, but I found myself craving something with a bit more heat. This chicken tortilla soup fits the bill perfectly. I think you could easily sub in chicken breasts or make it vegetarian and add another can of beans for some extra protein and staying power. You can also vary the spice too. By accident, when fiddling with my recipe, I added an entire can of chilies in adobo (fortunately I realized it and was able to remove all but two!). The toppings are optional (but are they really?). A squeeze of lime, some grated cheese, a dollop of sour cream and chopped cilantro taste so fresh and flavorful. If you want to lighten up, replace sour cream with plain Greek yogurt.

Without further ado, here is the recipe for Chicken Tortilla Soup. Enjoy!

Chicken Tortilla Soup (Either Instant Pot or Slow Cooker)

A flavorful, healthy, budget-friendly soup that is perfect for supper or lunch.
Course Main Course
Cuisine American, Mexican
Keyword Beans, budget friendly, Soup, Supper
Prep Time 30 minutes
Cook Time 6 hours
Cost $7

Equipment

  • Instant Pot
  • Slow cooker

Ingredients

  • 2 tablespoons vegetable oil I use avocado
  • 1 medium yellow or white onion diced
  • 2 medium jalapeno seeded membranes removed, and diced
  • 1 red or green bell pepper
  • 3 cloves garlic minced about 2 teaspoons
  • 1 teaspoon chili powder
  • 1 teaspoon ground cumin
  • 3/4 teaspoon salt plus additional to taste
  • 1 pound of boneless skinless chicken thighs or chicken breasts (about 2 breasts if you are using breasts)
  • 1 28- ounce can crushed tomatoes
  • 2 chipotle chiles in adobo chopped NOTE: I purchase these in a can and save the rest for another use – they freeze well. DO NOT use the whole can in this recipe as the soup will be too hot
  • 1 15- ounce can pinto beans rinsed and drained
  • 1 can of Mexican style corn
  • 4 cups chicken stock or broth
  • Corn tortilla strips or corn tortillas or tortilla chips. I also like the tortilla strips you buy as salad toppings.
  • Shredded cheddar or Mexican style cheese
  • Diced avocado
  • Chopped fresh cilantro
  • Lime add a slice on the side to squeeze over
  • Sour cream or plain Greek yogurt
  • Optional: Trader Joe’s Chili Lime seasoning delicious on top if you can find it!

Instructions

  • Turn Instant pot to saute, or if using your slow cooker heat a pan on the stove and heat on medium heat. Once hot, add the onion, jalapeno and bell pepper. Cook until the vegetables are softened, about 6 minutes or so. Stir in the garlic, cumin and chili powder and cook until fragrant, about 30 seconds.
  • Transfer mixture from the skillet to the bottom of a 6-quart or larger slow cooker or if using Instant pot, turn off saute function.
  • Arrange the chicken breasts on top of the mixture. Add the tomatoes, chicken stock, chilies in adobo and salt. Stir gently.
  • Turn Instant Pot to slow cooking function. Cook on LOW for 5 to 6 hours, until the chicken is falling apart tender. Dice or shred the chicken, then return it to the slow cooker. Add the canned pinto beans and Mexican corn. Let cook on low for 20 more minutes to allow the flavors to combine and everything to heat.
  • Taste and add salt or seasonings as needed. If the soup is thicker than you would like, add in the remaining 1 cup chicken broth until it reaches your desired consistency. Enjoy!

Pumpkin Blondies with White Chocolate Chips

Hi there! Well fall is in full glory in Connecticut. Our leaves are turning and the weather has been beautiful. We have been busy with visits to Vermont which I hope to share some recommendations and up to Boston. Last weekend I finally had a chance to catch my breath and do some decorating to celebrate the season. The wreath in the picture was a Christmas Tree Shop find which I added a bow with some Michael’s ribbon (on sale now!).

Fall wreath
Some fall cheer at the door

Other touches around the house include pumpkins, mums and some delightful Williams Sonoma fall soap for the powder room (I typically do not like pumpkin spiced scent so the cider option is wonderful). I also found myself in the kitchen making lentil soup and these amazing pumpkin blondies with white chocolate chips.

Pumpkin blondies with white chocolate chips are full of brown butter taste and the pumpkin flavor is not overpowering. You could easily make them with dark chocolate or milk chocolate chips too. I happened to have white chocolate chips on hand and loved how the white chocolate complements the pumpkin flavor. It took me a few tries to get the recipe just right. Needless to say this dessert was gobbled up! I may even try a teaspoon of ground ginger next time to add some depth (but they are delicious as in the recipe below).

Pumpkin Blondies with White Chocolate Chips

The taste of fall in an easy-to-make blondie full of brown-buttery, pumpkin spice flavors with creamy white chocolate chips. Delicious for game day or as dessert or snack anytime.
Course Dessert
Cuisine American
Keyword Bars
Prep Time 25 minutes
Cook Time 25 minutes
Cost $4

Ingredients

  • ½ cup unsalted butter
  • ¾ cup brown sugar packed
  • 1 egg
  • 1 teaspoon vanilla extract
  • 1 cup pumpkin puree
  • 1 ⅓ cup all purpose flour
  • 2 teaspoons pumpkin pie spice or apple pie spice
  • ¾ teaspoon baking powder
  • ¼ teaspoon salt
  • 1 cup good quality white chocolate chips

Instructions

  • Preheat oven to 350°F. Grease and line a 9×9 pan with parchment paper.
  • In a small saucepan over medium heat, melt the butter. Continue to cook, stirring the pan until the butter becomes a golden brown color. Watch it carefully to make sure the bits on the bottom of the pan do not burn. Remove from heat and cool slightly. It will look like the image when it is ready.
    Browned butter
  • In a large bowl combine brown butter, brown sugar, egg, vanilla, and pumpkin. Stir until combined.
  • In a separate bowl, combine flour, pumpkin spice, baking powder, and salt. Add the flour mixture to the wet ingredients and stir until combined. Fold in the white chocolate chips. Batter will be on the wet side.
  • Pour batter into prepared pan and bake for about 25 to even 30 minutes, until a toothpick inserted into the center comes out without raw batter on it. Oven temperatures can vary so watch carefully after 20 minutes.
  • Cool slightly before cutting and serving. Enjoy!

Care package chocolate chip cookies

Hi there! Fall for many of us means our kids are heading back to college. This year my daughter is a sophomore. Last year was a tough one. She ended up transferring from her dream school to a college closer to home. Transferring is never easy but during a pandemic it is even harder. So this year it is like she is almost like a freshman again. Along with getting into a routine, meeting two new room mates and taking on a full academic load comes some homesickness. What could be better than a care package to cheer her up? Cookies have to be part of it, but most of recipes create cookies that break easily or crumble. Not a problem at home, but throw UPS into the mix and she would have a mess by the time she opened the package. So, after experimenting a bit, I am sharing the perfect care package chocolate chip cookies.

What makes these cookies perfect for care packages?

These cookies are thick and chewy with some heft. They won’t break easily and are compact diameter wise. After completely cooling them, I put them into small zip lock bags and packed them snugly. I used UPS to send them to her dorm, and she received them two days later and said they were “yummy.” Apparently the room mates loved them too.

What are other items to put in a care package?

For my girl, I decided to add her favorite candy along with some hair styling product that I picked up inexpensively at TJ Maxx. I had some paper basket filler so I filled the bottom with it. Then I added a card and some funny print outs with reminders such as “share with your room mates.” Other ideas could include gum, other favorite foods that will keep a few days such as granola bars, dried fruit. Nail polish or self care items could work too.

A few other notes on missing your college student

Did you know that 70% of freshman are homesick the first semester? Don’t be surprised if this happens and frankly with the pandemic I can tell you it is hitting sophomores and other classes too who were online last year and now readjusting to college. If you are the one missing your kid, don’t feel bad. This is a huge adjustment for you too. I have been really enjoying articles from Grown and Flown and in particular the following posts:

How to Help Your College Freshman When They’re Homesick (grownandflown.com)

With My Daughter in College, It’s the Little Stuff I Miss the Most (grownandflown.com)

Nine Keys to College Success: What the Research Shows (grownandflown.com)

So much to learn and think about…parenting really is a lifelong journey! Without further ado, make these perfect care package chocolate chip cookies…save a few for yourself if you are feeling blue and send some to your student. He/she will thank you for them!

The Perfect Care Package Chocolate Chip Cookies

Chocolate chip cookies that are easy to make, withstand travel and taste delicious. Make a batch for your college student or anytime you wish to send some love (or just eat some delicious cookies!).
Course Dessert, Snack
Cuisine American
Keyword Care package, Cookies, Dessert
Prep Time 20 minutes
Cook Time 10 minutes

Equipment

  • Cookie sheets
  • Mixing bowls
  • Electric or stand mixer
  • Parchment paper (or baking liner)

Ingredients

  • 2 1/3 cups all-purpose flour
  • 2 teaspoons baking powder
  • 1/2 teaspoons baking soda
  • 1 teaspoon salt
  • 10 tablespoons unsalted butter 1 stick plus 2 tablespoons softened
  • 2/3 cup brown sugar packed
  • 1/3 cup granulated sugar
  • 1 egg
  • 2 teaspoons vanilla extract
  • 12 ounce bag semi-sweet chocolate chips
  • 1/2 cup of semi-sweet mini chocolate chips

Instructions

  • In a medium mixing bowl, whisk together the flour, baking powder, baking soda, and salt and set aside.
  • In a large mixing bowl (or the bowl of a stand mixer), cream the butter, brown sugar, and granulated sugar together with an electric mixer on medium speed until light and fluffy (about 5 minutes). Add the egg and vanilla and beat until combined.
  • Add the flour mixture and beat at medium speed just until combined. Stir in the chocolate chips. Note: the dough will be very firm and a bit crumbly but should form a ball when pressed together.
  • Shape cookies into small balls.
  • Preheat the oven to 375F.
  • Watch cookies carefully after about 10 minutes. I usually switch trays from top to middle and spin them around so far side is now the close side to the oven door for even baking. Remove when firm and with just the hint of toasted light brown tops.
  • Allow the cookies to cool on the cookie sheet for 5 minutes, then remove to a cooling rack to cool completely.
  • The cookies can be served warm or at room temperature.
  • Allow to cool completely before putting into zip locks bags or another wrapping for your care package.

Classic Clam Chowder + Weekend Wrap Up

Hi there. Summer has been so busy as we are at the shore every weekend, and the last two weekends we have hosted friends which has been so much fun. I finally had a chance to read a bit on Sunday at the beach and fell promptly asleep! As much as I love entertaining it can be tiring. So, this post is a bit of a catch up post. I will be sharing my recipe for classic clam chowder or as our clams come from right off of Cockenoe Island I am officially calling the clam chowder recipe, Cockenoe Clam Chowder! I will get to that in a bit.

What is immediately on my radar is the fourth of July. We will host friends this Sunday for a BBQ and to watch the fireworks from the shore. I am thinking of making the best Mediterranean pasta salad to go with Mr. SB’s amazing ribs. I am searching for a good bar recipe that will withstand the heat and of course we will have s’mores as we always do. We toast the marshmallows on the fire pit. It should be a great weekend to celebrate! I will try to share next week (although I will be college touring again so it may be after that…).

So to get back to the clam chowder, Mr. SB discovered how to go clamming/oystering last summer. He even received his shell fishing license and bought all of the equipment (well Santa actually brought some of it). Of course he had to go clamming as soon as possible. We had so many oysters and clams (all delicious and so, so fresh) that I had about 8 cups extra. The clams you find on the East Coast can range from the softer shell steamers to what we call in RI, quahogs, which have a very hard shell and are generally quite meaty. They are perfect for chowder (I also love to steam them and dip into butter). So I used a basic soup recipe and added cream and of course the classic white pepper. I recommend buying white pepper if you do not have it as it makes a difference. Below is the recipe. Enjoy!

Cockenoe (Classic) Clam Chowder

Taste the ocean in this delectable and traditional New England clam chowder. Easy to make and freeze and the perfect use for any extra clams.
Course Appetizer, Soup
Cuisine American
Keyword Clam Chowder, Cockenoe, New England Clam Chowder
Prep Time 30 minutes
Servings 6 servings

Ingredients

  • 7 pounds clams scrubbed and rinsed. I steam them first (7 cups includes the shells – there will be less once shells are removed)
  • 3 cups water
  • 4 bacon strips
  • 1 medium-size Spanish onion diced small
  • 2 tablespoons flour
  • 3 large red or yellow potatoes cut into 1/2-inch cubes
  • 1 teaspoon chopped fresh thyme
  • 2 tablespoons chopped fresh parsley
  • 1 cup heavy or light cream
  • 1 tsp white pepper (or to taste)

Instructions

  • In a large soup pot over high heat, add clams to water. Bring to a boil and cook just until clams open, about 10 minutes. Remove clams from broth and set aside. (Discard any clams that don't open.) Strain broth through a sieve lined with a coffee filter and set aside. Picture of my steamed clams below.
    Cockenoe Steamed Clams
  • Clean your soup pot; then, over medium-high heat, sauté bacon until it’s browned and fat is rendered. Using a slotted spoon, remove bacon to a paper towel (you won’t use the bacon so use for something else). Add diced onion to pot and sauté until translucent.
  • Stir in flour and cook 1 minute, being careful not to brown. Whisk in reserved clam broth. Add potatoes and thyme, and simmer 10 minutes.
  • Remove clams from shells, reserving liquid, and chop roughly. Strain liquid; then add clams and liquid to pot. Stir in parsley and cream; cook just long enough to heat clams through, about 3 minutes.
    New England Clam Chowder Mixture
  • We love this chowder with fresh bread and a green salad.

Notes

Often we steam our clams ahead of time as after clamming we want to cook them right away.  This preparation also reduces the work time when you are making the chowder.  You could also pre cut your onion and potatoes so that the chowder comes together very quickly.  

No-Bake Energy Bites

Hi all…Sunday Bread daughter here with a guest post. I made these no-bake energy bites for my mom on her birthday (her request), and they came out great! They are super easy to make and refrigerate well. My mom loves them for an afternoon snack or post workout. My sister and I think they taste like cookie dough. Yum. Healthy too apparently. Sometimes we double the health benefit by having one of these with my mom’s favorite blueberry cauliflower smoothie.

So here is the recipe for No-Bake Energy Balls.

Nutrition for No-Bake Energy Bites

These bites are super healthy. Flaxseed is full of omega threes and fiber. These energy bites also contain chia seeds which like flaxseed, contain omega threes and fiber, in addition to protein, calcium, and numerous antioxidants. The bites are also gluten free and if you would like them to be vegan you could sub out the honey and use maple syrup. Dark chocolate has magnesium and make the bites yummy. So no-bake energy bites are both delicious and nutritious!

No-Bake Energy Bites

No-Bake Energy Bites

These super simple energy bites are perfect for anytime whether it be a mid day pick-me-up or a post workout snack. They are easy to make and taste delicious!
Print Pin
Course: Snack
Cuisine: American
Keyword: Baking, Bites, easy, Energy, Healthy
Prep Time: 25 minutes
Cook Time: 1 hour
Total Time: 1 hour 25 minutes
Servings: 12 bites
Cost: $5

Equipment

  • Mixing Bowl
  • Measuring Cups
  • Large Spoon

Ingredients

  • 1 cup old-fashioned oats
  • 1/2 cup creamy nut butter – I like a combination of the Mixed Nut butter from Costco and Trader Joe’s Sunflower seed spread
  • 1/2 cup ground flaxseed
  • 1/2 cup chocolate chips – any kind you prefer
  • 1/3 cup honey
  • 1 TBS chia seeds
  • 1 tsp vanilla

Instructions

  • Stir everything together until combined. Stir with a big spoon to really mix well.
  • Cover the mixing bowl or container and place in the refrigerator for an hour or until the mixture can be formed into balls without falling apart.
 I use my hands to form balls. Store the balls in the fridge.

Lentil Vegetable Soup

Hi there! So, yes it is June and at this point I would not expect to be sharing a post about lentil vegetable soup. However, with last weekend at 45 degrees and raining until late Sunday afternoon…I made a big pot of this soup, and it was delicious. It freezes beautifully and is super economical as it only uses a small amount of bacon. You can also easily make the soup vegan by omitting the bacon and using vegetable stock. I would also up the garlic and other spices in the vegan version to add some flavor. Lentils are very popular in France, and it is said that eating them on the first of the month brings luck. Now, to share a bit of info on nutrition.

Nutrition in lentil vegetable soup

Lentils are considered a pulse (funny word right?) and are very nutritious. They are full of protein, rich in nutrients and are good for digestion, heart health and more. According to Dr. Axe, “Lentils are considered a top “functional food” due to their high nutritive value, polyphenols, minerals, fiber and other bioactive compounds. While they’re known for providing protein and fiber, their polyphenol content is becoming the focus of ongoing research, since polyphenols are know play an important role in the prevention of degenerative diseases.”

While nutritious, I also find them delicious. Lentils have a subtle nutty flavor that pairs well with all kinds of vegetables. Lentils are also great room temperature, cold or hot as is the case with this soup. I love to make a batch and have them handy to add to salads and more. But right now, this soup fits the bill…enjoy!

Easy Lentil Vegetable Soup

Easy Lentil Vegetable Soup

Easy lentil vegetable soup is chock full of nutrition and taste.
Print Pin
Course: Main Course
Cuisine: American
Keyword: Soup
Prep Time: 20 minutes
Cook Time: 38 minutes
Servings: 6 servings
Cost: $4

Ingredients

  • 4 slices bacon or omit if making vegetarian
  • 1 large onion chopped
  • 3 medium carrots peeled and chopped
  • 1 to 2 stalks of celery chopped
  • 2 cloves of garlic minced
  • 1 – 14 oz can diced tomatoes I like the basil, garlic version for even more flavor
  • 1 teaspoon fresh thyme
  • 1 cup lentils I use organic, green but you can use brown or red too
  • 1 teaspoon salt Or to taste
  • pepper to taste
  • 1/2 cup white wine
  • 4 cups chicken broth or use vegetable broth if making vegetarian
  • 2 cups water
  • 1 teaspoon balsamic vinegar
  • Dried herbs de Provence or Italian blend to taste

Instructions

  • Brown the bacon in a large soup pot or dutch oven. Set aside and crumble. Leave bacon drippings in the pot. If making vegetarian, heat vegetable oil until hot.
  • Add onions, celery and carrots to the pot and cook, stirring occasionally, until softened. Add garlic, then stir in tomatoes and thyme. Cook for 30 seconds.
  • Stir in lentils, salt, and pepper; cover, reduce heat to medium-low. Cook 8-10 minutes.
  • Uncover, increase heat to high, add wine, and bring to simmer. Add chicken or vegetable broth and water, bring to boil, cover partially, and reduce heat to low. Add your dried herbs de Provence (or other dried blend).
  • Simmer for 20-30 minutes, until vegetables and lentils are softened.
  • Stir in vinegar, bacon if you are using it.
  • Top with some grated cheese and serve with some fresh bread for a delicious meal.

Easiest strawberry shortcake recipe

Hi there! Not sure where the time goes…college girl came home and my youngest is busy finishing up school. Hard to believe the year is approaching halfway through and we are almost in June! Checking in today to say hello and share the easiest strawberry shortcake recipe that I brought to friends last weekend. In CT, strawberry season is right around the corner in June but we start to get some delicious strawberries from California this time of year too. I also find myself really craving spring desserts and fruit in particular. Strawberries are also so good for you. I do buy the organic versions as apparently strawberries are one of the most sprayed for conventional produce.

This recipe creates a light, crumbly shortcake that can be made in one bowl – so super easy. It also looks really pretty on top of a cake plate (and needless to say it was a big hit!). So, without further ado, here is the recipe for the easiest strawberry shortcake recipe.

easiest strawberry shortcake recipe

Easiest strawberry shortcake recipe

Delectable, crumbly shortcake is the perfect base for ripe, sweet strawberries and cloud-like soft whipped cream.
5 from 1 vote
Print Pin
Course: Dessert
Cuisine: American
Keyword: Dessert, Fruit dessert
Prep Time: 20 minutes
Cook Time: 25 minutes
Servings: 6
Cost: $5

Ingredients

  • 1 1/2 pounds strawberries hulled and sliced in half or quarters
  • 5 tablespoons sugar
  • 2 cups all-purpose flour
  • 2 teaspoons baking powder
  • 1/4 teaspoon baking soda
  • 2 tablespoons sugar
  • 3/4 teaspoon salt
  • 1 1/2 cups heavy cream
  • 1 1/2 cups heavy cream chilled
  • 2 tablespoons confectioners sugar

Instructions

  • Mix strawberries with 3 tablespoons of granulated sugar and refrigerate while juices develop (for at least 30 minutes).
  • Preheat the oven to 400 degrees F.
  • Sift together the flour, baking powder, baking soda, remaining 2 tablespoons sugar, and salt in a medium bowl. Add heavy cream and mix until just combined. Place mixture in an ungreased 8-inch square pan and bake until golden, 18 to 20 minutes.
  • Remove shortcake from pan and place on a rack to cool. Slice in half.
  • Spoon some of the strawberries with their juice onto the shortcake bottom then add the shortcake top. Spoon more strawberries over the top, add the whipped cream and serve.
  • Whipped Cream:
  • Using a mixer, beat the heavy cream, sugar, vanilla until soft peaks form, about 1 1/2 to 2 minutes. If you put your mixing attachments and bowl in the freezer the whipped cream will be fluffier.

Favorite Blueberry Cauliflower Spinach Smoothie

Hi there all! Hope you had a fabulous mother’s day (if you are a mom) and a great weekend. It has remained cool in the New York area so my gardening plans have been a bit on hold although I did manage to plant a few containers for our newly painted deck (as an aside love the color, Benjamin Moore Chelsea Grey). As spring and soon summer will be here, it is time to health-it-up! In truth, the following recipe for my Superfood Blueberry Cauliflower Spinach Smoothie is something I drink every day (well almost as I have a few other smoothie recipes too). And while cauliflower may throw you here (sounds icky right) it is actually tasteless, and the yummy blueberries and vanilla protein powder take center stage. Before we jump into the how to make the smoothie, let’s talk for a minute about the superfood ingredients.

Superfood Blueberry Cauliflower Spinach Smoothie Health Benefits

When I started making smoothies one thing I realized is that you can pack so much nutrition into one drink. In fact, now, as I have adopted intermittent fasting (thank you Cassie from Hi Sugarplum blog for inspiring me…see the link to her Q&A), my morning smoothie is a late morning, post-workout breakfast. Smoothies hydrate, can be full of amazing healthful ingredients and take minutes to put together (What is not to like?).

Let’s start with the star, delicious ingredient – blueberries. Way back when I had read that blueberries have anti-aging benefits (hello – as a woman in perimenopause let’s just say anti-aging is my goal!). According to my buddy, Dr. Axe, “blueberries remain one of the most nutritious, antioxidant-rich types of fruit in the world and have been shown to do everything from enhance brain health to keep your heart strong.” Here are some more top benefits of blueberries (courtesy of Dr. Axe):

  1. High in Antioxidants
  2. Help Fight Cancer
  3. Amp Up Weight Loss
  4. Boost Brain Health
  5. Alleviate Inflammation
  6. Support Digestion
  7. Promote Heart Health

Wild blueberries have even more antioxidants than the farmed version. Hello, see why you may want to eat (or drink) them?

Let’s talk cauliflower next. Cauliflower is another superfood. For this recipe, I buy organic, frozen cauliflower from Whole Foods freezer section. In the frozen form, cauliflower is basically tasteless (I actually love cauliflower but would not eat it raw in most cases). Cauliflower is one of the healthiest foods you can eat. It has tons of anti-inflammatory compounds, phytonutrients and is a member of the cruciferous vegetables which are known for their cancer fighting qualities.

Spinach or another leafy green is always my third, main ingredient. Greens are so important for health and should be part of every day’s nutrition.

Spinach nutrition also supplies flavonoids, which are a type of powerful antioxidant that protect against disease by fighting free radicals. These protective compounds make spinach one of the best anti-aging foods around (sign me up!). I also find that spinach is easy to mix with fruits, and it is a staple in all of my smoothies (and salads too).

Additional add-ins for the superfood smoothie

What else goes into this smoothie? Well here are a few of the ingredients and why I add them.

Flax seed: I add a good tablespoon of the ground kind. Full of fiber and plant-based Omega 3 fatty acids, these little seeds are great for the skin, hair and heart. I have also read they are great for perimenopause.

Aria vanilla protein powder. This is my favorite powder, but you can sub in what you like. It is only 45 calories and tastes delicious.

Coconut water. Coconut water is full of potassium and is a natural hydration fluid.

Hemp hearts, chia seeds, turmeric, superfood green powder – I like to sprinkle in all of these in teaspoon amounts and they may vary depending on what I have on hand.

So here is the recipe for my superfood blueberry, cauliflower smoothie. Enjoy!

Superfood Blueberry Cauliflower Spinach Smoothie

Superfood Blueberry Cauliflower Smoothie

Packed with anti-aging antioxidants, vitamins, fiber and more, this smoothie is creamy, delicious and I swear gives my skin a boost. Have it for a snack, breakfast or anytime you need some hydration and a healthy lift.
Prep Time: 5 minutes
Course: Breakfast, Snack
Cuisine: American
Keyword: Anti-aging, Blueberries, Cauliflower, Protein, Spinach, Superfoods
Servings: 1
Cost: $1

Equipment

  • Ninja or blender

Ingredients

  • 1/2 cup Frozen blueberries I always buy organic from Costco
  • 1/2 cup Frozen cauliflower
  • 1/2 cup Raw spinach leaves
  • 1 Tbsp Aria vanilla protein powder or powder of your choice
  • 1 cup Coconut water or regular water
  • Water or juice to blend smoothly
  • 1 tsp each Ground flax seed, chia seeds, turmeric, hemp hearts Feel free to experiment with healthy add-ins

Instructions

  • Add all to your blender or Ninja and blend for 15 seconds or to desired consistency. If too thick, thin with water. Enjoy!
Tried this recipe?Let us know how it was!

Catching up and a yummy roasted leeks recipe

Hi there. Goodness, it has been a whirlwind. In addition to being away for Spring break (college tours) I have been underwater at work, and the home improvement continues with the deck being painted this week. So my poor little blog has not been getting the attention it deserves. Hopefully, I will be able to share the kitchen cabinet reveal soon. If you missed the long process involved in picking the perfect white paint color for the cabinets, you can read that post here. We finally installed the new hood over the stove. While I could not use my stove for the last six weeks (due to no hood), I have been roasting everything. I am here to tell you that roasted leeks are delicious. Without further ado, here are a few fun facts about how super healthy leeks are and the roasted leeks recipe.

Are leeks good for you?

Like most vegetables, leeks are good for you. In fact, leeks belong to the allium family along with onions and garlic. Similar to these vegetables, leeks are a great source of vitamins A, K and C. They also have folate and fiber. Leeks have properties that fight heart disease and cancer as well as inflammation. Frankly, leeks have always intimidated me. I really did not know how to cook them other than in my best-ever Thanksgiving stuffing. I did quite a bit of research to learn how to cook them on their own. This roasted leeks recipe is adapted from Martha Stewart.

Roasted Leeks Recipe

Roasted Leeks with Thyme

Leeks are roasted in a blend of white wine and broth and then sprinkled with thyme for a delectable side dish.
5 from 1 vote
Print Pin
Course: Side Dish
Cuisine: American
Keyword: Side Dish
Prep Time: 15 minutes
Cook Time: 50 minutes
Cost: $5

Equipment

  • Roasting pan

Ingredients

  • 2 pounds leeks 6 to 8 small or medium sized
  • 1/2 cup dry white wine I used Bota Box pinot grigio
  • 1 cup low-sodium vegetable or chicken broth
  • Salt and freshly ground pepper to taste
  • 5 sprigs Fresh thyme (or add to taste)

Instructions

Instructions

  • Preheat oven to 400°F. Trim dark-green tops and root ends from leeks. Cut leeks in half lengthwise. Remove thick, tough outer layers (2 to 4 total, depending on size). Thoroughly wash and drain leeks, keeping them intact. Arrange in a tight single layer, cut sides up, in a broiler-safe baking dish.
  • In a small saucepan, boil the white wine 30 seconds. Add broth and return to a boil. Then season generously with salt and pepper. Pour the mixture over leeks and sprinkle with thyme. Cover dish with foil.
  • Roast for 45 minutes. Uncover and continue roasting until leeks are very soft and broth mixture is reduced by half, 20 to 22 minutes.
  • At this point you can sprinkle with some grated parmesan cheese or even add some butter if you like. Serve as a side or light main dish.

Lentil and Quinoa Chili in the Slow Cooker

Hi friends. Well with about three feet of snow on the ground (it snowed yet again yesterday) I have been looking for comfort food. To date, I have not been as healthy as I should be with snacks… This time, chili fits the bill so well with its satisfying heartiness and a touch of heat. The bonus with this recipe for Lentil and Quinoa Chili in the Slow Cooker is that it is healthy (and practically effortless) too! The recipe is actually vegan, although I like to add some grated cheese and sour cream so in that case it would be vegetarian. You could skip those toppings of course if you are following a vegan diet.

My vegetarian diet

I was a vegetarian for two years when I lived in California (definitely influenced by the Southern California get healthy vibe) before getting married. As Mr. SB is an avowed omnivore I have transitioned our household to more of a meatless Monday or even Tuesday, Wednesday type of diet.

Why? Plant based diets are so good for you even if you may need to plan a bit to ensure you are receiving all of the nutrients you need. Vegetarian recipes are also flat out cheap (meat is always the most expensive part of the grocery bill here) and so much better for the environment. I heard on a podcast recently that skipping meat for just one day of the week actually equals saving the carbon emissions for one cross country trip (coast to coast). Wow! Imagine if the entire country committed to at least a meatless Monday?

Benefits of lentils and quinoa

Often I find that some vegetarian recipes lack texture and sometimes I am still hungry – not this recipe for lentil and quinoa chili. It is full of texture and flavor. The combination of the nutty lentils and the quinoa which naturally thickens the sauce makes it super satisfying.

The recipe is full of health benefits too as both lentils and quinoa are considered superfoods. Lentils have been associated with improved digestive health, sustainable weight loss and healthy blood sugar levels. One cup of lentils has about 18 grams of protein and almost a full day’s worth of folate. A serving of lentils is also high in manganese and potassium. Quinoa is another superfood and is actually not a grain but is a seed. It is also a complete protein possessing all 20 amino acids which is key if you are following a vegetarian diet. One cup cooked quinoa also offers tons of health benefits.

How do you make lentil and quinoa chili in the slow cooker?

This recipe is one of what I call, “On my last nerve” recipes. I keep the ingredients on hand in the pantry. I use both black and red kidney beans for some variation. Cans of beans are fine but if you have pre-cooked beans that would work too. I like the Costco quinoa which is already pre-rinsed to save a step. Trader Joe’s chili lime spice is a wonderful addition if you have a TJs on hand. If not, regular chili powder works just fine and then feel free to squeeze some lime on top at the end. Basically you stir everything together and let it slow cook for eight hours or four on high. Add your favorite toppings. Mine include cilantro, lime, avocado and a small dollop of sour cream. So without further ado, here is the recipe. Enjoy!

Lentil and Quinoa Chili in the Slow Cooker

Hearty, healthy and just what you need on a cold winter's day. The recipe is vegan but you may want to add some sour cream, grated cheese too. Fresh cilantro and a squeeze of lime perfect this protein packed, superfood-rich dish.
Course Main Course
Cuisine American
Keyword budget friendly, lentils, Perfect Slow Cooker Pot Roast, Quinoa, Superfoods, vegan, vegetarian
Prep Time 20 minutes
Cook Time 8 hours
Servings 8
Cost $5

Equipment

  • Slow cooker

Ingredients

  • 1 yellow onion
  • 2 cloves garlic
  • 1 15 oz can petite diced tomatoes with liquid
  • 1 6 oz can tomato paste or I like the tubes of past and I use two tablespoons
  • 1 15 oz can black beans drained
  • 1 15 oz can red kidney beans drained
  • 1 cup brown lentils uncooked
  • cup of quinoa
  • 1 Tbsp chili powder or if you can find it 1 and ½ Tbsp of Trader Joes Chili Lime powder
  • 1 tsp smoked paprika
  • 1 tsp ground cumin
  • 1/2 tsp onion powder
  • 1/4 tsp garlic powder
  • 1/4 tsp cayenne pepper
  • 1/2 tsp salt
  • A pinch freshly cracked black pepper
  • 4 cups vegetable broth
  • 1 cup of water
  • Fresh chopped cilantro
  • Sour cream guacamole, avocados, lime juice or other toppings you desire

Instructions

  • Dice the onion and mince the garlic.
  • Add the onion and garlic and all ingredients to the slow cooker. Stir to combine.
  • Place a lid on the slow cooker and cook on high for four hours (or low for 8 hours).
  • After cooking, the lentils should be tender. Taste the chili and add salt to taste.
  • Serve hot with your favorite toppings.